編輯:關於Android編程
Android多線程分析之四:MessageQueue的實現
在前面兩篇文章《Android多線程分析之二:Thread的實現》,《Android多線程分析之三:Handler,Looper的實現》中分別介紹了 Thread 的創建,運行,銷毀的過程以及 Thread與 Handler,Looper 之間的關聯:Thread 在其 run() 方法中創建和運行消息處理循環 Looper,而 Looper::loop() 方法不斷地從 MessageQueue 中獲取消息,並由 Handler 分發處理該消息。接下來就來介紹 MessageQueue 的運作機制,MessageQueue。
參考源碼:
android/framework/base/core/java/android/os/MessageQueue.java
android/framework/base/core/java/android/os/Message.java
android/frameworks/base/core/jni/android_os_MessageQueue.h
android/frameworks/base/core/jni/android_os_MessageQueue.cpp
先來看 MessageQueue 的構造函數以及重要的成員變量:
    // True if the message queue can be quit.
    private final boolean mQuitAllowed;
    private int mPtr; // used by native code
    Message mMessages;
    private boolean mQuiting;
    // Indicates whether next() is blocked waiting in pollOnce() with a non-zero timeout.
    private boolean mBlocked;
MessageQueue 的構造函數很簡單:
    MessageQueue(boolean quitAllowed) {
        mQuitAllowed = quitAllowed;
        nativeInit();
    }
static void android_os_MessageQueue_nativeInit(JNIEnv* env, jobject obj) {
    NativeMessageQueue* nativeMessageQueue = new NativeMessageQueue();
    if (!nativeMessageQueue) {
        jniThrowRuntimeException(env, Unable to allocate native queue);
        return;
    }

    nativeMessageQueue->incStrong(env);
    android_os_MessageQueue_setNativeMessageQueue(env, obj, nativeMessageQueue);
}
static void android_os_MessageQueue_setNativeMessageQueue(JNIEnv* env, jobject messageQueueObj,
        NativeMessageQueue* nativeMessageQueue) {
    env->SetIntField(messageQueueObj, gMessageQueueClassInfo.mPtr,
             reinterpret_cast(nativeMessageQueue));
}
class MessageQueue : public RefBase {
public:
    /* Gets the message queue's looper. */
    inline sp getLooper() const {
        return mLooper;
    }

    bool raiseAndClearException(JNIEnv* env, const char* msg);
    virtual void raiseException(JNIEnv* env, const char* msg, jthrowable exceptionObj) = 0;
protected:
    MessageQueue();
    virtual ~MessageQueue();
protected:
    sp mLooper;
};

class NativeMessageQueue : public MessageQueue {
public:
    NativeMessageQueue();
    virtual ~NativeMessageQueue();
    virtual void raiseException(JNIEnv* env, const char* msg, jthrowable exceptionObj);
    void pollOnce(JNIEnv* env, int timeoutMillis);
    void wake();

private:
    bool mInCallback;
    jthrowable mExceptionObj;
};
NativeMessageQueue::NativeMessageQueue() : mInCallback(false), mExceptionObj(NULL) {
    mLooper = Looper::getForThread();
    if (mLooper == NULL) {
        mLooper = new Looper(false);
        Looper::setForThread(mLooper);
    }
}

void NativeMessageQueue::pollOnce(JNIEnv* env, int timeoutMillis) {
    mInCallback = true;
    mLooper->pollOnce(timeoutMillis);
    mInCallback = false;
}

void NativeMessageQueue::wake() {
    mLooper->wake();
}
對於Android MessageQueue 來說,其主要的工作就是:接收投遞進來的消息,獲取下一個需要處理的消息。這兩個功能是通過 enqueueMessage() 和 next() 方法實現的。next() 在前一篇文章介紹 Looper.loop() 時提到過。
在分析這兩個函數之前,先來介紹一下 Message:前面說過 Message 是完備的,即它同時帶有消息內容和處理消息的 Handler 或 callback。下面列出它的主要成員變量:
public int what;     // 消息 id
public int arg1;     // 消息參數
public int arg2;     // 消息參數
public Object obj;   // 消息參數
long when;           // 處理延遲時間,由 Handler 的 sendMessageDelayed/postDelayed 設置
Handler target;    // 處理消息的 Handler
Runnable callback;   // 處理消息的回調
Message next;    // 鏈表結構,指向下一個消息
接下來分析 enqueueMessage:
    final boolean enqueueMessage(Message msg, long when) {
        if (msg.isInUse()) {
            throw new AndroidRuntimeException(msg +  This message is already in use.);
        }
        if (msg.target == null) {
            throw new AndroidRuntimeException(Message must have a target.);
        }

        boolean needWake;
        synchronized (this) {
            if (mQuiting) {
                return false;
            }

            msg.when = when;
            Message p = mMessages;
            if (p == null || when == 0 || when < p.when) {
                // New head, wake up the event queue if blocked.
                msg.next = p;
                mMessages = msg;
                needWake = mBlocked;
            } else {
                // Inserted within the middle of the queue.  Usually we don't have to wake
                // up the event queue unless there is a barrier at the head of the queue
                // and the message is the earliest asynchronous message in the queue.
                needWake = mBlocked && p.target == null && msg.isAsynchronous();
                Message prev;
                for (;;) {
                    prev = p;
                    p = p.next;
                    if (p == null || when < p.when) {
                        break;
                    }
                    if (needWake && p.isAsynchronous()) {
                        needWake = false;
                    }
                }
                msg.next = p; // invariant: p == prev.next
                prev.next = msg;
            }
        }
        if (needWake) {
            nativeWake(mPtr);
        }
        return true;
    }
    public boolean sendMessageAtTime(Message msg, long uptimeMillis) {
        MessageQueue queue = mQueue;
        if (queue == null) {
            RuntimeException e = new RuntimeException(
                    this +  sendMessageAtTime() called with no mQueue);
            Log.w(Looper, e.getMessage(), e);
            return false;
        }
        return enqueueMessage(queue, msg, uptimeMillis);
    }

    private boolean enqueueMessage(MessageQueue queue, Message msg, long uptimeMillis) {
        msg.target = this;
        if (mAsynchronous) {
            msg.setAsynchronous(true);
        }
        return queue.enqueueMessage(msg, uptimeMillis);
    }
下面來分析如何從 MessageQueue 中獲取合適的消息, 這是 next() 要做的最主要的事情,next() 方法還做了其他一些事情,這些其它事情是為了提高系統效果,利用消息隊列在空閒時通過 idle handler 做一些事情,比如 gc 等等。但它們和獲取消息關系不大,所以這部分將從略介紹。
   final Message next() {
        int pendingIdleHandlerCount = -1; // -1 only during first iteration
        int nextPollTimeoutMillis = 0;

        for (;;) {
            if (nextPollTimeoutMillis != 0) {
                Binder.flushPendingCommands();
            }
            nativePollOnce(mPtr, nextPollTimeoutMillis);

            synchronized (this) {
                if (mQuiting) {
                    return null;
                }

                // Try to retrieve the next message.  Return if found.
                final long now = SystemClock.uptimeMillis();
                Message prevMsg = null;
                Message msg = mMessages;
                if (msg != null && msg.target == null) {
                    // Stalled by a barrier.  Find the next asynchronous message in the queue.
                    do {
                        prevMsg = msg;
                        msg = msg.next;
                    } while (msg != null && !msg.isAsynchronous());
                }
                if (msg != null) {
                    if (now < msg.when) {
                        // Next message is not ready.  Set a timeout to wake up when it is ready.
                        nextPollTimeoutMillis = (int) Math.min(msg.when - now, Integer.MAX_VALUE);
                    } else {
                        // Got a message.
                        mBlocked = false;
                        if (prevMsg != null) {
                            prevMsg.next = msg.next;
                        } else {
                            mMessages = msg.next;
                        }
                        msg.next = null;
                        if (false) Log.v(MessageQueue, Returning message:  + msg);
                        msg.markInUse();
                        return msg;
                    }
                } else {
                    // No more messages.
                    nextPollTimeoutMillis = -1;
                }

                // If first time idle, then get the number of idlers to run.
                // Idle handles only run if the queue is empty or if the first message
                // in the queue (possibly a barrier) is due to be handled in the future.
                if (pendingIdleHandlerCount < 0
                        && (mMessages == null || now < mMessages.when)) {
                    pendingIdleHandlerCount = mIdleHandlers.size();
                }
                if (pendingIdleHandlerCount <= 0) {
                    // No idle handlers to run.  Loop and wait some more.
                    mBlocked = true;
                    continue;
                }

                if (mPendingIdleHandlers == null) {
                    mPendingIdleHandlers = new IdleHandler[Math.max(pendingIdleHandlerCount, 4)];
                }
                mPendingIdleHandlers = mIdleHandlers.toArray(mPendingIdleHandlers);
            }

            // Run the idle handlers.
            // We only ever reach this code block during the first iteration.
            for (int i = 0; i < pendingIdleHandlerCount; i++) {
                final IdleHandler idler = mPendingIdleHandlers[i];
                mPendingIdleHandlers[i] = null; // release the reference to the handler

                boolean keep = false;
                try {
                    keep = idler.queueIdle();
                } catch (Throwable t) {
                    Log.wtf(MessageQueue, IdleHandler threw exception, t);
                }

                if (!keep) {
                    synchronized (this) {
                        mIdleHandlers.remove(idler);
                    }
                }
            }

            // Reset the idle handler count to 0 so we do not run them again.
            pendingIdleHandlerCount = 0;

            // While calling an idle handler, a new message could have been delivered
            // so go back and look again for a pending message without waiting.
            nextPollTimeoutMillis = 0;
        }
    }
  public static void loop() {
        final Looper me = myLooper();
        if (me == null) {
            throw new RuntimeException(No Looper; Looper.prepare() wasn't called on this thread.);
        }
        final MessageQueue queue = me.mQueue;
        ...
        for (;;) {
            Message msg = queue.next(); // might block
            if (msg == null) {
                // No message indicates that the message queue is quitting.
                return;
            }

            msg.target.dispatchMessage(msg);

            msg.recycle();
        }
    }
如果隊列中沒有消息或者第一個待處理的消息時機未到,且也沒有其他利用隊列空閒要處理的事務,則將隊列設置為設置 blocked 狀態,進入等待狀態;否則就利用隊列空閒處理其它事務。
至此,已經對 Android 多線程相關的主要概念 Thread, HandlerThread, Handler, Looper, Message, MessageQueue 作了一番介紹,下一篇就要講講 AsyncTask,這是為了簡化 UI 多線程編程為提供的一個便利工具類。
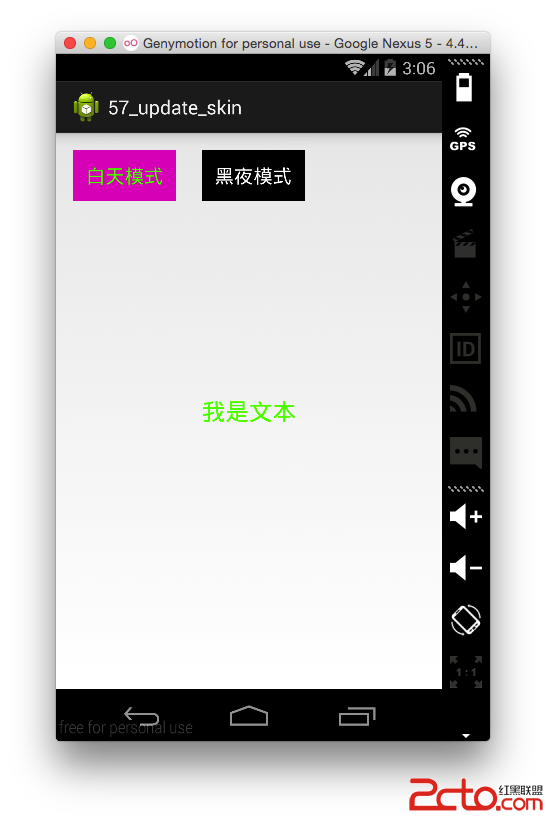 Android更換皮膚解決方案
Android更換皮膚解決方案 轉載請注明出處:IT_xiao小巫本篇博客要給大家分享的一個關於Android應用換膚的Demo,大家可以到我的github去下載demo
 android各種對話框總結筆記
確定取消對話框(帶圖標) //(上下文,主題) new AlertDialog.Builder(this, AlertDialog.THEME_DEVICE
 windows下eclipse搭建android_ndk開發環境
安裝cygwin:由於NDK編譯代碼時必須要用到make和gcc,所以你必須先搭建一個linux環境, cygwin是一個在windows平台上運行的unix模擬環境,它
 Android 自定義對話框,進度條,下拉刷新等
這個demo集合了自定義對話框,進度條,下拉刷新以及popup彈出框等。是學習了網上開源項目後,抽取集合了常用對話框,進度條,下拉刷新以及popup彈出框等。現在結構目錄