編輯:關於Android編程
采集更大的圖像
為了解決大小限制,從Android 1.5開始,在大多數機器上,我們傳入一個extra到激活相機應用的Intent中。此extra的名字在MediaStore類中定義為EXTRA_OUTPUT。它的值(extra以名稱-值對的形式存在)以URI的形式,為相機應用指定了拍攝的圖像保存的地方。
下面的代碼段要求相機應用將圖像保存到設備的SD卡,文件名為myfavoritepicture.png。
String imageFilePath = Environment.getExternalStorageDirectory().getAbsolutePath()
    + "/myfavoritepicture.jpg";
File imageFile = new File(imageFilePath);
Uri imageFileUri = Uri.fromFile(imageFile);
Intent i = new Intent(android.provider.MediaStore.ACTION_IMAGE_CAPTURE);
i.putExtra(android.provider.MediaStore.EXTRA_OUTPUT, imageFileUri);
startActivityForResult(i, CAMERA_RESULT);
注意:上述創建圖像文件URI的代碼段可以簡化如下:
imageFileUri = Uri.parse("file:///sdcard/myfavoritepicture.jpg");
雖然在實踐中,所示的方法設備無關性更強,而且當SD卡的命名規則或者URI的語法因本地系統改變時,仍然能夠兼容。加載和顯示圖像涉及大量使用內存。例如,HTC G1手機擁有一個320萬像素的攝像頭。320M像素的攝像頭,拍攝的圖像通常為2048x1536像素。顯示32位的這樣大小的圖像需要多達100663kb,大約13MB的內存。雖然不能肯定我們的應用就會耗盡內存,但是它顯然使內存耗盡的可能性大大增加了。
Android給我們提供了一個名為BitmapFactory的工具類,它提供了一系列的靜態方法從各種源加載位圖圖像。我們的需求是從文件加載圖像,並把它顯示在我們最初的activity中。幸運的是,BitmapFactory提供的加載方法都接受BitmapFactory.Options類,它允許我們定義將位圖讀入到內存的方式。具體來說,我們可以設置BitmapFactory加載圖像的采樣大小。指定BitmapFactory.Options類的inSampleSize參數,得到的位圖圖像將為原圖大小inSampleSize分之一。例如,像我在這裡做的,inSampleSize設置為8,將生成一個原圖1/8大小的圖像。
BitmapFactory.Options bmpFactoryOptions = new BitmapFactory.Options();
bmpFactoryOptions.inSampleSize = 8;
Bitmap bmp = BitmapFactory.decodeFile(imageFilePath, bmpFactoryOptions);
imv.setImageBitmap(bmp);
這是一個快速加載大圖像的方法,但是沒有考慮圖像的原始大小以及屏幕的大小。如果我們縮放圖像使之適應我們的屏幕,那就更好了。
下面的代碼段說明了如何使用屏幕的大小確定加載圖像時的采樣值。當我們采用這些方法時,圖像能夠確保盡可能的填充屏幕。然而,如果圖像的任一維度只顯示100像素,則這個值將用來替換屏幕的維度。獲取顯示屏維度的代碼如下:
Display currentDisplay = getWindowManager().getDefaultDisplay();
int dw = currentDisplay.getWidth();
int dh = currentDisplay.getHeight();
//加載圖像的外形尺寸,而非圖像本身
BitmapFactory.Options bmpFactoryOptions = new BitmapFactory.Options();
bmpFactoryOptions.inJustDecodeBounds = true;
Bitmap bmp = BitmapFactory.decodeFile(imageFilePath, bmpFactoryOptions);
int heightRatio = (int)Math.ceil(bmpFactoryOptions.outHeight/(float)dh);

int widthRatio = (int)Math.ceil(bmpFactoryOptions.outWidth/(float)dw);
Log.v("HEIGHTRATIO",""+heightRatio);
Log.v("WIDTHRATIO",""+widthRatio); //如果兩個比值都大於1,
//那麼圖像的某一邊大於屏幕
if (heightRatio > 1 && widthRatio > 1) {
if (heightRatio > widthRatio) {
//高度比較大,以它進行縮小
bmpFactoryOptions.inSampleSize = heightRatio;
}
else {
//寬度比較大,以它進行縮小
bmpFactoryOptions.inSampleSize = widthRatio;
}
}
// 真正解碼圖像
bmpFactoryOptions.inJustDecodeBounds = false;
bmp = BitmapFactory.decodeFile(imageFilePath, bmpFactoryOptions);package com.apress.proandroidmedia.ch1.sizedcameraintent;
import java.io.File;
import android.app.Activity;
import android.content.Intent;
import android.graphics.Bitmap;
import android.graphics.BitmapFactory;
import android.net.Uri;
import android.os.Bundle;
import android.os.Environment;
import android.util.Log;
import android.view.Display;
import android.widget.ImageView;
public class SizedCameraIntent extends Activity {
final static int CAMERA_RESULT = 0;
ImageView imv; String imageFilePath;
@Override public void onCreate(Bundle savedInstanceState) {
super.onCreate(savedInstanceState);
setContentView(R.layout.main);
imageFilePath = Environment.getExternalStorageDirectory().getAbsolutePath()
+ "/myfavoritepicture.jpg";
File imageFile = new File(imageFilePath);
Uri imageFileUri = Uri.fromFile(imageFile);
Intent i = new Intent(android.provider.MediaStore.ACTION_IMAGE_CAPTURE);
i.putExtra(android.provider.MediaStore.EXTRA_OUTPUT, imageFileUri);
startActivityForResult(i,CAMERA_RESULT);
}
protected void onActivityResult(int requestCode, int resultCode, Intent intent) {
super.onActivityResult(requestCode, resultCode, intent);
if (resultCode == RESULT_OK) {
//取得ImageView的引用
imv = (ImageView) findViewById(R.id.ReturnedImageView);
Display currentDisplay = getWindowManager().getDefaultDisplay();
int dw = currentDisplay.getWidth();
int dh = currentDisplay.getHeight();
//加載圖片的尺寸信息,而非圖像本身
BitmapFactory.Options bmpFactoryOptions = new BitmapFactory.Options();
bmpFactoryOptions.inJustDecodeBounds = true;
Bitmap bmp = BitmapFactory.decodeFile(imageFilePath, bmpFactoryOptions);
int heightRatio = (int)Math.ceil(bmpFactoryOptions.outHeight/(float)dh);
int widthRatio = (int)Math.ceil(bmpFactoryOptions.outWidth/(float)dw);
Log.v("HEIGHTRATIO",""+heightRatio);
Log.v("WIDTHRATIO",""+widthRatio);
// 如果兩個比值都大於1,
// 那麼圖像的某一邊大於屏幕
if (heightRatio > 1 && widthRatio > 1) {
if (heightRatio > widthRatio) {
// 高度比較大,以它進行縮小
bmpFactoryOptions.inSampleSize = heightRatio;
}
else {
// 寬度比較大,以它進行縮小
bmpFactoryOptions.inSampleSize = widthRatio;
}
}
// 真正解碼圖像
bmpFactoryOptions.inJustDecodeBounds = false;
bmp = BitmapFactory.decodeFile(imageFilePath, bmpFactoryOptions);
// 顯示圖像
imv.setImageBitmap(bmp);
}
}
}
 微信小程序 實現列表刷新的實例詳解
微信小程序 列表刷新: 微信小程序,最近自己學習微信
 Android for work總結(下)
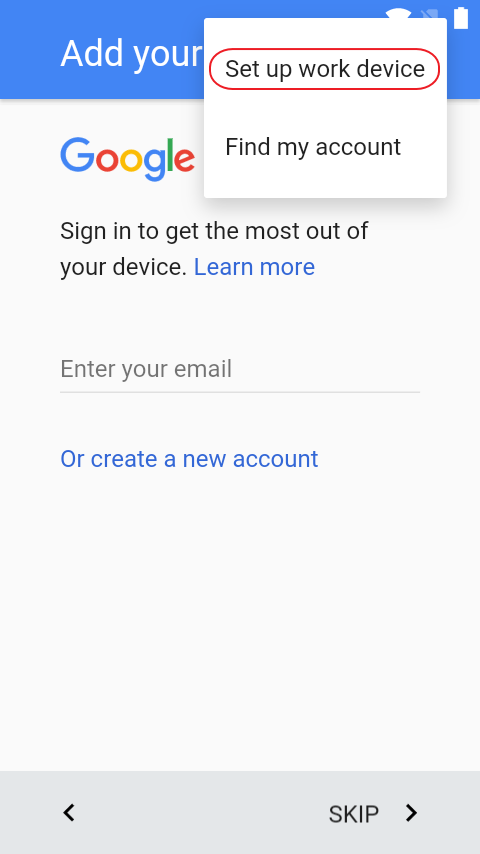
Afw流程演示Device OwnerL平台恢復出廠設置連接翻牆Wifi直到出現如下界面點擊”Set up work device”,輸入賬號和激
 Android打造屬於自己的數據庫操作類。
1、概述開發Android的同學都知道sdk已經為我們提供了一個SQLiteOpenHelper類來創建和管理SQLite數據庫,通過寫一個子類去繼承它,就可以方便的創建
 WebView使用詳解(二)——WebViewClient與常用事件監聽
前言:生活的艱難,更會激發對夢想的渴望,但艱難的生活卻往往會成為夢想的絆腳石上篇給大家簡單講了Webview中Native代碼與JS相互調用的方法,這篇我們再講講有關各種
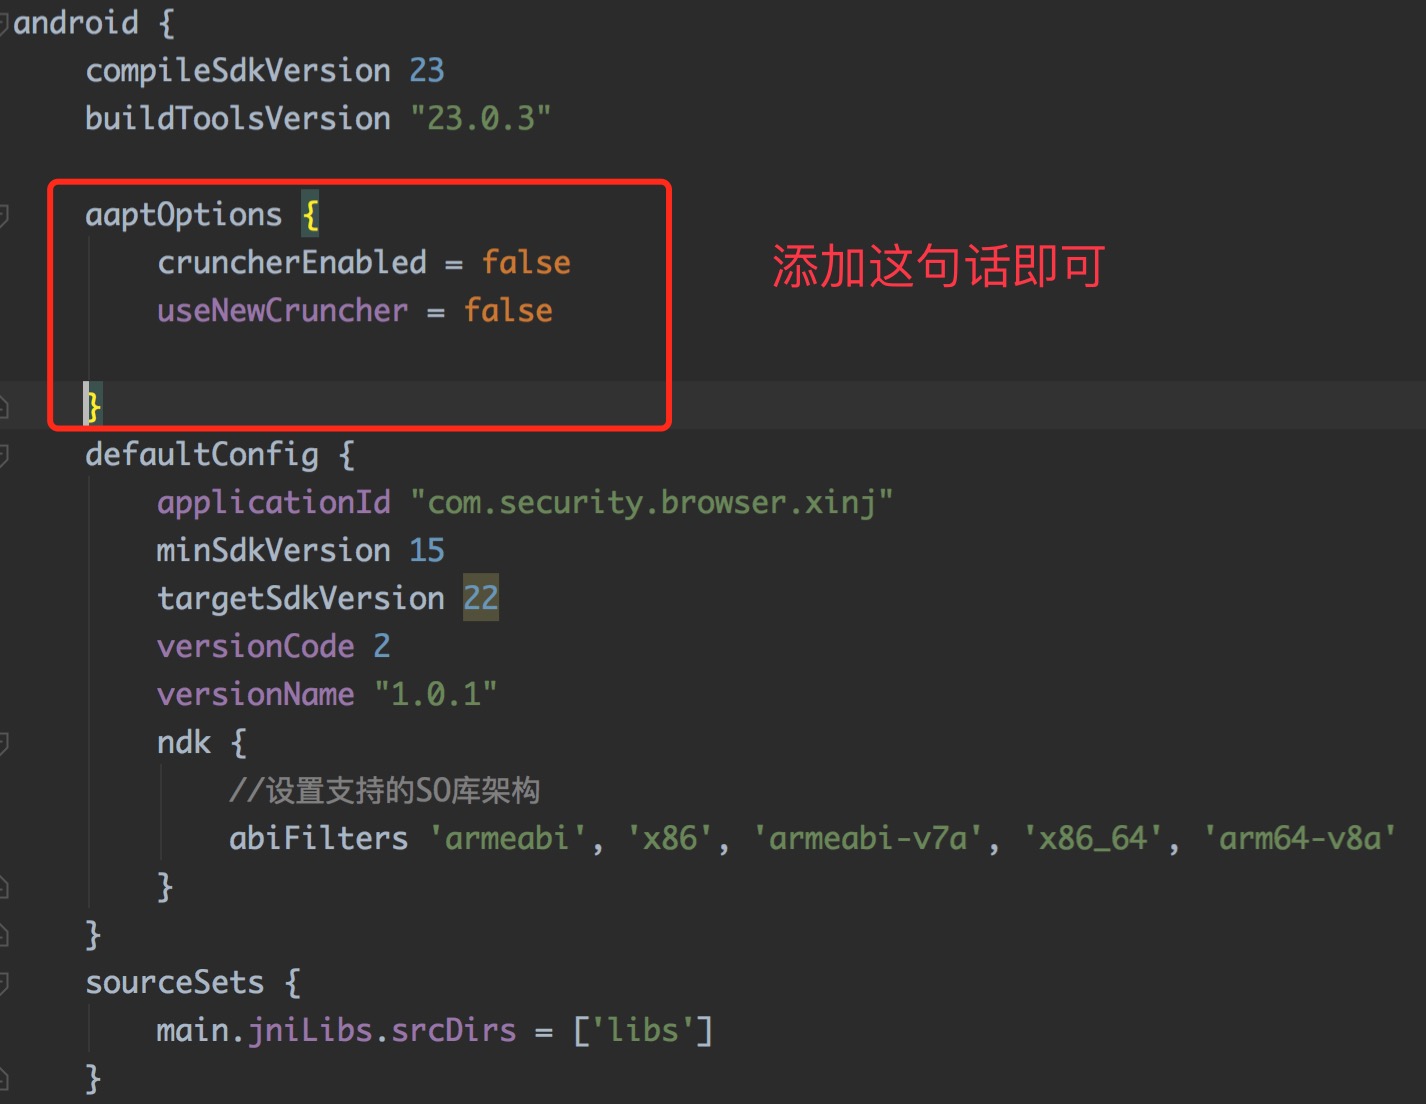 Android Gradle Build Error:Some file crunching failed, see logs for details解決辦法
Android Gradle Build Error:Some file