編輯:關於Android編程
注:使用NotificationCompat.Builder 類需要因引入support包
在創建一個Notification時 NotificationCompat.Builder 用於定義其ui
。Builder 對象至少包含以下幾個方法:
setSmallIcon()設置圖標 setContentTitle()設置標題setContentText() 設置詳情文本
例如:
NotificationCompat.Builder mBuilder =
    new NotificationCompat.Builder(this)
    .setSmallIcon(R.drawable.notification_icon)
    .setContentTitle("My notification")
    .setContentText("Hello World!");
盡管action是可選的,建議為你的Notification添加一個。action 可以讓你直接從通知欄轉跳到你應用的activity中,在其中可以查看引發notification的事件和做相應的操作。在notification內部,action通過一個包含 Intent 的PendingIntent啟動一個activity。
如何構建 PendingIntent 取決於你啟動 Activity 的類型。當你啟動Activity 時候,你要遵循用戶使用notification的經驗。
在下面的例子中,點擊通知打開了一個有效擴展notification的新的activity.,因此沒有必要創建一個人工回退堆棧。 (從 在啟動Activity的時候保存通知 獲取更多信息):
Intent resultIntent = new Intent(this, ResultActivity.class);
...
// Because clicking the notification opens a new ("special") activity, there's
// no need to create an artificial back stack.
PendingIntent resultPendingIntent =
    PendingIntent.getActivity(
    this,
    0,
    resultIntent,
    PendingIntent.FLAG_UPDATE_CURRENT
);
用一個手勢和之前的創建的 PendingIntent 關聯,調用NotificationCompat.Builder適當的方法。例如通過 setContentIntent()添加 PendingIntent,可以在用戶點擊通的文本的時候啟動一個activity。
如下:
PendingIntent resultPendingIntent;
...
mBuilder.setContentIntent(resultPendingIntent);
發出通知要滿足以下條件:
NotificationManager.的實例notify() 方法發出通知.
當調用 notify(), 方法添加特定的id.你可以通過這個id來更新notification.在Managing
Notifications有更詳細的描述.調用 build(),
返回 包含說明 Notification 的對象.
For example:
NotificationCompat.Builder mBuilder;
...
// Sets an ID for the notification
int mNotificationId = 001;
// Gets an instance of the NotificationManager service
NotificationManager mNotifyMgr =
        (NotificationManager) getSystemService(NOTIFICATION_SERVICE);
// Builds the notification and issues it.
mNotifyMgr.notify(mNotificationId, mBuilder.build());
完整代碼如下:
NotificationCompat.Builder mBuilder = new NotificationCompat.Builder(
this).setSmallIcon(R.drawable.ic_launcher)
.setContentTitle("My notification")
.setContentText("Hello World!");
Intent resultIntent = new Intent(this, AActicity.class);
// Because clicking the notification opens a new ("special") activity,
// there's
// no need to create an artificial back stack.
PendingIntent resultPendingIntent = PendingIntent.getActivity(this, 0,
resultIntent, PendingIntent.FLAG_UPDATE_CURRENT);
mBuilder.setContentIntent(resultPendingIntent);
int mNotificationId = 001;
// Gets an instance of the NotificationManager service
NotificationManager mNotifyMgr = (NotificationManager) getSystemService(NOTIFICATION_SERVICE);
// Builds the notification and issues it.
Notification notification = mBuilder.build();
        //notification.flags |= Notification.FLAG_ONGOING_EVENT
 | Notification.FLAG_NO_CLEAR; //該行代碼可以使通知常駐通知欄
mNotifyMgr.notify(mNotificationId, notification);
 深入剖析Android中Service和Thread區別
Service既不是進程也不是線程,它們之間的關系如下:可能有的朋友會問了,既然是長耗時的操作,那麼Thread也可以完成啊。沒錯,在程序裡面很多耗時工作我們也可以通過T
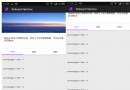
 Material Design系列之Behavior上滑顯示返回頂部按鈕
效果預覽源碼在文章末尾。引文有時候我們的頁面內容過長的時候,滑動到頁面底部用戶再滑動到頂部很麻煩,Android不像iOS可以點擊statusBar回到頂部,一般都是雙擊
 Android 自定義View-圖片文字變色,實現酷炫LoadingView或者進度條
我要自定義的控件是一個蓋世英雄,它不僅僅是一個Loading控件,同時還支持進度條 (ProgressBar)功能 。它會在你需要的時候出現,它支持 left,top,r
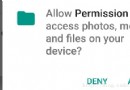 Android 6.0權限管理,sdk)=23請求權限
如果APP運行在Android 6.0或以上版本的手機,並且target sdk>=23,那麼在使用一些相對敏感的權限時,需要征求用戶的許可。比如讀寫sdcard,