編輯:Android技術基礎
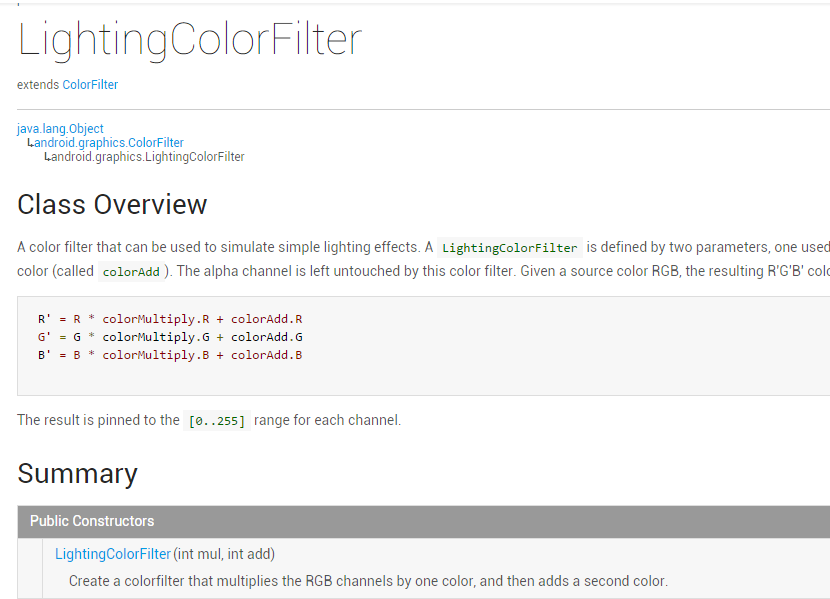
上一節中我們講解了Android中Paint API中的ColorFilter(顏色過濾器)的第一個子類: ColorMatrixColorFilter(顏色矩陣顏色過濾器),相信又開闊了大家的Android圖像處理視野, 而本節我們來研究它的第二個子類:LightingColorFilter(光照色彩顏色過濾器),先上一發 官方API文檔:LightingColorFilter,文檔裡的東西也不多,關鍵的在這裡:
大概意思就是:一個顏色過濾器,可以用來模擬簡單的燈光效果,構造方法的參數有兩個,一個 用來乘以原圖的RPG值,一個添加到前面得出的結果上!其實計算方法無非: (RGB值 * mul + Add) % 255,從而得到新的RPG值,這裡的%是求余,另外,整個過程中Alpha不 參與改變!下面我們寫個示例來驗證驗證!
運行效果圖:
實現代碼:
先是一個簡單的布局:activity_main.xml:
<RelativeLayout xmlns:android="http://schemas.android.com/apk/res/android"
    xmlns:tools="http://schemas.android.com/tools"
    android:layout_width="match_parent"
    android:layout_height="match_parent"
    android:padding="5dp"
    tools:context=".MainActivity">

    <ImageView
        android:id="@+id/img_meizi"
        android:layout_width="300dp"
        android:layout_height="300dp"
        android:src="@mipmap/img_meizi" />

    <EditText
        android:id="@+id/edit_mul"
        android:layout_width="wrap_content"
        android:layout_height="wrap_content"
        android:layout_below="@id/img_meizi"
        android:text="0" />

    <EditText
        android:id="@+id/edit_add"
        android:layout_width="wrap_content"
        android:layout_height="wrap_content"
        android:layout_below="@id/edit_mul"
        android:text="0" />


    <Button
        android:id="@+id/btn_change"
        android:layout_width="wrap_content"
        android:layout_height="wrap_content"
        android:layout_alignRight="@id/img_meizi"
        android:layout_below="@id/img_meizi"
        android:text="變化" />

</RelativeLayout>
接著是我們的MainActiivty.java,同樣很簡單:
public class MainActivity extends AppCompatActivity implements View.OnClickListener{

    private ImageView img_meizi;
    private EditText edit_mul;
    private EditText edit_add;
    private Button btn_change;
    private Bitmap mBitmap;

    @Override
    protected void onCreate(Bundle savedInstanceState) {
        super.onCreate(savedInstanceState);
        setContentView(R.layout.activity_main);
        mBitmap = BitmapFactory.decodeResource(getResources(), R.mipmap.img_meizi);
        bindViews();
    }

    private void bindViews() {
        img_meizi = (ImageView) findViewById(R.id.img_meizi);
        edit_mul = (EditText) findViewById(R.id.edit_mul);
        edit_add = (EditText) findViewById(R.id.edit_add);
        btn_change = (Button) findViewById(R.id.btn_change);

        btn_change.setOnClickListener(this);

    }


    private Bitmap ProcessImage(Bitmap bp,int mul,int add){
        Bitmap bitmap = Bitmap.createBitmap(bp.getWidth(),bp.getHeight(), Bitmap.Config.ARGB_8888);
        Canvas canvas = new Canvas(bitmap);
        Paint paint = new Paint(Paint.ANTI_ALIAS_FLAG);
        paint.setColorFilter(new LightingColorFilter(mul,add));
        canvas.drawBitmap(bp,0,0,paint);
        return bitmap;
    }

    @Override
    public void onClick(View v) {
        switch (v.getId()){
            case R.id.btn_change:
                int mul = Integer.parseInt(edit_mul.getText().toString());
                int add = Integer.parseInt(edit_add.getText().toString());
                img_meizi.setImageBitmap(ProcessImage(mBitmap,mul,add));
                break;
        }
    }
}
好了,LightingColorFilter的使用演示完畢~
LightingColorFilterDemo.zip
嗯,本節演示了一下LightingColorFilter的一個基本用法,用來模擬簡單的燈光效果, 實現簡單的圖片處理效果,好的,本節就到這裡,謝謝~
 1.0.1 2015年最新Android基礎入門教程目錄
前言:關於《2015年最新Android基礎入門教程目錄》終於在今天落下了帷幕,全套教程共148節已編寫完畢,附上目錄,關於教程的由來,筆者的情況和
 10.4 Vibrator(振動器)
本節引言:本節我們介紹的是Vibrator(振動器),是手機自帶的振動器,別去百度直接搜針振動器,因為你的搜索結果可能是如圖所示的神秘的道具,或者其
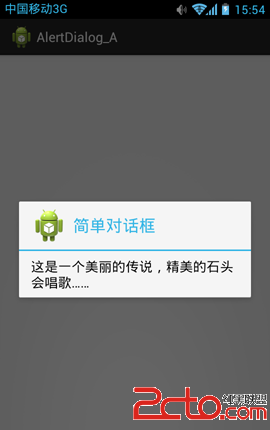 第30章、常見對話框之一AlertDialog(從零開始學Android)
在Android應用中,有多種對話框:Dialog、AlertDialog、ProgressDialog、時間、日期等對話框。 (1)Dialog類,是一切對話框的基類
 第87章、系統服務之WIFI_SERVICE(從零開始學Android)
WIFI就是一種無線聯網技術,常見的是使用無線路由器。那麼在這個無線路由器的信號覆蓋的范圍內都可以采用WIFI連接的方式進行聯網。如果無線路由器連接了一個ADSL線路或其