編輯:關於android開發
Android與PHP的交互是通過Http網絡編程來實現的,利用php訪問數據庫,並且操作數據庫中的數據,利用php作為接口,使Android連接數據庫。
一般情況下,我們使用Json格式進行傳輸,利用php將數據封裝為Json的形式,然後再Android上面在對Json數據進行解析。將解析好的數據顯示在手機上。
為了跟前兩篇的進行對接,我這篇博文就不給大家展示Json數據的解析了,等到下篇的時候我給大家講一下Json數據的解析,以及怎麼樣將數據部署在布局文件中,我這次只是將獲取到的Json數據顯示在TextView中。為了方便大家觀察,我這裡設置了兩個TextView進行對比,一個部署上數據,另一個是本地的數據。並且,通過跳轉的方式實現。
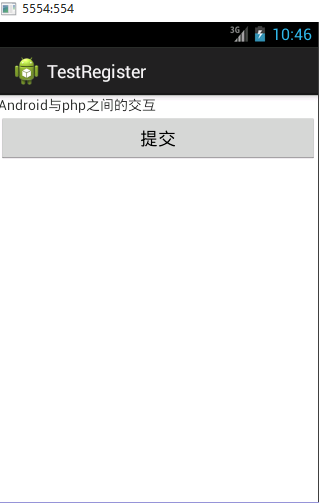
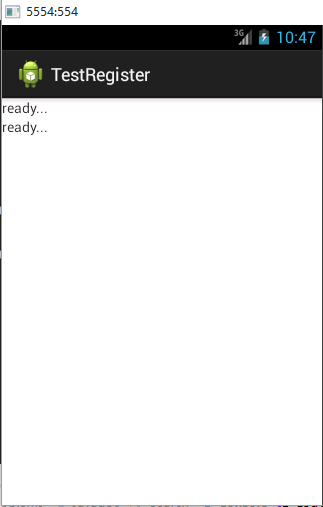
效果圖如下:
A:
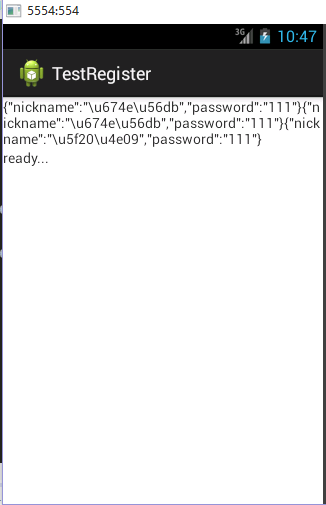
B:
C:
操作步驟:
首先打開軟件,然後點擊提交跳轉到另一個界面中進行顯示數據。顯示的直接是Json數據,並沒有對其進行解析。
Java代碼:
MainActivity:
 1 package com.example.testregister;
 2
 3
 4 import android.app.Activity;
 5 import android.content.Intent;
 6 import android.os.Bundle;
 7 import android.view.View;
 8 import android.view.View.OnClickListener;
 9 import android.widget.Button;
10 import android.widget.EditText;
11
12 public class MainActivity extends Activity{
13
14     private Button btn;
15
16     @Override
17     protected void onCreate(Bundle savedInstanceState) {
18         super.onCreate(savedInstanceState);
19         setContentView(R.layout.activity_main);
20
21         btn = (Button) findViewById(R.id.btn_tijao);
22
23         btn.setOnClickListener(new OnClickListener() {
24
25             @Override
26             public void onClick(View v) {
27
28                 Intent intent = new Intent(getApplicationContext(),ShowTest.class);
29                 startActivity(intent);
30             }
31         });
32     }
33
34
35
36 }
布局文件activity_main.xml:
 1 <LinearLayout xmlns:android="http://schemas.android.com/apk/res/android"
 2     xmlns:tools="http://schemas.android.com/tools"
 3     android:id="@+id/LinearLayout1"
 4     android:layout_width="match_parent"
 5     android:layout_height="match_parent"
 6     android:orientation="vertical"
 7     tools:context=".MainActivity" >
 8
 9     <TextView
10         android:layout_width="wrap_content"
11         android:layout_height="wrap_content"
12         android:text="@string/hello_world" />
13
14     <Button
15         android:id="@+id/btn_tijao"
16         android:layout_width="fill_parent"
17         android:layout_height="wrap_content"
18         android:text="提交" />
19
20 </LinearLayout>
第二個界面ShowTest:
 1 package com.example.testregister;
 2
 3 import android.app.Activity;
 4 import android.os.Bundle;
 5 import android.widget.TextView;
 6
 7 import com.example.interfaceHttp.HttpGetListener;
 8 import com.example.service.HttpGetData;
 9
10 public class ShowTest extends Activity implements HttpGetListener{
11
12     private TextView textv1;
13     private TextView textv2;
14
15     //我的本地服務器的接口,如果在你自己的服務器上需要更改相應的url
16     private String url ="http://10.17.64.85:8080/testregister/JSONPars.php";
17
18     private HttpGetData mhttpgetdata;
19
20
21     @Override
22     protected void onCreate(Bundle savedInstanceState) {
23         // TODO Auto-generated method stub
24         super.onCreate(savedInstanceState);
25         setContentView(R.layout.activitytwo);
26         mhttpgetdata = (HttpGetData) new HttpGetData(url,this).execute();
27         textv1 = (TextView) findViewById(R.id.tv1);
28         textv2 = (TextView) findViewById(R.id.tv2);
29
30
31     }
32
33
34     @Override
35     public void GetDataUrl(String data) {
36         // TODO Auto-generated method stub
37         System.out.println(data);
38         textv1.setText(data);
39
40     }
41
42 }
第二個布局 activitytwo.xml:
 1 <?xml version="1.0" encoding="utf-8"?>
 2 <LinearLayout xmlns:android="http://schemas.android.com/apk/res/android"
 3     android:layout_width="match_parent"
 4     android:layout_height="match_parent"
 5     android:orientation="vertical" >
 6
 7     <TextView
 8         android:id="@+id/tv1"
 9         android:layout_width="fill_parent"
10         android:layout_height="wrap_content"
11         android:text="ready..." />
12
13     <TextView
14         android:id="@+id/tv2"
15         android:layout_width="fill_parent"
16         android:layout_height="wrap_content"
17         android:text="ready..." />
18
19 </LinearLayout>
接下來就是利用HTTP進行網絡的處理,這裡使用的是get請求,這些代碼我在http://www.cnblogs.com/bingbingliang-xiaomonv/p/5247223.html這篇文章中給大家講過:
HttpGetData:
 1 package com.example.service;
 2
 3 import java.io.BufferedReader;
 4 import java.io.InputStream;
 5 import java.io.InputStreamReader;
 6
 7 import org.apache.http.HttpEntity;
 8 import org.apache.http.HttpResponse;
 9 import org.apache.http.client.HttpClient;
10 import org.apache.http.client.methods.HttpGet;
11 import org.apache.http.impl.client.DefaultHttpClient;
12
13 import android.os.AsyncTask;
14
15 import com.example.interfaceHttp.HttpGetListener;
16
17 public class HttpGetData extends AsyncTask<String, Void, String>{
18
19     private HttpClient mhttpclient;
20     private HttpGet mhttpget;
21     private HttpResponse mhttpResponse;
22     private HttpEntity mHttpEntity;
23     private InputStream in;
24     private StringBuffer sb;
25
26
27
28
29     //聲明url變量
30     private String url;
31     //聲明接口
32     private HttpGetListener listener;
33
34     public HttpGetData(){
35     }
36
37     public HttpGetData(String url){
38         this.url = url;
39     }
40
41     public HttpGetData(String url,HttpGetListener listener){
42         this.url = url;
43         this.listener = listener;
44     }
45
46     /**
47      * 寫後台需要執行的程序
48      */
49     @Override
50     protected String doInBackground(String... params) {
51
52         try{
53             //首先創建一個客戶端實例
54             mhttpclient = new DefaultHttpClient();
55             //設置傳遞的方法
56             mhttpget = new HttpGet(url);
57             //通過客戶端進行發送
58             mhttpResponse = mhttpclient.execute(mhttpget);
59             //通過HttpResponse獲取方法體
60             mHttpEntity = mhttpResponse.getEntity();
61             //通過流獲取具體的內容
62             in = mHttpEntity.getContent();
63             //創建緩沖區
64             BufferedReader br = new BufferedReader(new InputStreamReader(in));
65             sb = new StringBuffer();
66             String line = null;
67             while((line = br.readLine())!= null){
68                 sb.append(line);
69             }
70             return sb.toString();
71
72
73         }catch(Exception e){
74             e.printStackTrace();
75         }
76
77         return null;
78     }
79
80     @Override
81     protected void onPostExecute(String result) {
82         // TODO Auto-generated method stub
83         listener.GetDataUrl(result);
84         super.onPostExecute(result);
85     }
86
87 }
為了使更多的類方便的使用,實現了這個接口HttpGetListener:
1 package com.example.interfaceHttp;
2
3 public interface HttpGetListener {
4     void GetDataUrl(String data);
5 }
好了,這就是基本的Android端的代碼了,比較簡單,關於HTTP網絡通信這一塊不是很懂得話,建議參照http://www.cnblogs.com/bingbingliang-xiaomonv/p/5247223.html
注意:
在跳轉的時候需要給Activity進行配置
配置文件如下:
1  <activity
2                android:name = "com.example.testregister.ShowTest">
3             <intent-filter >
4                 <action android:name="android.intent.action.VIEW" />
5
6                 <category android:name="android.intent.category.DEFAULT"/>
7
8             </intent-filter>
9         </activity>
因為涉及到網絡的交互,所以還需要添加網絡條件,在配置文件中配置:
1 <uses-permission android:name="android.permission.INTERNET" />
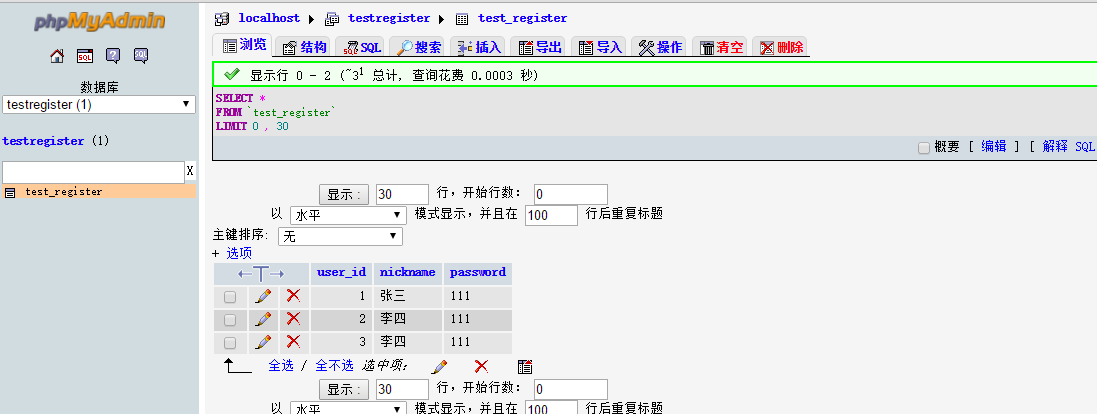
在講php實現接口的時候,我先給大家看一下我的本地的數據庫以及裡面的數據
數據庫:

添加的數據:
PHP代碼:
首先先建立一個數據庫的文件Conn.php
 1 <?php
 2     //連接本地數據庫localhost以及數據庫賬戶root密碼為空
 3     $con = mysql_connect("localhost","root","");
 4
 5     //設置字符集
 6     mysql_query("SET NAMES 'utf8'");
 7     mysql_query("SET CHARACTER SET utf8");
 8
 9     if(!$con){
10         die(mysql_error());
11     }
12     mysql_select_db("testregister",$con);
13     // echo "測試成功";
14
15 ?>
訪問數據庫php代碼的簡單實現JSONPars.php:
 1 <?php
 2     //用於連接文件
 3     require 'Conn.php';
 4
 5     //按照倒敘的順序輸出
 6     $result = mysql_query("SELECT nickname,password FROM test_register ORDER BY user_id DESC");
 7     // $array = mysql_fetch_assoc($result);
 8     //計算數據的條數
 9     $num = mysql_num_rows($result);
10     //列出新添加的數據是在上面向下輸出,如果$i<3,只是輸出前三項
11     for($i=0;$i<$num;$i++){
12         // print_r($array);
13         echo json_encode(mysql_fetch_assoc($result));
14     }
15
16 ?>
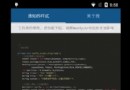
對於上面的PHP代碼進行測試,看是否成功,如果出現下面的效果圖,就是成功,如果沒有則會顯示錯誤
效果圖如下:

到這裡基本的實現就已經完成了,如果大家有什麼不懂得或者我的這篇文章有什麼不好(不對)的地方,歡迎大家留言,我一定會在第一時間回復。
 個人應用開發詳記. (一),個人應用開發
個人應用開發詳記. (一),個人應用開發 心血來潮. 突然想開發一個視頻分享社區類的APP. 於是想了就開始做~ 博客就來記錄開發過程
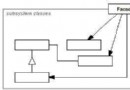
 viewflipper動畫切換屏幕,viewflipper動畫切換
viewflipper動畫切換屏幕,viewflipper動畫切換 整個項目的 package com.example.viewflipper; imp
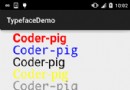
 手把手教你畫一個 逼格滿滿圓形水波紋loadingview Android
手把手教你畫一個 逼格滿滿圓形水波紋loadingview Android 才沒有完結呢o( ̄︶ ̄)n 。大家好,這裡是番外篇。 拜讀了愛哥的博客,又學到不少東西。愛哥曾
 Android開發: fragment解析及案例
Android開發: fragment解析及案例 Fragment 設計理念 在設計應用時特別是Android 應用 ,有眾多的分辨率要去適應,而fragme