編輯:關於Android編程
本文在《7種形式的Android Dialog使用實例》在這篇文章的基礎進行學習,具體內容如下
1.概述
android原生控件向來以丑著稱(新推出的Material Design當另說),因此幾乎所有的應用都會特殊定制自己的UI樣式。而其中彈出式提示框的定制尤為常見,本篇我們將從模仿QQ退出提示框來看一下常見的幾種自定義提示框的實現方式。
這裡使用的幾種彈出框實現方法概括為以下幾種:
自定義Dialog
自定義PopupWindow
自定義Layout View
Activity的Dialog樣式
FragmentDialog
先看下最終的效果圖:

2.實踐
前面提到幾種實現方式均可以達到同樣的演示效果,但其中又是各有不同。這裡先逐一列舉各種具體實現,最後加以綜述總結和歸納吧。
在此之前呢,先看一下這裡實現的對話框共用布局layout/confirm_dialog.xml 。
<?xml version="1.0" encoding="utf-8"?>
<LinearLayout xmlns:android="http://schemas.android.com/apk/res/android"
 android:layout_width="match_parent"
 android:layout_height="wrap_content"
 android:layout_marginLeft="5dp"
 android:layout_marginRight="5dp"
 android:background="@drawable/confirm_dialog_bg"
 android:orientation="vertical">

 <LinearLayout
  android:layout_width="fill_parent"
  android:layout_height="wrap_content"
  android:background="@android:color/transparent"
  android:orientation="vertical" >

  <TextView
   android:id="@+id/title_name"
   android:layout_width="fill_parent"
   android:layout_height="wrap_content"
   android:gravity="center_horizontal"
   android:paddingBottom="10dp"
   android:paddingTop="15dp"
   android:text="Message Title"
    android:textColor="@android:color/black"
   android:textSize="20sp"
   android:visibility="visible" />
 </LinearLayout>

 <LinearLayout
  android:layout_width="fill_parent"
  android:layout_height="fill_parent"
  android:background="@android:color/transparent"
  android:orientation="vertical" >

  <TextView
   android:id="@+id/text_view"
   android:layout_width="fill_parent"
   android:layout_height="wrap_content"
   android:layout_marginLeft="15dp"
   android:layout_marginRight="15dp"
   android:layout_marginTop="10dp"
   android:textColor="@android:color/black"
   android:text="this is message content"
   android:textSize="16dip"/>

  <View
   android:layout_width="match_parent"
   android:layout_height="1px"
   android:layout_marginTop="15dip"
   android:background="#c5c5c5" />

  <LinearLayout
   android:layout_width="fill_parent"
   android:layout_height="50dip"
   android:background="@android:color/transparent"
   android:gravity="center_horizontal"
   android:orientation="horizontal" >

   <!-- 取消按鈕 -->
   <Button
    android:id="@+id/btn_cancel"
    android:layout_width="wrap_content"
    android:layout_height="match_parent"
    android:layout_weight="1"
    android:text="Cancel"
    android:text
    android:textColor="#0072c6"
    android:background="@drawable/confirm_dialog_cancel_selector"
    android:textSize="15sp" />

   <!-- 確認按鈕 -->

   <View
    android:layout_width="1px"
    android:layout_height="match_parent"
    android:layout_gravity="center_horizontal"
    android:background="#c5c5c5"/>

   <Button
    android:id="@+id/btn_ok"
    android:layout_width="wrap_content"
    android:layout_height="match_parent"
    android:layout_weight="1"
    android:text="OK"
    android:text
    android:textColor="#0072c6"
    android:background="@drawable/confirm_dialog_ok_selector"
    android:textSize="15sp" />
  </LinearLayout>
 </LinearLayout>

</LinearLayout>
僅僅通過布局預覽就可以看到效果了:

下邊我們分別通過上述幾種方式來使用這個布局展示消息提示框。
2.1 Dialog
這個是最基本也最常見的非阻塞式對話框。具體形式可分為七種,詳細參見網上各種文章,隨便引用一篇7種形式的Android Dialog使用舉例。
(注:官方在fragmentDialog推出後就不在推薦直接使用Dialog來創建對話框,這是後話)
我們這裡自定義的提示框ConfirmDialog繼承自Dialog,使用confirm_dialog.xml 初始化布局,綁定相應事件。
public class ConfirmDialog extends Dialog {
 private Context context;
 private TextView titleTv,contentTv;
 private View okBtn,cancelBtn;
 private OnDialogClickListener dialogClickListener;

 public ConfirmDialog(Context context) {
  super(context);
  this.context = context;
  initalize();
 }

 //初始化View
 private void initalize() {
  LayoutInflater inflater = LayoutInflater.from(context);
  View view = inflater.inflate(R.layout.confirm_dialog, null);
  setContentView(view);
  initWindow();

  titleTv = (TextView) findViewById(R.id.title_name);
  contentTv = (TextView) findViewById(R.id.text_view);
  okBtn = findViewById(R.id.btn_ok);
  cancelBtn = findViewById(R.id.btn_cancel);
  okBtn.setOnClickListener(new View.OnClickListener() {

   @Override
   public void onClick(View v) {
    dismiss();
    if(dialogClickListener != null){
     dialogClickListener.onOKClick();
    }
   }
  });
  cancelBtn.setOnClickListener(new View.OnClickListener() {

   @Override
   public void onClick(View v) {
    dismiss();
    if(dialogClickListener != null){
     dialogClickListener.onCancelClick();
    }
   }
  });
 }

 /**
 *添加黑色半透明背景
 */
 private void initWindow() {
  Window dialogWindow = getWindow();
  dialogWindow.setBackgroundDrawable(new ColorDrawable(0));//設置window背景
  dialogWindow.setSoftInputMode(WindowManager.LayoutParams.SOFT_INPUT_STATE_HIDDEN | WindowManager.LayoutParams.SOFT_INPUT_ADJUST_PAN);//設置輸入法顯示模式
  WindowManager.LayoutParams lp = dialogWindow.getAttributes();
  DisplayMetrics d = context.getResources().getDisplayMetrics();//獲取屏幕尺寸
  lp.width = (int) (d.widthPixels * 0.8); //寬度為屏幕80%
  lp.gravity = Gravity.CENTER;  //中央居中
  dialogWindow.setAttributes(lp);
 }

 public void setOnDialogClickListener(OnDialogClickListener clickListener){
  dialogClickListener = clickListener;
 }

 /**
 *添加按鈕點擊事件
 */
 public interface OnDialogClickListener{
  void onOKClick();
  void onCancelClick();
 }
}
2.2 PopupWindow
PopupWindow是阻塞式對話框,只有在退出操作時候程序才會繼續運行。另外PopupWindow可以根據自由確定自身位置。按照位置有無偏移分,可以分為偏移和無偏移兩種;按照參照物的不同,可以分為相對於某個控件(Anchor錨)和相對於父控件。具體如下
showAsDropDown(View anchor):相對某個控件的位置(正左下方),無偏移
showAsDropDown(View anchor, int xoff, int yoff):相對某個控件的位置(正下方),有偏移
showAtLocation(View parent, int gravity, int x, int y):相對於父控件的位置(例如正中央Gravity.CENTER,下方Gravity.BOTTOM等),可以設置偏移或無偏移
這裡只是達到同樣的顯示效果,僅示范下showAtBottom的使用:
public class ConfirmPopWindow extends PopupWindow{
 private Context context;
 private TextView titleTv,contentTv;
 private View okBtn,cancelBtn;
 private OnDialogClickListener dialogClickListener;

 public ConfirmPopWindow(Context context) {
  super(context);
  this.context = context;
  initalize();
 }

 private void initalize() {
  LayoutInflater inflater = LayoutInflater.from(context);
  View view = inflater.inflate(R.layout.confirm_dialog, null);
  setContentView(view);
  initWindow();

  titleTv = (TextView) view.findViewById(R.id.title_name);
  contentTv = (TextView) view.findViewById(R.id.text_view);
  okBtn = view.findViewById(R.id.btn_ok);
  cancelBtn = view.findViewById(R.id.btn_cancel);
  okBtn.setOnClickListener(new View.OnClickListener() {

   @Override
   public void onClick(View v) {
    dismiss();
    if(dialogClickListener != null){
     dialogClickListener.onOKClick();
    }
   }
  });
  cancelBtn.setOnClickListener(new View.OnClickListener() {

   @Override
   public void onClick(View v) {
    dismiss();
    if(dialogClickListener != null){
     dialogClickListener.onCancelClick();
    }
   }
  });
 }

 private void initWindow() {
  this.setBackgroundDrawable(new ColorDrawable(0));
  DisplayMetrics d = context.getResources().getDisplayMetrics();
  this.setWidth((int) (d.widthPixels * 0.8));
  this.setHeight(LayoutParams.WRAP_CONTENT);
  this.setFocusable(true);
  this.setOutsideTouchable(true);
  this.update();
 }

 public void showAtBottom(View view){
  showAsDropDown(view, Math.abs((view.getWidth() - getWidth())/2), 20);
 }

 public void setOnDialogClickListener(OnDialogClickListener clickListener){
  dialogClickListener = clickListener;
 }

 public interface OnDialogClickListener{
  void onOKClick();
  void onCancelClick();
 }
}
2.3 自定義Layout
前邊兩種是系統封裝好的View ,同樣的,我們也可以自定義layout布局來實現的彈出式對話框效果。既然是自定義,有必要細致講述一下,
ConfirmLayout繼承自FrameLayout,通過獲取窗口管理器WindowManager 將我們的自定義view添加到窗口最前端並顯示出來,達到預期效果。
1.初始化View
先初始化半透明黑色背景和對應的confirm_layout,然後給窗體添加按鍵返回事件
 protected void initialize() {
  initBackground();//初始化黑色背景
  initContentView();//初始化confirm_layout 對應的View

  windowManager = (WindowManager) getContext().getSystemService(Context.WINDOW_SERVICE);
  setOnKeyListener(new OnKeyListener() { //添加按鍵返回事件
   @Override
   public boolean onKey(View v, int keyCode, KeyEvent event) {
    if (KeyEvent.KEYCODE_BACK == keyCode && KeyEvent.ACTION_DOWN == event.getAction()) {
     hide();//隱藏當前view
     return true;
    }
    return false;
   }

  setFocusable(true); //可獲得焦點
  setFocusableInTouchMode(true); //可觸碰獲得焦點
 }
2.顯示自定義VIew : show()
調用顯示的時候保證在主線程中,如果當前View沒有被添加至窗口中,則添加;然後使用動畫漸變效果顯示背景,最後動畫完成時顯示當前對話框View.
public void show() {
  ((Activity) getContext()).runOnUiThread(new Runnable() {
   @Override
   public void run() {
    if (getParent() == null) { //沒有添加則添加至窗體
     //獲取窗體的布局屬性,設置左上角對齊,填充父容器
     WindowManager.LayoutParams wlp = new WindowManager.LayoutParams();
     wlp.type = WindowManager.LayoutParams.TYPE_APPLICATION;
     wlp.format = PixelFormat.TRANSPARENT;
     wlp.gravity = Gravity.LEFT | Gravity.TOP;
     wlp.width = LayoutParams.MATCH_PARENT;
     wlp.height = LayoutParams.MATCH_PARENT;
     windowManager.addView(ConfirmLayout.this, wlp);
    }
    showBackGround();//顯示背景動畫和自定義View
   }
  });
 }

 /**
 *顯示背景動畫
 */
 protected void showBackGround() {
  if (isShowing)
   return;
  isShowing = true;
  background.clearAnimation();
  background.setVisibility(View.VISIBLE);
  AlphaAnimation an = new AlphaAnimation(0, 1);
  an.setDuration(durationMillis);
  background.startAnimation(an);
 }
3.隱藏自定義VIew : hide()
隱藏對話框的方法跟show()恰恰相反,首先調用隱藏動畫,動畫結束從窗體中移除View
 public void hide() {
  ((Activity) getContext()).runOnUiThread(new Runnable() {
   @Override
   public void run() {
    hideBackGround();//隱藏背景
    if (getParent() != null)
     windowManager.removeView(ConfirmLayout.this);//移除view
   }
  });
 }

 /**
 *隱藏背景背景動畫
 */
 protected void hideBackGround() {
  if (!isShowing)
   return;
  isShowing = false;
  background.clearAnimation();
  AlphaAnimation an = new AlphaAnimation(1, 0);
  an.setDuration(durationMillis);
  an.setAnimationListener(new AnimationListener() {
   @Override
   public void onAnimationStart(Animation animation) {
   }

   @Override
   public void onAnimationRepeat(Animation animation) {
   }

   @Override
   public void onAnimationEnd(Animation animation) {
    background.setVisibility(View.GONE);
   }
  });
  background.startAnimation(an);
 }
其他部分同上,不再一一貼出,詳細可查看示例源碼。
2.4 Activity的Dialog樣式
通過使用主題Theme來實現Activity作為一個dialog來顯示的效果。我們首先在 AndroidManifest.xml 中配置該activity,使得
android:theme=”@android:style/Theme.Dialog”
同樣我們可以自定義繼承於Theme.Dialog的style樣式增加自定義屬性,比如:
<resources>
 <style name="DialogStyle" parent="@android:style/Theme.Dialog">
  <item name="android:windowBackground">@android:color/transparent</item>
  <item name="android:windowFrame">@null</item>
  <item name="android:windowNoTitle">true</item>
  <item name="android:windowIsFloating">true</item>
  <item name="android:windowIsTranslucent">true</item>
  <item name="android:windowFullscreen">true</item>
  <item name="android:backgroundDimEnabled">true</item>
 </style>
</resources>
然後使用 > android:theme=”@style/DialogStyle” 達到上述效果。具體實現跟dialog類似:
public class ConfirmActivity extends Activity{
 private TextView titleTv,contentTv;
 private View okBtn,cancelBtn;
 private OnDialogClickListener dialogClickListener;

 @Override
 protected void onCreate(Bundle savedInstanceState) {
  super.onCreate(savedInstanceState);
  requestWindowFeature(Window.FEATURE_NO_TITLE);
  setContentView(R.layout.confirm_dialog);
  initViews();
  initListeners();
 }

 private void initViews() {
  initWindow();
  titleTv = (TextView) findViewById(R.id.title_name);
  contentTv = (TextView) findViewById(R.id.text_view);
  okBtn = findViewById(R.id.btn_ok);
  cancelBtn = findViewById(R.id.btn_cancel);
  okBtn.setOnClickListener(new View.OnClickListener() {

   @Override
   public void onClick(View v) {
    finish();
    if(dialogClickListener != null){
     dialogClickListener.onOKClick();
    }
   }
  });
 }

 private void initWindow() {
  getWindow().setBackgroundDrawable(new ColorDrawable(0));
  getWindow().setSoftInputMode(WindowManager.LayoutParams.SOFT_INPUT_STATE_HIDDEN |
    WindowManager.LayoutParams.SOFT_INPUT_ADJUST_PAN);
 }

 private void initListeners() {
  cancelBtn.setOnClickListener(new View.OnClickListener() {

   @Override
   public void onClick(View v) {
    finish();
    if(dialogClickListener != null){
     dialogClickListener.onCancelClick();
    }
   }
  });
 }

 public void setOnDialogClickListener(OnDialogClickListener clickListener){
  dialogClickListener = clickListener;
 }


 public interface OnDialogClickListener{
  void onOKClick();
  void onCancelClick();
 }
}
2.5 DialogFragment
DialogFragment在android 3.0時被引入並被加以推廣。
我們在使用DialogFragment時,至少需要實現onCreateView或者onCreateDIalog方法。這裡在onCreateDIalog中直接返回前面寫好的ConfirmDialog來實現這個Fragment。
public class ConfirmFragment extends DialogFragment{

 @Override
 @NonNull
 public Dialog onCreateDialog(Bundle savedInstanceState) {
  return new ConfirmDialog(getActivity());
 }

public void setOnDialogClickListener(OnDialogClickListener clickListener){
  ((ConfirmDialog)getDialog()).setOnDialogClickListener(clickListener);
 }
}
當然並不推薦偷懶直接返回前面定義好的ConfirmDialog。我們實際上使用fragment的onCreateView也更合理和簡介,他可以產生同樣的Dialog效果,同時可以作為內嵌fragment引用。從使用總結來看,FragmentDialog 相較於Dialog有兩點好處:
在手機配置變化,導致Activity需要重新創建時,例如旋屏,DialogFragment對話框將會由FragmentManager自動重建,然而Dialog實現的對話框則不會重新生成;
DialogFragment還擁有fragment的優點,即可以在一個Activity內部實現回退(因為FragmentManager會管理一個回退棧 ,另外,他可以直接作為一個普通Fragment嵌套在其他布局裡邊;
3.小結
從實現效果來看我們確實有很多選擇,當然我們用的最多的必然要數Dialog(FragmentDialog)和PopupWindow了。但在一般情況下,選擇Dialog和PopupWindow是由我們的具體使用場景來定。比如有些提示消息,比較適合Dialog,而彈出一些具體選項,需要等待選擇結果等情況,更傾向於使用PopupWindow了。
FragmentDialog的幾種使用場景

PopupWindow的幾種使用場景

4.補充
其實還有種長按彈出菜單,這種除了可以通過上述方法彈出菜單選項外,還可以通過系統提供的 View.setOnCreateContextMenu()方法來實現。比如:
itemView.setOnCreateContextMenuListener(new View.OnCreateContextMenuListener() {
    @Override
    public void onCreateContextMenu(ContextMenu menu, View v, ContextMenu.ContextMenuInfo menuInfo) {
     menu.add("刪除").setOnMenuItemClickListener(new MenuItem.OnMenuItemClickListener() {
      @Override
      public boolean onMenuItemClick(MenuItem item) {
       //執行刪除操作
       return true;
      }
     });
    }
   });
長按彈出,基本效果為:

有興趣的不妨試一下。
後邊的話我們先從源碼角度來看一下這裡講的幾種實現方案的具體原理,最後通過一些簡易封裝來做一個類似IOS上的ActionSheet控件的效果。
演示效果大概為:

詳情請繼續關注接下來的博文。
最後附上本篇所講內容的源碼:示例源碼demo(已重新更新)
以上就是本文的全部內容,希望對大家的學習有所幫助,也希望大家多多支持本站。
 Android 5.0中CoordinatorLayout的使用技巧
CoordinatorLayout 實現了多種Material Design中提到的滾動效果。目前這個框架提供了幾種不用寫動畫代碼就能工作的方法,這些效果包括: *讓浮動
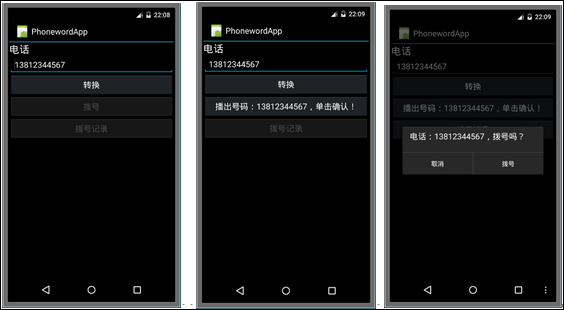 第1個Android應用程序 Android制作簡單單頁導航
本例子演示如何添加一個簡單的單頁導航,在此基礎上,再演示如何在第2個頁面中顯示第1個頁面中撥打過的所有電話號碼。(1)通過該例子理解Android App的基本架構。(2
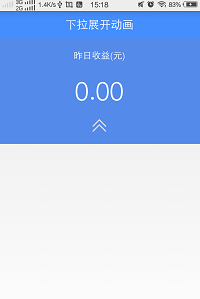 Android屬性動畫實現布局的下拉展開效果
在Android的3.0之後,google又提出了屬性動畫的這樣一個框架,他可以更好的幫助我們實現更豐富的動畫效果。所以為了跟上技術的步伐,今天就聊一聊屬性動畫。這一次的
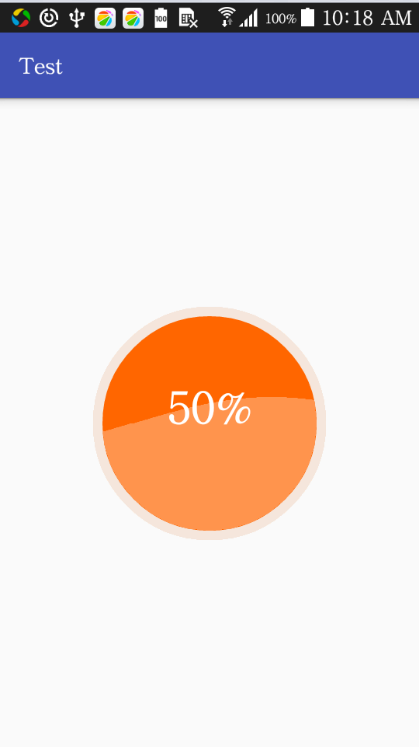 android球形水波百分比控件代碼
本文主要介紹的是一個球形水波的百分比控件,市面上有各種形形色色的百分比控件,我一直覺得水波是最炫的,UI給了我這個機會,然而網上搜了一大堆,不是太復雜,代碼太多(反正我是