編輯:關於Android編程
本文實例為大家分享了Android實現單項、多項選擇操作的相關代碼,供大家參考,具體內容如下
1、單項選擇
1.1.布局
<?xml version="1.0" encoding="utf-8"?>
<LinearLayout xmlns:android="http://schemas.android.com/apk/res/android"
 xmlns:tools="http://schemas.android.com/tools"
 android:layout_width="match_parent"
 android:layout_height="match_parent"
 android:orientation="vertical"
 tools:context="com.rj141.sb.kongjian.DateActivity">


 <TextView
  android:layout_marginLeft="10dp"
  android:layout_width="wrap_content"
  android:layout_height="wrap_content"
  android:text="2+3="
  android:textSize="22dp"
  />

 <RadioGroup
  android:layout_marginLeft="20dp"
  android:layout_width="wrap_content"
  android:layout_height="wrap_content">
  <RadioButton
   android:layout_width="wrap_content"
   android:layout_height="wrap_content"
   android:text="A.2"
   android:id="@+id/rb1"
   />
  <RadioButton
   android:layout_width="wrap_content"
   android:layout_height="wrap_content"
   android:text="B.3"
   android:id="@+id/rb2"
   />
  <RadioButton
   android:layout_width="wrap_content"
   android:layout_height="wrap_content"
   android:text="C.4"
   android:id="@+id/rb3"
   />
  <RadioButton
   android:layout_width="wrap_content"
   android:layout_height="wrap_content"
   android:text="D.5"
   android:id="@+id/rb4"
   />
 </RadioGroup>

 <Button
  android:id="@+id/submit"
  android:layout_width="match_parent"
  android:layout_height="wrap_content"
  android:text="提交"/>
</LinearLayout>
1.2.Java文件
public class SingChoose extends AppCompatActivity {
 private Button btn;
 private RadioButton rbD;
 @Override
 protected void onCreate(Bundle savedInstanceState) {
  super.onCreate(savedInstanceState);
  setContentView(R.layout.sing_choose);

  rbD= (RadioButton) this.findViewById(R.id.rb4);
  btn= (Button) this.findViewById(R.id.submit);
  btn.setOnClickListener(new View.OnClickListener() {
   @Override
   public void onClick(View v) {
    if(rbD.isChecked()){
     Toast.makeText(SingChoose.this,"正確,請加五分",Toast.LENGTH_SHORT).show();
    }
    else {
     Toast.makeText(SingChoose.this,"錯誤,請減五分",Toast.LENGTH_SHORT).show();
    }
   }
  });
 }
}
效果圖:

2、多項選擇
2.1.布局
<?xml version="1.0" encoding="utf-8"?>
<LinearLayout xmlns:android="http://schemas.android.com/apk/res/android"
 xmlns:tools="http://schemas.android.com/tools"
 android:layout_width="match_parent"
 android:layout_height="match_parent"
 android:orientation="vertical"
 tools:context="com.rj141.sb.kongjian.CheckChoose">

 <TextView
  android:layout_width="wrap_content"
  android:layout_height="wrap_content"
  android:textSize="20dp"
  android:text="你喜歡下列哪些物品?"
  />

 <CheckBox
  android:layout_width="wrap_content"
  android:layout_height="wrap_content"
  android:text="巧克力"
  android:id="@+id/cb1" />

 <CheckBox
  android:layout_width="wrap_content"
  android:layout_height="wrap_content"
  android:text="冰淇淋"
  android:id="@+id/cb2" />

 <CheckBox
  android:layout_width="wrap_content"
  android:layout_height="wrap_content"
  android:text="蛋糕"
  android:id="@+id/cb3" />

 <CheckBox
  android:layout_width="wrap_content"
  android:layout_height="wrap_content"
  android:text="啤酒"
  android:id="@+id/cb4" />

 <CheckBox
  android:layout_width="wrap_content"
  android:layout_height="wrap_content"
  android:text="肉"
  android:id="@+id/cb5" />

 <TextView
  android:layout_width="wrap_content"
  android:layout_height="wrap_content"
  android:textSize="18dp"
  android:id="@+id/tv" />

</LinearLayout>
2.2.Java文件
public class CheckChoose extends AppCompatActivity implements CompoundButton.OnCheckedChangeListener {

 private CheckBox cb1,cb2,cb3,cb4,cb5;
 private TextView tv;
 @Override
 protected void onCreate(Bundle savedInstanceState) {
  super.onCreate(savedInstanceState);
  setContentView(R.layout.check_choose);

  tv= (TextView) this.findViewById(R.id.tv);
  cb1= (CheckBox) this.findViewById(R.id.cb1);
  cb2= (CheckBox) this.findViewById(R.id.cb2);
  cb3= (CheckBox) this.findViewById(R.id.cb3);
  cb4= (CheckBox) this.findViewById(R.id.cb4);
  cb5= (CheckBox) this.findViewById(R.id.cb5);
  cb1.setOnCheckedChangeListener(this);
  cb2.setOnCheckedChangeListener(this);
  cb3.setOnCheckedChangeListener(this);
  cb4.setOnCheckedChangeListener(this);
  cb5.setOnCheckedChangeListener(this);
 }

 @Override
 public void onCheckedChanged(CompoundButton buttonView, boolean isChecked) {
  String str="您喜歡:";
  if(cb1.isChecked()){
   str+=cb1.getText()+",";
  }
  if(cb2.isChecked()){
   str+=cb2.getText()+",";
  }
  if(cb3.isChecked()){
   str+=cb3.getText()+",";
  }
  if(cb4.isChecked()){
   str+=cb4.getText()+",";
  }
  if(cb5.isChecked()){
   str+=cb5.getText()+",";
  }
  tv.setText(str);
 }
}
效果圖:

以上就是本文的全部內容,希望對大家學習Android軟件編程有所幫助。
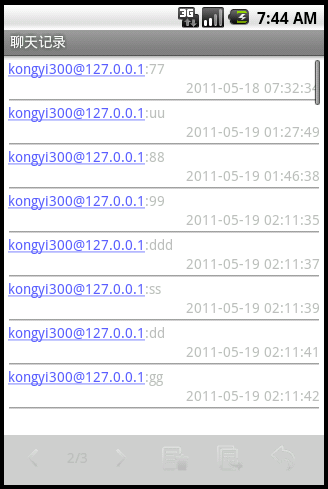 android實現listview分頁的方法
本文實例講述了android實現listview分頁的方法。分享給大家供大家參考。具體分析如下:最近做了下listview的分頁,跟WEB上的分頁是一個意思,需要那幾個分
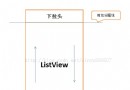 Android下拉刷新完全解析,教你如何一分鐘實現下拉刷新功能(附源碼)
最近項目中需要用到ListView下拉刷新的功能,一開始想圖省事,在網上直接找一個現成的,可是嘗試了網上多個版本的下拉刷新之後發現效果都不怎麼理想。有些是因為功能不完整或
 android 實現自定義狀態欄通知(Status Notification)
在android項目的開發中,有時為了實現和用戶更好的交互,在通知欄這一小小的旮旯裡,我們通常需要將內容豐富起來,這個時候我們就需要去實現自定義的通知欄,例如下面360或
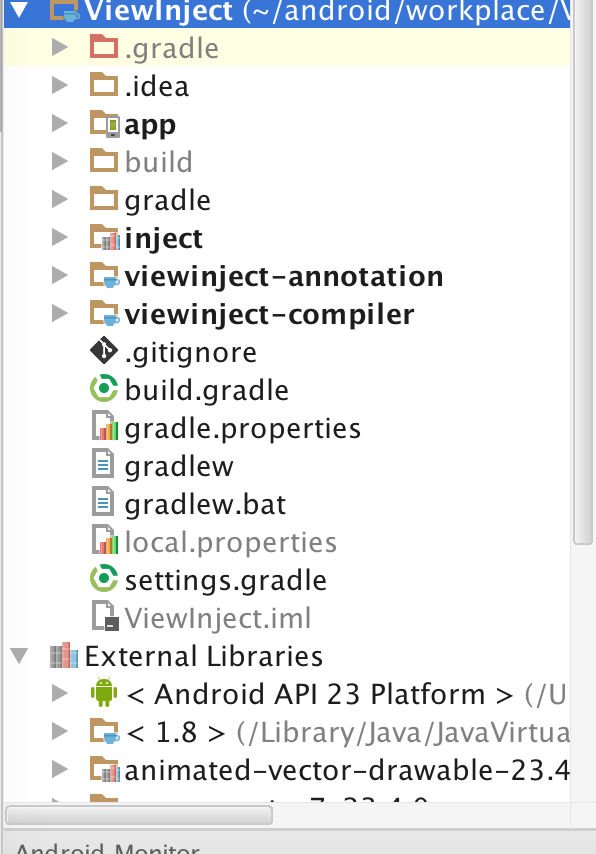 Android注解-編譯時生成代碼 (APT)
Android注解越來越引領潮流,比如 Dagger2, ButterKnife, EventBus3 等,他們都是注解類型,而且他們都有個共同點就是編譯時生成代碼,而不