編輯:關於Android編程
最近准備整理一套關於UI效果的文章,算是對這段時間的一個總結,主要講Android開發中的UI效果設計模塊。初步分為一下幾個篇幅:
今天就當開胃菜,先講講最簡單的xml繪圖,相信這個大家都用的比較熟,這裡就當給大家做一個小文檔,當那個參數配置忘了,便於查閱
一、Shape
<?xml version="1.0" encoding="utf-8"?>
<shape xmlns:android="http://schemas.android.com/apk/res/android"
// 此處可以設置shape的形狀 不設置默認為rectangle
android:shape=["rectangle"|"oval"|"line"|"ring"|]

>

  <!-- 圓角 shape="rectangle"是使用 默認為1dp -->
  <corners
    android:radius="xdp"
    android:topLeftRadius="xdp"
    android:topRightRadius="xdp"
    android:bottomLeftRadius="xdp"
    android:bottomRightRadius="xdp"/>

  <!-- 漸變 -->
  <gradient
    android:startColor="color"
    android:centerColor="color"
    android:endColor="color"
    android:useLevel="boolean"
    android:angle="integer"//angle的值必須是45的倍數(包括0),僅在type="linear"有效
    android:type=["linear"|"radial"|"sweep"]
    android:centerX="integer"
    android:centerY="integer"
    android:gradientRadius="integer"/>

  <!-- 間隔 -->
  <padding
    android:left="xdp"
    android:top="xdp"
    android:right="xdp"
    android:bottom="xdp"/>

  <!-- 大小 寬度和高度 -->
  <size
    android:width="dp"
    android:height="dp"/>

  <!-- 填充 -->
  <solid
    android:color="color"/><!-- 填充的顏色 -->

  <!-- 描邊 -->
  <stroke
    android:width="dp"
    android:color="color"
    android:dashWidth="dp" //虛線寬度
    android:dashGap="dp"/> //虛線間隔寬度

</shape>
二、Layer
這個用過photoshop的朋友,應該很好理解,用於實現圖層效果
<?xml version="1.0" encoding="utf-8"?>
<layer-list xmlns:android="http://schemas.android.com/apk/res/android">
  <!-- item1 -->
  <item>
   <bitmap android:src="drawable"
    android:gravity="center" />
  </item>
  <!-- item2 -->
  <item>
   <bitmap android:src="drawable"
    android:gravity="center" />
  </item>
  <!-- item3 -->
  <item
   <bitmap android:src="drawable"
    android:gravity="center" />
  </item>
</layer-list>
三、Selector
這個常用語Button、CheckBox、Radio等控件中,通過不同的事件切換控件效果
<?xml version="1.0" encoding="utf-8" ?>
<selector xmlns:Android="http://schemas.android.com/apk/res/android">
<!-- 默認時的背景圖片-->
<item Android:drawable="drawable" />
<!-- 沒有焦點時的背景圖片 -->
<item
  Android:state_window_focused="false"
  android:drawable="drawable"
  />
<!-- 非觸摸模式下獲得焦點並單擊時的背景圖片 -->
<item
  Android:state_focused="true"
  android:state_pressed="true"
  android:drawable= "drawable"
  />
<!-- 觸摸模式下單擊時的背景圖片-->
<item
  Android:state_focused="false"
  Android:state_pressed="true"
  Android:drawable="drawable"
  />
<!--選中時的圖片背景-->
<item
  Android:state_selected="true"
  android:drawable="drawable"
  />
<!--獲得焦點時的圖片背景-->
<item
  Android:state_focused="true"
  Android:drawable="drawable"
  />
</selector>
以上就是Android開發中的UI效果設計模塊的一部分內容,之後還會繼續更新,希望對大家的學習有所幫助。
 Android中通過ViewHelper.setTranslationY實現View移動控制(NineOldAndroids開源項目)
我們知道有不少開源工程,能實現很多不錯的效果。前幾天,我看了一個效果,剛好項目中也用到了這個jar包。沒事挖一挖 學一學(一說到挖一挖,那麼問題來了,挖掘機技術到底哪家強
 Android開發之PullToRefresh的Click點擊事件的監聽實現長按刪除Item
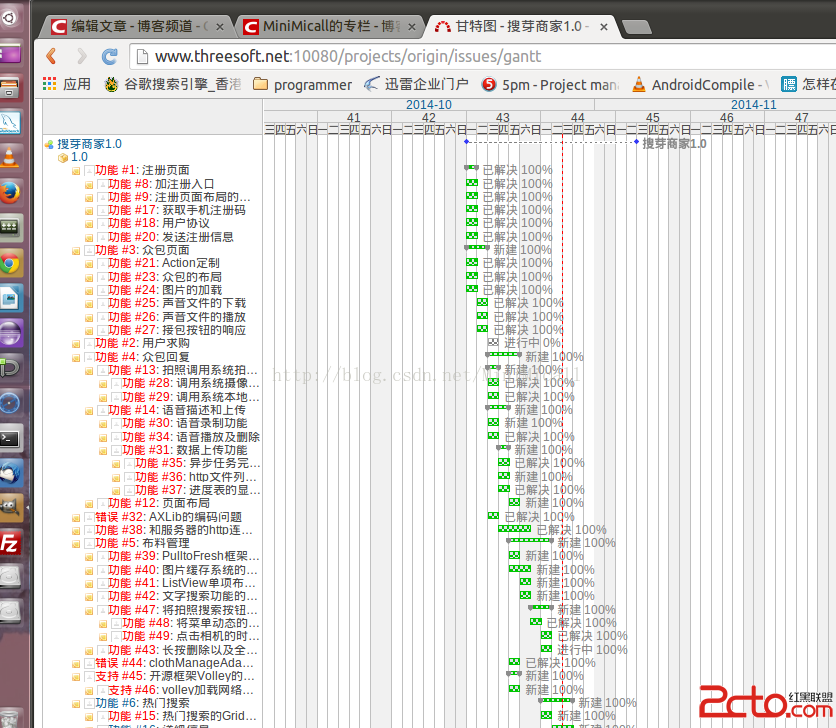
本文為原創博客,出自http://blog.csdn.net/minimicall 到今天為止,搜芽的賣家版本應該來說已經基本完成,攻堅克難的一路過來。速度也控制的比較好
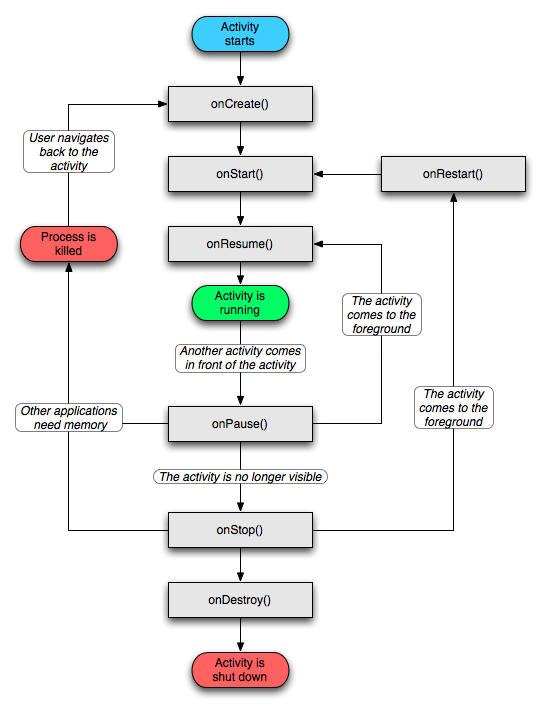 android中Activity詳解(生命周期、以各種方式啟動Activity、狀態保存,完全退出等)
一、什麼是Activity?簡單的說:Activity就是布滿整個窗口或者懸浮於其他窗口上的交互界面。在一個應用程序中通常由多個Activity構成,都會在Manifes
 Android關於Glide的使用(高斯模糊、加載監聽、圓角圖片)
高斯模糊、加載監聽、圓角圖片這些相信大家都很熟悉,那如何實現這些效果,請大家參考本文進行學習。1、引用compile com.github.bumptech.glide: