編輯:關於Android編程
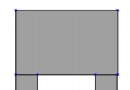
本文實例介紹的是Android的Tab控件,Tab控件可以達到分頁的效果,讓一個屏幕的內容盡量豐富,當然也會增加開發的復雜程度,在有必要的時候再使用。Android的Tab控件使用起來有點奇怪,必須包含和按照以下的順序:

TabHost控件->TabWidget(必須命名為tabs)->FrameLayout(必須命名為tabcontent)。
先來貼出本例運行的截圖:

main.xml的源碼如下:
<?xml version="1.0" encoding="utf-8"?>
<TabHost android:layout_width="fill_parent"
  android:layout_height="fill_parent" xmlns:android="http://schemas.android.com/apk/res/android" android:id="@android:id/TabHost1">
  <TabWidget android:id="@android:id/tabs"
    android:layout_height="wrap_content" android:layout_width="fill_parent">
</TabWidget>
  <FrameLayout android:id="@android:id/tabcontent"
    android:paddingTop="65px" android:layout_width="fill_parent" android:layout_height="fill_parent">
    <LinearLayout android:layout_height="wrap_content" android:id="@+id/Tab1" android:orientation="vertical" android:layout_width="fill_parent">
      <EditText android:layout_height="wrap_content" android:id="@+id/edtTab1" android:layout_width="fill_parent"></EditText>
      <Button android:layout_width="wrap_content" android:layout_height="wrap_content" android:id="@+id/btnTab1" android:text="Tab1"></Button>
    </LinearLayout>
    <LinearLayout android:layout_height="wrap_content" android:id="@+id/Tab2" android:layout_width="fill_parent" android:orientation="horizontal">
      <EditText android:layout_height="wrap_content" android:id="@+id/edtTab2" android:layout_width="wrap_content" android:layout_weight="300"></EditText>
      <Button android:layout_width="wrap_content" android:layout_height="wrap_content" android:id="@+id/btnTab2" android:text="Tab2"></Button></LinearLayout>
  </FrameLayout>
</TabHost>
java程序源碼如下:
package com.testTab;
import android.app.TabActivity;
import android.os.Bundle;
import android.view.View;
import android.widget.Button;
import android.widget.EditText;
import android.widget.TabHost;
import android.widget.TabHost.TabSpec;
public class testTab extends TabActivity {//基於TabActivity構建

 Button btnTab1,btnTab2;
 EditText edtTab1,edtTab2;
  /** Called when the activity is first created. */
  @Override
  public void onCreate(Bundle savedInstanceState) {
   super.onCreate(savedInstanceState);
    setContentView(R.layout.main);

    TabHost tabs = getTabHost();
    //設置Tab1
    TabSpec tab1 = tabs.newTabSpec("tab1");
    tab1.setIndicator("tab1");   // 設置tab1的名稱
    tab1.setContent(R.id.Tab1);  // 關聯控件
    tabs.addTab(tab1);        // 添加tab1

    btnTab1=(Button)this.findViewById(R.id.btnTab1);
    edtTab1=(EditText)this.findViewById(R.id.edtTab1);
    btnTab1.setOnClickListener(new ClickEvent());

    //設置Tab2
    TabSpec tab2 = tabs.newTabSpec("tab2");
    tab2.setIndicator("tab2");
    tab2.setContent(R.id.Tab2);
    tabs.addTab(tab2);

    btnTab2=(Button)this.findViewById(R.id.btnTab2);
    edtTab2=(EditText)this.findViewById(R.id.edtTab2);
    btnTab2.setOnClickListener(new ClickEvent());

    tabs.setCurrentTab(0);
  }

  class ClickEvent implements View.OnClickListener {
 @Override
 public void onClick(View v) {
  if(v==btnTab1)
  {
  edtTab1.setText("tab1");
  }
  else if(v==btnTab2)
  {
  edtTab2.setText("tab2");
  }
 }

  }
}
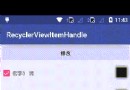 RecyclerView實現條目Item拖拽排序與滑動刪除
效果演示需求和技術分析RecyclerView Item拖拽排序::長按RecyclerView的Item或者觸摸Item的某個按鈕。 RecyclerView Item
 Android通過String.format格式化(動態改變)字符串資源的顯示內容
一、實現效果: 最近在項目中需要做類似於上圖顯示的效果,裡面的數字和稱謂是動態獲取的,對於這種顯示效果,有如下兩種解決方案來處理: (1)通過代碼動態設置TextVie
 Android自定義水波紋動畫Layout實例代碼
話不多說,我們先來看看效果:Hi前輩搜索預覽這一張是《Hi前輩》的搜索預覽圖,你可以在這裡下載這個APP查看更多效果:http://www.wandoujia.com/a
 Android 中的SurfaceTexture,TextureView, GLsurfaceview的區別與聯系詳解
SurfaceView, GLSurfaceView, SurfaceTexture和TextureView是Android當中名字比較繞,關系又比較密切的幾個類。本文基