編輯:關於Android編程
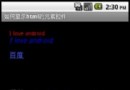
因為有這樣的一個場景,需要實現豎直方向的多色進度條,然後在網上也找了下,沒看到符合需要的,於是自定義了一個,效果如下:

本來想定義水平的,然後旋轉一下,後來發現還不如直接定義豎直方向來的直接,就直接在豎直方向畫了下。
首先講一下思路,就是通過繼承View,然後通過onDraw()方法進行繪制。具體繪制的時候,需要處理一些小細節。比如,我們需要畫一個圓形的滑動塊,那麼我們的背景色帶就不能把整個寬度占滿,要不然,小圓塊只能和色帶一樣寬了,效果不是很好看,所以在繪制的時候應該把背景畫的寬度小於View的實際寬度。
接下來我要貼代碼了:
    @Override
    protected void onDraw(Canvas canvas) {
        super.onDraw(canvas);
        int h = getMeasuredHeight();
        int w = getMeasuredWidth();
        mRadius = (float) w/2;
        sLeft = w * 0.25f; // 背景左邊緣坐標
        sRight = w * 0.75f;// 背景右邊緣坐標
        sTop = 0;
        sBottom = h;
        sWidth = sRight - sLeft; // 背景寬度
        sHeight = sBottom - sTop; // 背景高度
        x = (float) w/2;//圓心的x坐標
        y = (float) (1-0.01*progress)*sHeight;//圓心y坐標
        drawBackground(canvas);
        drawCircle(canvas);
        paint.reset();
    }
再看下畫背景:
private void drawBackground(Canvas canvas){
        RectF rectBlackBg = new RectF(sLeft, sTop, sRight, sBottom);
        linearGradient=new LinearGradient(sLeft,sTop,sWidth,sHeight,colorArray,null, Shader.TileMode.MIRROR);
        paint.setAntiAlias(true);
        paint.setStyle(Paint.Style.FILL);
        //設置渲染器
        paint.setShader(linearGradient);
        canvas.drawRoundRect(rectBlackBg, sWidth/2, sWidth/2, paint);
}
這裡使用LinearGradient實現多種顏色漸變,默認初始化定義如下:
    private int endColor=Color.WHITE;
    private int thumbColor=Color.BLACK;
    private int thumbBorderColor=Color.WHITE;
    private int colorArray[]={startColor, middleColor, endColor};
然後看下畫圓的操作:
    private void drawCircle(Canvas canvas){
        Paint thumbPaint = new Paint();
        y = y < mRadius ? mRadius : y;//判斷thumb邊界
        y = y > sHeight-mRadius ? sHeight-mRadius : y;
        thumbPaint.setAntiAlias(true);
        thumbPaint.setStyle(Paint.Style.FILL);
        thumbPaint.setColor(thumbColor);
        canvas.drawCircle(x, y, mRadius, thumbPaint);
        thumbPaint.setStyle(Paint.Style.STROKE);
        thumbPaint.setColor(thumbBorderColor);
        thumbPaint.setStrokeWidth(2);
        canvas.drawCircle(x, y, mRadius, thumbPaint);
    }
這裡通過畫布畫了一個圓形,內部填充和外邊沿。
上面的過程已經可以使效果展示出來了,但是無法操作,我們還需要給它加上事件才行:
    @Override
    public boolean onTouchEvent(MotionEvent event) {
        this.y = event.getY();
        progress= (sHeight-y)/sHeight*100;
        switch(event.getAction()) {
            case MotionEvent.ACTION_DOWN:
                break;
            case MotionEvent.ACTION_UP:
                if (onStateChangeListener!=null){
                    onStateChangeListener.onStopTrackingTouch(this, progress);
                }
                break;
            case MotionEvent.ACTION_MOVE:
                if (onStateChangeListener!=null){
                    onStateChangeListener.OnStateChangeListener(this, progress);
                }
                setProgress(progress);
                this.invalidate();
                break;
        }

        return true;
    }
    public interface OnStateChangeListener{
        void OnStateChangeListener(View view, float progress);
        void onStopTrackingTouch(View view, float progress);
    }

    public void setOnStateChangeListener(OnStateChangeListener onStateChangeListener){
        this.onStateChangeListener=onStateChangeListener;
    }
這裡寫了個回調接口,然後我們在Activity中就可以接收到相應的滑動進度,進而進行操作,當然,這裡我們還得再加一個方法,以便改變seekbar的狀態:
    public void setProgress(float progress) {
        this.progress = progress;
        invalidate();
    }
到這裡,功能基本就OK了,然後我們可以在Activity中去使用它了,下面是布局中的引用:
怎麼使用就很簡單了:
package com.tfxiaozi.activity.setting;
import android.graphics.Color;
import android.os.Bundle;
import android.view.View;
import android.widget.ImageView;
import android.widget.TextView;

import com.tfxiaozi.R;
import com.tfxiaozi.activity.BaseActivity;
import com.tfxiaozi.utils.ToastUtils;
import com.tfxiaozi.widget.VerticalColorSeekBar;

/**
 * Created by dongqiang on 2016/10/16.
 */
public class ManualSettingActivity extends BaseActivity implements View.OnClickListener, VerticalColorSeekBar.OnStateChangeListener {

    private TextView tvCurrentTemper, tvCurrentBrightness, tvMainTitle;
    private ImageView ivBack;
    private VerticalColorSeekBar vpbInnerTemper;
    private VerticalColorSeekBar vpbBrightness;

    @Override
    protected void onCreate(Bundle savedInstanceState) {
        super.onCreate(savedInstanceState);
        setContentView(R.layout.activity_manual_setting);
        initViews();
        initEvents();
        initData();
    }

    private void initViews() {
        tvMainTitle = (TextView) findViewById(R.id.title_main_text);
        tvMainTitle.setText(getString(R.string.manual_setting));
        tvMainTitle.setVisibility(View.VISIBLE);
        ivBack = (ImageView) findViewById(R.id.title_back);
        ivBack.setVisibility(View.VISIBLE);

        tvCurrentTemper = (TextView) findViewById(R.id.tv_current_temper);
        tvCurrentBrightness = (TextView) findViewById(R.id.tv_current_brightness);
        vpbInnerTemper = (VerticalColorSeekBar)findViewById(R.id.vpb_inner_temper);
        vpbBrightness = (VerticalColorSeekBar) findViewById(R.id.vpb_brightness);
        vpbInnerTemper.setColor(Color.RED, Color.YELLOW, Color.GREEN, Color.BLUE, Color.TRANSPARENT);
        vpbBrightness.setColor(Color.BLUE, Color.WHITE, Color.YELLOW, Color.BLUE, Color.TRANSPARENT);
    }

    private void initEvents() {
        ivBack.setOnClickListener(this);
        vpbInnerTemper.setOnStateChangeListener(this);
        vpbBrightness.setOnStateChangeListener(this);
    }

    private void initData() {
        vpbInnerTemper.setProgress(50);
        vpbBrightness.setProgress(70);
    }

    @Override
    public void onClick(View v) {
        switch (v.getId()) {
            case R.id.title_back:
                finish();
                break;
        }
    }

    @Override
    public void OnStateChangeListener(View view, float progress) {

    }

    @Override
    public void onStopTrackingTouch(View view, float progress) {
        int viewId = view.getId();
        switch (viewId) {
            case R.id.vpb_inner_temper:
                if (progress < 0) {
                    progress = 0;
                }
                if(progress > 100) {
                    progress = 100;
                }
                ToastUtils.showShort(this, "progress= " + progress);
                break;

            case R.id.vpb_brightness:
                if (progress < 0) {
                    progress = 0;
                }
                if(progress > 100) {
                    progress = 100;
                }
                ToastUtils.showShort(this, "progress1= " + progress);
                break;
        }

    }
}
到這裡就結束了,最後還是附上自定義View的整個代碼吧:
package com.tfxiaozi.widget;

import android.content.Context;
import android.graphics.Canvas;
import android.graphics.Color;
import android.graphics.LinearGradient;
import android.graphics.Paint;
import android.graphics.RectF;
import android.graphics.Shader;
import android.util.AttributeSet;
import android.util.Log;
import android.view.MotionEvent;
import android.view.View;

/**
 * Created by dongqiang on 2016/10/21.
 */
public class VerticalColorSeekBar extends View{

    private static final String TAG = VerticalColorSeekBar.class.getSimpleName();
    private int startColor= Color.BLACK;
    private int middleColor = Color.GRAY;
    private int endColor=Color.WHITE;
    private int thumbColor=Color.BLACK;
    private int thumbBorderColor=Color.WHITE;
    private int colorArray[]={startColor, middleColor, endColor};
    private float x,y;
    private float mRadius;
    private float progress;
    private float maxCount = 100f;
    private float sLeft, sTop, sRight, sBottom;
    private float sWidth,sHeight;
    private LinearGradient linearGradient;
    private Paint paint = new Paint();
    protected OnStateChangeListener onStateChangeListener;

    public VerticalColorSeekBar(Context context) {
        this(context, null);
    }

    public VerticalColorSeekBar(Context context, AttributeSet attrs) {
        super(context, attrs);
    }

    @Override
    protected synchronized void onMeasure(int widthMeasureSpec, int heightMeasureSpec) {
        super.onMeasure(widthMeasureSpec, heightMeasureSpec);
        setMeasuredDimension(getMeasuredWidth(), getMeasuredHeight());
    }

    public void setColor(int startColor,int middleColor, int endColor,int thumbColor,int thumbBorderColor){
        this.startColor= startColor;
        this.middleColor = middleColor;
        this.endColor= endColor;
        this.thumbColor= thumbColor;
        this.thumbBorderColor= thumbBorderColor;
        colorArray[0] = startColor;
        colorArray[1] = middleColor;
        colorArray[2] = endColor;
    }


    @Override
    protected void onDraw(Canvas canvas) {
        super.onDraw(canvas);
        int h = getMeasuredHeight();
        int w = getMeasuredWidth();
        mRadius = (float) w/2;
        sLeft = w * 0.25f; // 背景左邊緣坐標
        sRight = w * 0.75f;// 背景右邊緣坐標
        sTop = 0;
        sBottom = h;
        sWidth = sRight - sLeft; // 背景寬度
        sHeight = sBottom - sTop; // 背景高度
        x = (float) w/2;//圓心的x坐標
        y = (float) (1-0.01*progress)*sHeight;//圓心y坐標
        drawBackground(canvas);
        drawCircle(canvas);
        paint.reset();
    }

    private void drawBackground(Canvas canvas){
        RectF rectBlackBg = new RectF(sLeft, sTop, sRight, sBottom);
        linearGradient=new LinearGradient(sLeft,sTop,sWidth,sHeight,colorArray,null, Shader.TileMode.MIRROR);
        paint.setAntiAlias(true);
        paint.setStyle(Paint.Style.FILL);
        //設置渲染器
        paint.setShader(linearGradient);
        canvas.drawRoundRect(rectBlackBg, sWidth/2, sWidth/2, paint);
    }

    private void drawCircle(Canvas canvas){
        Paint thumbPaint = new Paint();
        y = y < mRadius ? mRadius : y;//判斷thumb邊界
        y = y > sHeight-mRadius ? sHeight-mRadius : y;
        thumbPaint.setAntiAlias(true);
        thumbPaint.setStyle(Paint.Style.FILL);
        thumbPaint.setColor(thumbColor);
        canvas.drawCircle(x, y, mRadius, thumbPaint);
        thumbPaint.setStyle(Paint.Style.STROKE);
        thumbPaint.setColor(thumbBorderColor);
        thumbPaint.setStrokeWidth(2);
        canvas.drawCircle(x, y, mRadius, thumbPaint);
    }

    @Override
    public boolean onTouchEvent(MotionEvent event) {
        this.y = event.getY();
        progress= (sHeight-y)/sHeight*100;
        switch(event.getAction()) {
            case MotionEvent.ACTION_DOWN:
                break;
            case MotionEvent.ACTION_UP:
                if (onStateChangeListener!=null){
                    onStateChangeListener.onStopTrackingTouch(this, progress);
                }
                break;
            case MotionEvent.ACTION_MOVE:
                if (onStateChangeListener!=null){
                    onStateChangeListener.OnStateChangeListener(this, progress);
                }
                setProgress(progress);
                this.invalidate();
                break;
        }

        return true;
    }


    public interface OnStateChangeListener{
        void OnStateChangeListener(View view, float progress);
        void onStopTrackingTouch(View view, float progress);
    }

    public void setOnStateChangeListener(OnStateChangeListener onStateChangeListener){
        this.onStateChangeListener=onStateChangeListener;
    }

    public void setProgress(float progress) {
        this.progress = progress;
        invalidate();
    }
}
到這裡就真的結束啦,就當記錄一下吧,然後也希望幫到有需要的人。有更好的實現也可以告訴我哈~
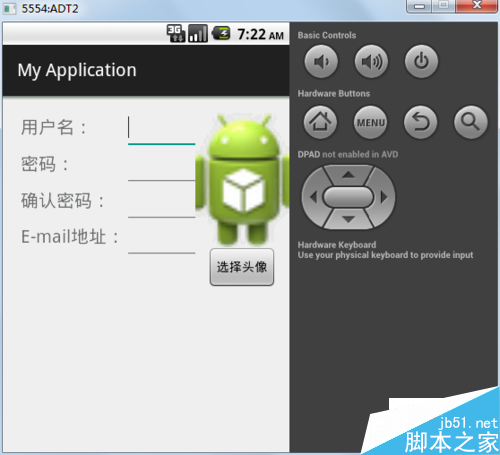 Android實現帶頭像的用戶注冊頁面
1.首先是注冊頁面的布局:<?xml version=1.0 encoding=utf-8?><LinearLayout xmlns:a
 Android開源項目PullToRefresh下拉刷新功能詳解2
先看看效果圖:這裡介紹的是PullToRefreshGridView的使用方法,和之前的PullToRefreshListView方法如出一轍,因為這個開源項目模塊化很棒
 Android sdcard讀寫權限問題之一
博主在剛剛在學習過程中發現了一個關於android往sdcard讀寫的問題, 配置了該配置的提示無讀寫權限。 在AndroidManifest.xml文件中配置清單如下
 詳解Android App中的AsyncTask異步任務執行方式
基本概念AsyncTask:異步任務,從字面上來說,就是在我們的UI主線程運行的時候,異步的完成一些操作。AsyncTask允許我們的執行一個異步的任務在後台。我們可以將