編輯:關於Android編程
 一、創建
為 Activity 指定選項菜單,重寫 onCreateOptionsMenu()(Fragment 對應 onCreateOptionsMenu() 回調)。啟動 Activity 時會調用 onCreateOptionsMenu()方法,因此可以在該方法中將菜單資源(使用 XML 定義)注入到回調方法的Menu 中。
二、處理響應事件
重寫 onOptionsItemSelected() 方法,方法將傳遞所選中的 MenuItem。您可以通過調用 getItemId() 方法來識別對應item,該方法將返回菜單項的唯一 ID(由菜單資源中的 android:id 屬性定義)。
補充:動態內容菜單內容
當菜單項顯示在操作欄中時,選項菜單被視為始終處於打開狀態。發生事件時,如果您要執行菜單更新,則必須調用 invalidateOptionsMenu() 來請求系統調用 onPrepareOptionsMenu()。在onPrepareOptionsMenu()方法中去通過 menu.add() 等操作修改菜單項。
一、創建
為 Activity 指定選項菜單,重寫 onCreateOptionsMenu()(Fragment 對應 onCreateOptionsMenu() 回調)。啟動 Activity 時會調用 onCreateOptionsMenu()方法,因此可以在該方法中將菜單資源(使用 XML 定義)注入到回調方法的Menu 中。
二、處理響應事件
重寫 onOptionsItemSelected() 方法,方法將傳遞所選中的 MenuItem。您可以通過調用 getItemId() 方法來識別對應item,該方法將返回菜單項的唯一 ID(由菜單資源中的 android:id 屬性定義)。
補充:動態內容菜單內容
當菜單項顯示在操作欄中時,選項菜單被視為始終處於打開狀態。發生事件時,如果您要執行菜單更新,則必須調用 invalidateOptionsMenu() 來請求系統調用 onPrepareOptionsMenu()。在onPrepareOptionsMenu()方法中去通過 menu.add() 等操作修改菜單項。
 一、為單個視圖創建上下文操作模式
實現 ActionMode.Callback 接口:
一、為單個視圖創建上下文操作模式
實現 ActionMode.Callback 接口:
private ActionMode.Callback mActionModeCallback = new ActionMode.Callback() {
public boolean onCreateActionMode(ActionMode mode, Menu menu) {
        MenuInflater inflater = mode.getMenuInflater();
        inflater.inflate(R.menu.context_menu, menu);
        return true;
}
//該方法用於創建Menu視圖
public boolean onActionItemClicked(ActionMode mode, MenuItem item) {
        switch (item.getItemId()) {
            case R.id.menu_share:
                shareCurrentItem();
                mode.finish();
                return true;
            default:
                return false;
        }
}
//該方法用於對用戶的操作做出相應的反饋
public void onDestroyActionMode(ActionMode mode) {
        mActionMode = null;
}
//及時清除mActionMode引用,一者為了垃圾回收,二者為了後面再次進入上下文操作模式考慮
}
private ActionMode mActionMode;
someView.setOnLongClickListener(new View.OnLongClickListener() { //someView是一個普通的View控件
    public boolean onLongClick(View view) {
        if (mActionMode == null) { mActionMode = getActivity().startActionMode(mActionModeCallback)};
        //根據情況如果消耗事件則返回true,沒有消耗事件則返回false。
        view.setSelected(true);
        ..............
        return true;
    }
});
public ActionMode startActionMode(ActionMode.Callback callback) {
        return mWindow.getDecorView().startActionMode(callback);
}
其中mWindow = new PhoneWindow(this);因此我們往下看PhoneWindow的startActionMode方法。
@PhoneWindow.class
public ActionMode startActionMode(ActionMode.Callback callback) {
            if (mActionMode != null) { mActionMode.finish(); }
            final ActionMode.Callback wrappedCallback = new ActionModeCallbackWrapper(callback);
            ActionMode mode = null;
            ...........
            if (mode != null) {
                mActionMode = mode;
            } else {
                if (mActionModeView == null) {//創建ActionModeView
                    if (isFloating()) {
                        mActionModeView = new ActionBarContextView(mContext);//note1
                        mActionModePopup = new PopupWindow(mContext, null,
                                com.android.internal.R.attr.actionModePopupWindowStyle);
                        mActionModePopup.setWindowLayoutType(
                                WindowManager.LayoutParams.TYPE_APPLICATION);
                        mActionModePopup.setContentView(mActionModeView); //mActionModeView這裡是准備被顯示的View
                        mActionModePopup.setWidth(MATCH_PARENT);

                        TypedValue heightValue = new TypedValue();
                        mContext.getTheme().resolveAttribute(
                                com.android.internal.R.attr.actionBarSize, heightValue, true);
                        final int height = TypedValue.complexToDimensionPixelSize(heightValue.data,
                                mContext.getResources().getDisplayMetrics());
                        mActionModeView.setContentHeight(height);
                        mActionModePopup.setHeight(WRAP_CONTENT);
                        mShowActionModePopup = new Runnable() {
                            public void run() {
                                mActionModePopup.showAtLocation( //note2
                                        mActionModeView.getApplicationWindowToken(),
                                        Gravity.TOP | Gravity.FILL_HORIZONTAL, 0, 0);
                            }
                        };
                    } else {
                        ViewStub stub = (ViewStub) findViewById(
                                com.android.internal.R.id.action_mode_bar_stub);
                        if (stub != null) {
                            mActionModeView = (ActionBarContextView) stub.inflate();
                        }
                    }
                }

                if (mActionModeView != null) { //顯示ActionModeView
                    mActionModeView.killMode();
                    mode = new StandaloneActionMode(getContext(), mActionModeView, wrappedCallback,
                            mActionModePopup == null);
                    if (callback.onCreateActionMode(mode, mode.getMenu())) {//創建菜單到ActionMode中
                        mode.invalidate();
                        mActionModeView.initForMode(mode);//note3
                        mActionModeView.setVisibility(View.VISIBLE);
                        mActionMode = mode;
                        if (mActionModePopup != null) {
                            post(mShowActionModePopup); //交給Handler去執行前面的Runnable異步方法
                        }
                        mActionModeView.sendAccessibilityEvent(
                                AccessibilityEvent.TYPE_WINDOW_STATE_CHANGED);
                    } else {
                        mActionMode = null;
                    }
                }
            }
            ....
            return mActionMode;
}
-------------------------------------------------------------
note1:
ActionBarContextView()@ActionBarContextView.class
ActionBarContextView(mContext)-->最終調用構造器為:public ActionBarContextView( Context context, null,com.android.internal.R.attr.actionModeStyle, 0)
構造器內部會調用final TypedArray a = context.obtainStyledAttributes( null,R.styleable.ActionMode,com.android.internal.R.attr.actionModeStyle, 0);即從主題中定義的actionModeStyle樣式文件中和主題直接定義的屬性中獲取到如下屬性:
public void showAtLocation(IBinder token, int gravity, int x, int y) {
        .........
        final WindowManager.LayoutParams p = createPopupLayoutParams(token);
        preparePopup(p);
        .....
        invokePopup(p);
}
將視圖顯示到手機界面上。具體內容講完note3後就會詳細分析。
note3
@ActionBarContextView.class
public void initForMode(final ActionMode mode) {
        if (mClose == null) {
            LayoutInflater inflater = LayoutInflater.from(mContext);
            mClose = inflater.inflate(mCloseItemLayout, this, false);
            //看到這裡都想哭了,,,,,,,找了半天就是想搞明白那個返回鍵究竟在哪設置的!!!!
            //這裡終於找到了,mCloseItemLayout就是定義了返回鍵的布局文件,它的定義看note1,即ActionBarContextView的構造器。
            addView(mClose);
        } else if (mClose.getParent() == null) {
            addView(mClose);
        }
        View closeButton = mClose.findViewById(R.id.action_mode_close_button);
        closeButton.setOnClickListener(new OnClickListener() {
            public void onClick(View v) {
                mode.finish(); //點擊返回按鈕則銷毀當前ActionBarContextView視圖
            }
        });
        ....
}
-------------------------------------------------------------
最後我們可以對PopupWindow做一個總結:PopupWindow.setContentView(View v); 方法參數是PopupWindow將要具體顯示的內容,而PopupWindow的任務就是在屏幕中合適的位置將該View顯示出來。但是該方法並不會將View顯示出來,需要調用如下兩個方法才能最終顯示出來:showAtLocation(View parent, int gravity, int x, int y)、showAsDropDown(View anchor, int xoff, int yoff)。showAtLocation是在一個特定的位置中顯示視圖,而showAsDropDown則會首先選取指定視圖的左下方或者左上方顯示視圖。showAtLocation()和showAsDropDown()兩者底層顯示過程基本一致,先後調用preparePopup()和 invokePopup()方法,前者對即將顯示的視圖進行初始化操作,後者調用mWindowManager.addView(decorView, p);將視圖顯示出來。
PopupWindow的構造器中有如下的方法:final TypedArray a = context.obtainStyledAttributes( null, R.styleable.PopupWindow, com.android.internal.R.attr.popupWindowStyle,0);因此它從主題中定義的popupWindowStyle樣式文件中和主題直接定義的屬性中獲取到如下屬性:
 一、實例化PopupMenu及其構造器函數
該函數將提取當前應用的 Context 以及菜單應錨定到的 View。
一、實例化PopupMenu及其構造器函數
該函數將提取當前應用的 Context 以及菜單應錨定到的 View。
 try {
            Field field = popupMenu.getClass().getDeclaredField("mPopup");
            field.setAccessible(true);
            MenuPopupHelper mHelper = (MenuPopupHelper) field.get(popupMenu);
            mHelper.setForceShowIcon(true);
} catch (IllegalAccessException | NoSuchFieldException e) {      e.printStackTrace();   }
private void showPopupMenu(View v){
        PopupMenu popup = new PopupMenu(this, v);
        MenuInflater inflater = popup.getMenuInflater();
        inflater.inflate(R.menu.popmenu, popup.getMenu());
        try {
            Field field = popup.getClass().getDeclaredField("mPopup");
            field.setAccessible(true);
            MenuPopupHelper mHelper = (MenuPopupHelper) field.get(popup);
            mHelper.setForceShowIcon(true);
        } catch (IllegalAccessException | NoSuchFieldException e) {
            e.printStackTrace();   }
        popup.setOnMenuItemClickListener(new OnPopupMenuItemClickListener(this));
        popup.setGravity(Gravity.RIGHT);
        popup.show();
}
補充4:主題設置(PopupMenu的字體背景等)
在xml文件中注意:上面的ProfileTheme在manifest.xml文件中可以加給某個Activity如:
public View getView(int position, View convertView, ViewGroup parent) {
            if (convertView == null) {
                convertView = mInflater.inflate(ITEM_LAYOUT, parent, false); //note1
            }
            MenuView.ItemView itemView = (MenuView.ItemView) convertView;
            if (mForceShowIcon) {
                ((ListMenuItemView) convertView).setForceShowIcon(true); //note2
            }
            itemView.initialize(getItem(position), 0); //note3
            return convertView;
}
1、static final int ITEM_LAYOUT = R.layout.abc_popup_menu_item_layout;該布局文件只有一個Title和SubTitle的布局信息。外面包裹的是一個android.support.v7.view.menu.ListMenuItemView類型(是一個繼承自LinearLayout的類)
2、設置ListMenuItemView的標志位 mPreserveIconSpacing = mForceShowIcon = true。mForceShowIcon域可以通過MenuPopupHelper的setForceShowIcon方法進行設置,默認是false。
3、調用android.support.v7.view.menu.ListMenuItemView的initialize方法對該行視圖進行初始化設置:設置title、icon等。最後返回當前的convertView對象。
MenuPopupHelper中的MenuAdapter的傳遞
android.support.v7.view.menu.MenuPopupHelper在創建android.support.v7.widget.ListPopupWindow對象的時候會將MenuAdapter傳過去。android.support.v7.widget.ListPopupWindow在創建android.support.v7.widget.ListPopupWindow.DropDownListView的時候也會將MenuAdapter傳過去。DropDownListView是一個繼承自ListView的控件,之後就是ListView和Adapter的情況了,該部分可以參考ListView知識。
final TypedArray a = context.obtainStyledAttributes(attrs, R.styleable.ListPopupWindow, R.attr.popupMenuStyle, 0);即從主題中定義的popupMenuStyle樣式文件中和主題直接定義的屬性中獲取到如下屬性:DropDownListView的構造器中有如下方法: final TypedArray a =context.obtainStyledAttributes( attrs, R.styleable.ListView, R.attr.dropDownListViewStyle, 0);即從主題中定義的dropDownListViewStyle樣式文件中和主題直接定義的屬性中獲取到如下屬性:
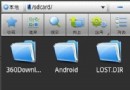 如何在ES文件浏覽器內使用網盤
如何在ES文件浏覽器內使用網盤。是一款多功能的手機文件/程序/進程管理器,可以在手機、電腦、遠程和藍牙間浏覽管理文件,是一個功能強大的免費的本地和網絡文件管
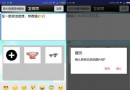 Android仿新浪微博發布微博界面設計(5)
本教程為大家分享了Android發布微博、添加表情等功能的具體代碼,供大家參考,具體內容如下發布一條新微博接口:http://open.weibo.com/wiki/2/
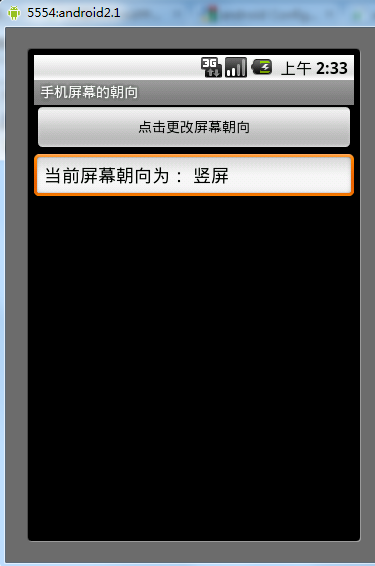 Android改變手機屏幕朝向的方法
本文實例講述了Android改變手機屏幕朝向的方法。分享給大家供大家參考。具體如下:模擬當點擊按鈕時,使手機朝向發生改變。main.xml布局文件:<?xm
 Android自定義View實現多圖片選擇控件
前言相信很多朋友在開發中都會遇到圖片上傳的情況,尤其是多圖上傳,最經典的莫過於微信的圖片選擇了。所有很多情況下會使用到多圖選擇,所以就有了這篇文章,今天抽點時間寫了個控件