編輯:關於Android編程
  在使用ContentProvider對數據進行操作的時候,以Uri的形式進行數據交換...Uri包含兩個部分,一部分包含著我們要操作的ContentProvider..另一部分包括的是對ContentProvider中哪一個數據進行操作...

Uri uri=Uri.parse("content://com.example.contentprovider/person");//這個Uri表示訪問person表中的所有記錄...
UriMatcher:

  在使用ContentProvider類操作某一種方法的時候有可能傳遞多種Uri,必須對這些傳遞的Uri進行相應的判斷才能夠決定如何去操作...可以使用switch語句進行判斷...


    UriMatcher match =new UriMatcher(No_MATCH);//對象的實例化操作...NO_MATCH表示-1...
    match.addURI("包名","表名",匹配碼)..
    match.addURI("content://com.example.contentprovider","person",1);//增加一個URI值
   /* 如果match方法匹配content://content.example.contentprovider/person/5
    * 那麼返回值就是2...
    */
    mathc.addURI("content://com.example.contentprovider","person/#",2);//#為通配符......
ContentUris: 由於所有的數據操作都要通過Uri的形式進行傳遞,那麼當執行完增加操作之後,我們往往想要返回我們增加後數據的ID以Uri的形式進行返回,那麼就可以使用這個類來完成操作... 數據共享: 如果想實現數據共享,我們可以自己定義自己的ContentProvider...定義以後重寫其內部的方法,不過這種方式一般都是沒有任何的必要的..因為Android提供了多種類型的ContentProvider(圖片,音頻,視頻,聯系人等)...這些類都是它所提供的,因此我們只需要把數據封裝這些類中,然後就可以完成數據的共享...因此一般我們都是將數據寫入到系統提供的類中,完成數據的共享.... 聯系人的ContentProvider... 一般當我們在打電話或者是發短信的時候會使用到聯系人這一數據信息,因此這個聯系人內部的數據信息必須要進行共享,才使得其他的應用程序獲取聯系人信息...因此我們需要把數據寫入到ContentProvider中....我們在模擬器中或者是自己的手機中也可以,添加幾條聯系人...然後我們通過觸發按鈕的形式來獲取我們保存的數據信息...這個還需要配置一下權限,在AndroidManifest.xml文件中加入<user-permission android:name="android.permission.READ_CONTACTS"/>....布局文件一個按鈕,一個文本顯示控件...很簡單....主要還是實現過程...
import android.net.Uri;
import android.os.Bundle;
import android.provider.ContactsContract;
import android.app.Activity;
import android.content.ContentResolver;
import android.content.ContentUris;
import android.content.ContentValues;
import android.database.Cursor;
import android.view.Menu;
import android.view.View;
import android.widget.TextView;
public class MainActivity extends Activity implements View.OnClickListener {
private TextView tv;
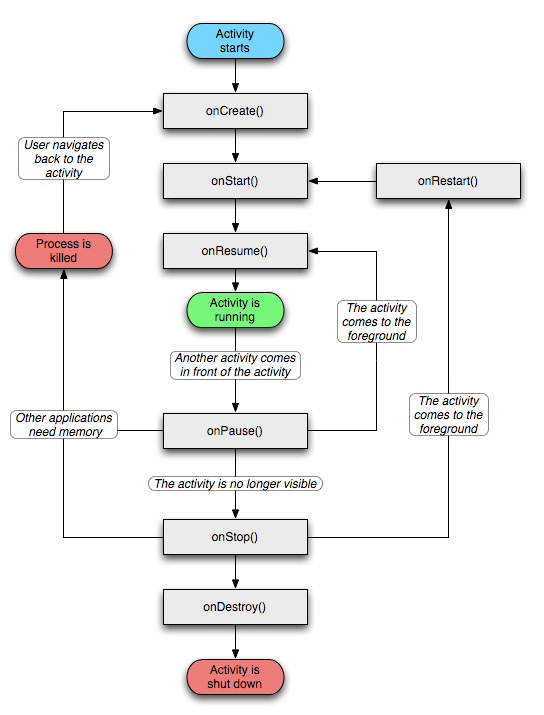
@Override
protected void onCreate(Bundle savedInstanceState) {
super.onCreate(savedInstanceState);
setContentView(R.layout.activity_main);
findViewById(R.id.but).setOnClickListener(this);
findViewById(R.id.but_1).setOnClickListener(this);
tv=(TextView) findViewById(R.id.text);
}
@Override
public boolean onCreateOptionsMenu(Menu menu) {
// Inflate the menu; this adds items to the action bar if it is present.
getMenuInflater().inflate(R.menu.main, menu);
return true;
}
@Override
public void onClick(View v) {
// TODO Auto-generated method stub
switch(v.getId()){
case R.id.but:
StringBuilder st=getContents();//定義一個StringBuilder對象...表示st是一個可變的字符串...這裡也可以使用StringBuffered...但是使用StringBuider更快...
tv.setText(st.toString());
break;
}
}
private StringBuilder getContents(){
StringBuilder stlog=new StringBuilder();
ContentResolver cr=this.getContentResolver();//操作ContentProvider首先要利用getContentResolver()獲取ContentResolver實例..
Cursor cursor=cr.query(ContactsContract.Contacts.CONTENT_URI, null, null, null, null);//用Cursor來保存結果...
/* cr.query(uri, projection, selection, selectionArgs, sortOrder)
* uri參數:表示的是對哪個數據表進行操作..
* projection參數:表示在表中需要選取的列值..
* selection參數:表示的是查詢的條件...相當於where子句..
* selectionArgs參數:表示語句中是否有?...
* sortorder參數:表示查詢的結果按照什麼形式進行排列...
* 查詢的結果返回給Cursor對象...按行進行排列數據...
* */
for(cursor.moveToFirst();!cursor.isAfterLast();cursor.moveToNext()){
//這裡cr按行來保存每一條獲取的數據...我們可以對想要的數據進行一一獲取..
int nameIndex=cursor.getColumnIndex(ContactsContract.Contacts.DISPLAY_NAME);//這句話的意思表示獲取聯系人的名字...內容在ContactsContract.Contacts中...
String name=cursor.getString(nameIndex);
stlog.append("name= "+name+";");
String contentid=cursor.getString(cursor.getColumnIndex(ContactsContract.Contacts._ID));//獲取聯系人的ID信息...
//由於一個人可能有多個手機號碼...因此還需要Cursor對多個號碼進行保存...ContactsContract.CommonDataKinds.Phone.CONTACT_ID + " = "+contenti 這一參數來限制必須是同一個ID下的電話號碼..說白了就是限制號碼必須是一個人的...
Cursor phonecursor=cr.query(ContactsContract.CommonDataKinds.Phone.CONTENT_URI, null, ContactsContract.CommonDataKinds.Phone.CONTACT_ID + " = "+contentid, null, null);
while(phonecursor.moveToNext()){
String strphone=phonecursor.getString(phonecursor.getColumnIndex(ContactsContract.CommonDataKinds.Phone.NUMBER));
stlog.append("phone="+ strphone+";");
}
// phonecursor.close(); 這句話在模擬器上可以使用...我們動態關閉...
//這個也一樣可能有多個email....
Cursor email=cr.query(ContactsContract.CommonDataKinds.Email.CONTENT_URI, null, ContactsContract.CommonDataKinds.Email.CONTACT_ID + " = "+contentid, null, null);
while(email.moveToNext()){
String stremail=email.getString(email.getColumnIndex(ContactsContract.CommonDataKinds.Email.DATA));
stlog.append("email="+stremail+";");
}
/*
* if(Build.VERSION.SDK_INT < 14) {
* cursor.close();
* }
* Android真機超過4.0以後的版本無法使用close()方法來關閉程序...否則會出現崩潰現象... 但是在模擬器上可以運行... 可以使用上面的函數進行判斷是否已經超過4.0版本...
* */
// email.close();
// cursor.close();
}
return stlog;
}
}
<LinearLayout xmlns:android="http://schemas.android.com/apk/res/android"
xmlns:tools="http://schemas.android.com/tools"
android:layout_width="match_parent"
android:layout_height="match_parent"
android:orientation="vertical"
tools:context=".MainActivity" >
<TextView
android:id="@+id/text"
android:layout_width="wrap_content"
android:layout_height="wrap_content"/>
<Button
android:id="@+id/but"
android:layout_height="wrap_content"
android:layout_width="wrap_content"
android:text="獲取信息..."/>
<Button
android:id="@+id/but_1"
android:layout_height="wrap_content"
android:layout_width="wrap_content"
android:text="增加信息..."/>
</LinearLayout>
這裡我們只是獲取我們保存的數據信息,同時我們可以添加聯系人,然後將數據保存在聯系人中...插入數據就需要使用到ContentValues這個類,將插入的數據信息保存在其中...最後通過insert方法來完成數據的插入操作...這樣就完成了數據的插入操作...
  Uri uri=Uri.parse("content://com.android.contacts/raw_contacts");
            ContentResolver resolver_1=this.getContentResolver();
            ContentValues values=new ContentValues();
            //獲取主鍵值...
            long contactid=ContentUris.parseId(resolver_1.insert(uri, values));
            uri=Uri.parse("content://com.android.contacts/data");
            values.put("raw_contact_id",contactid);
            values.put("mimetype", "vnd.android.cursor.item/name");
            values.put("data2", "aa");
            resolver_1.insert(uri, values);
            values.clear();
            values.put("raw_contact_id", contactid);
            values.put("mimetype", "vnd.andoroid.cursor.item/phone_v2");
            values.put("data2", "2");
            values.put("data1", "1131313");
            resolver_1.insert(uri, values);
            values.clear();
            values.put("raw_contact_id", contactid);
            values.put("mimetype", "vnd.android.cursor.item/email_v2");
            values.put("data2", "2");
            values.put("data1", "sa@qq.com");
            resolver_1.insert(uri, values);
多媒體信息的ContentProvider...
多媒體的ContentProvider和聯系人的基本都差不多,基本的模式都差不多,多媒體的ContentProvider也是需要首先獲取ContentValues實例..然後才能進行增刪改查等操作...查詢一般使用query(uri,Prjs,Selections,selectArgs,Order)..方法來查詢然後進行保存...查詢的URI接收幾個系統參數...這幾個系統參數表示的是幾個URI,這幾個URI分別表示的是存儲在手機內部或者是外部的圖片內容,音頻內容,或者是視頻內容的URI...通過傳遞參數,我們就可以獲取到手機裡的圖片,音頻,或者是視頻...
通過一個簡單的例子來說一下多媒體信息的ContentProvider...然後實現多媒體數據信息的共享...這個例子就是獲取手機裡的音樂的基本信息...主布局...
<LinearLayout xmlns:android="http://schemas.android.com/apk/res/android"
    xmlns:tools="http://schemas.android.com/tools"
    android:layout_width="fill_parent"
    android:layout_height="fill_parent"
    android:orientation="vertical"
    tools:context=".MainActivity" >

    <TextView
        android:id="@+id/msg"
        android:layout_height="wrap_content"
        android:layout_width="fill_parent"
        android:text="所有音樂"
        android:textSize="20dp"
        android:gravity="center"/>
    <TableLayout
        android:layout_width="fill_parent"
        android:layout_height="wrap_content">
        <TableRow >
            <TextView
                android:layout_height="wrap_content"
                android:layout_width="150px"
                android:textSize="15px"
                android:text="歌曲名"/>
            <TextView
                android:layout_height="wrap_content"
                android:layout_width="100px"
                android:textSize="15px"
                android:text="歌手"/>
            <TextView
                android:layout_width="50px"
                android:layout_height="wrap_content"
                android:textSize="15px"
                android:text="時間"/>
        </TableRow>
    </TableLayout>
    <ListView
        android:id="@+id/songlist"
        android:layout_width="wrap_content"
        android:layout_height="wrap_content">

    </ListView>

</LinearLayout>
這個布局沒什麼好說的...重點還是如何實現獲取音樂的基本信息...這是實現的過程...在這裡調用了另一個布局文件...調用另一個布局文件來顯示獲取到的數據信息...這種方式非常的常用...另一個布局文件...
<?xml version="1.0" encoding="utf-8"?>
<TableLayout xmlns:android="http://schemas.android.com/apk/res/android"
    android:layout_width="fill_parent"
    android:layout_height="wrap_content">
    <TableRow >
        <TextView
            android:id="@+id/title"
            android:layout_height="wrap_content"
            android:layout_width="150px"
            android:textSize="15px"/>
        <TextView
            android:id="@+id/name"
            android:layout_height="wrap_content"
            android:layout_width="100px"
            android:textSize="15px"/>
        <TextView
            android:id="@+id/time"
            android:layout_width="50px"
            android:layout_height="wrap_content"
            android:textSize="15px"/>

    </TableRow>
</TableLayout>

package com.example.contentprovidermedia;

import java.io.IOException;
import java.util.ArrayList;
import java.util.HashMap;
import java.util.List;
import java.util.Map;

import android.media.MediaPlayer;
import android.os.Bundle;
import android.provider.MediaStore;
import android.app.Activity;
import android.content.ContentResolver;
import android.database.Cursor;
import android.view.Menu;
import android.view.View;
import android.widget.AdapterView;
import android.widget.AdapterView.OnItemClickListener;
import android.widget.ListView;
import android.widget.SimpleAdapter;
import android.widget.Toast;

public class MainActivity extends Activity {

    private List<Map<String,String>>list=new ArrayList<Map<String,String>>();
    private SimpleAdapter simpleadapter;
    private ListView listview;
    private String songname;
    private String songtime;
    private String songwriter;
    private int  Alltime;
    @Override
    protected void onCreate(Bundle savedInstanceState) {
        super.onCreate(savedInstanceState);
        setContentView(R.layout.activity_main);
        listview=(ListView) findViewById(R.id.songlist);
        listview.setOnItemClickListener(new OnItemClickListener() {

            private MediaPlayer media;
            @Override
            public void onItemClick(AdapterView<?> parent, View view,
                    int position, long id) {
                /*
                 * 這個實現方法簡單的說一下...parent表示的這個整體的列表,這個列表保存在適配器中...
                 * view表示的是列表中被選擇的子選項...position表示被點擊的定位...id表示的是被點擊的行數...
                 * 這裡表示的是當列表的某一行沒觸發時需要進行的操作...我定義的操作是,當點擊到列表的某一行的時候
                 * 這個音樂將進行播放操作...
                 * */
                // TODO Auto-generated method stub
                Map<String,String>map=(Map<String, String>) MainActivity.this.simpleadapter.getItem(position);
                String songtitle=map.get("title");
                String songname=map.get("name");
                String songtime=map.get("time");
                String songpath=map.get("path");
                palysong(songpath);
            }
            private void palysong(String songpath) {
                // TODO Auto-generated method stub
                this.media=new MediaPlayer();
                media.reset();
                try {
                    media.setDataSource(songpath);
                } catch (IllegalArgumentException e) {
                    // TODO Auto-generated catch block
                    e.printStackTrace();
                } catch (SecurityException e) {
                    // TODO Auto-generated catch block
                    e.printStackTrace();
                } catch (IllegalStateException e) {
                    // TODO Auto-generated catch block
                    e.printStackTrace();
                } catch (IOException e) {
                    // TODO Auto-generated catch block
                    e.printStackTrace();
                }
                try {
                    media.prepare();
                } catch (IllegalStateException e) {
                    // TODO Auto-generated catch block
                    e.printStackTrace();
                } catch (IOException e) {
                    // TODO Auto-generated catch block
                    e.printStackTrace();
                }
                media.start();
            }
        });

        ContentResolver resolver=this.getContentResolver();
       /* resolver.query(uri, projection, selection, selectionArgs, sortOrder)
        * uri參數:表示的是對哪個數據表進行操作..
        * projection參數:表示在表中需要選取的列值..
        * selection參數:表示的是查詢的條件...相當於where子句..
        * selectionArgs參數:表示語句中是否有?...
        * sortorder參數:表示查詢的結果按照什麼形式進行排列...
        * 查詢的結果返回給Cursor對象...按行進行排列數據...
        * */
        Cursor cursor=resolver.query(MediaStore.Audio.Media.EXTERNAL_CONTENT_URI,  null, null, null, MediaStore.Audio.Media.DEFAULT_SORT_ORDER);
        if(cursor==null){
            Toast.makeText(MainActivity.this, "沒有找到相應的數據", Toast.LENGTH_SHORT).show();
        }else{
            for(cursor.moveToFirst();!cursor.isAfterLast();cursor.moveToLast()){
                songname=cursor.getString(cursor.getColumnIndexOrThrow(MediaStore.Audio.Media.TITLE));//獲取音樂的名字信息..
                songwriter=cursor.getString(cursor.getColumnIndexOrThrow(MediaStore.Audio.Media.ARTIST));//獲取音樂的作者...
                Alltime=cursor.getInt(cursor.getColumnIndexOrThrow(MediaStore.Audio.Media.DURATION));//獲取音樂的時長...以毫秒為單位...
                songtime=settime(Alltime);
                Map<String,String>map=new HashMap<String, String>();//用一個Map來保存數據...
                map.put("title", songname);
                map.put("songwriter", songwriter);
                map.put("maptime", songtime);
                list.add(map);//將map存入到List中...
                /*
                 *  這裡使用了一個簡單的適配器...
                 *  new SimpleAdapter(context,data,resource,from,to);這是適配器的構造方法...
                 *    context  SimpleAdapter關聯的View的運行環境
                 *    data    一個Map組成的List。在列表中的每個條目對應列表中的一行,每一個map中應該包含所有在from參數中指定的鍵
                 *    resource    一個定義列表項的布局文件的資源ID。布局文件將至少應包含那些在to中定義了的ID
                 *    from          一個將被添加到Map映射上的鍵名
                 *    to     將綁定數據的視圖的ID,跟from參數對應,這些應該全是TextView
                 *
                 * */
                this.simpleadapter=new SimpleAdapter(this,list, R.layout.songlist, new String[]{"title","name","time"},new int[]{R.id.title,R.id.name,R.id.time});
                listview.setAdapter(simpleadapter);//設置適配器...
            }
        }
    }
    private String settime(int time){
        time/=1000;
        int minute=time/60;
        int second=time%60;
        minute %=60;
        return String.format("%02d:%02d", minute,second);

    }
    @Override
    public boolean onCreateOptionsMenu(Menu menu) {
        // Inflate the menu; this adds items to the action bar if it is present.
        getMenuInflater().inflate(R.menu.main, menu);
        return true;
    }

}
ContentProvider的東西很多,也很雜,其重要的作用還是實現數據的共享,掌握了如何使用這個類來完成數據共享,那麼目的就達到了...主要還是掌握如何去實現應用之間去調用共享的數據...
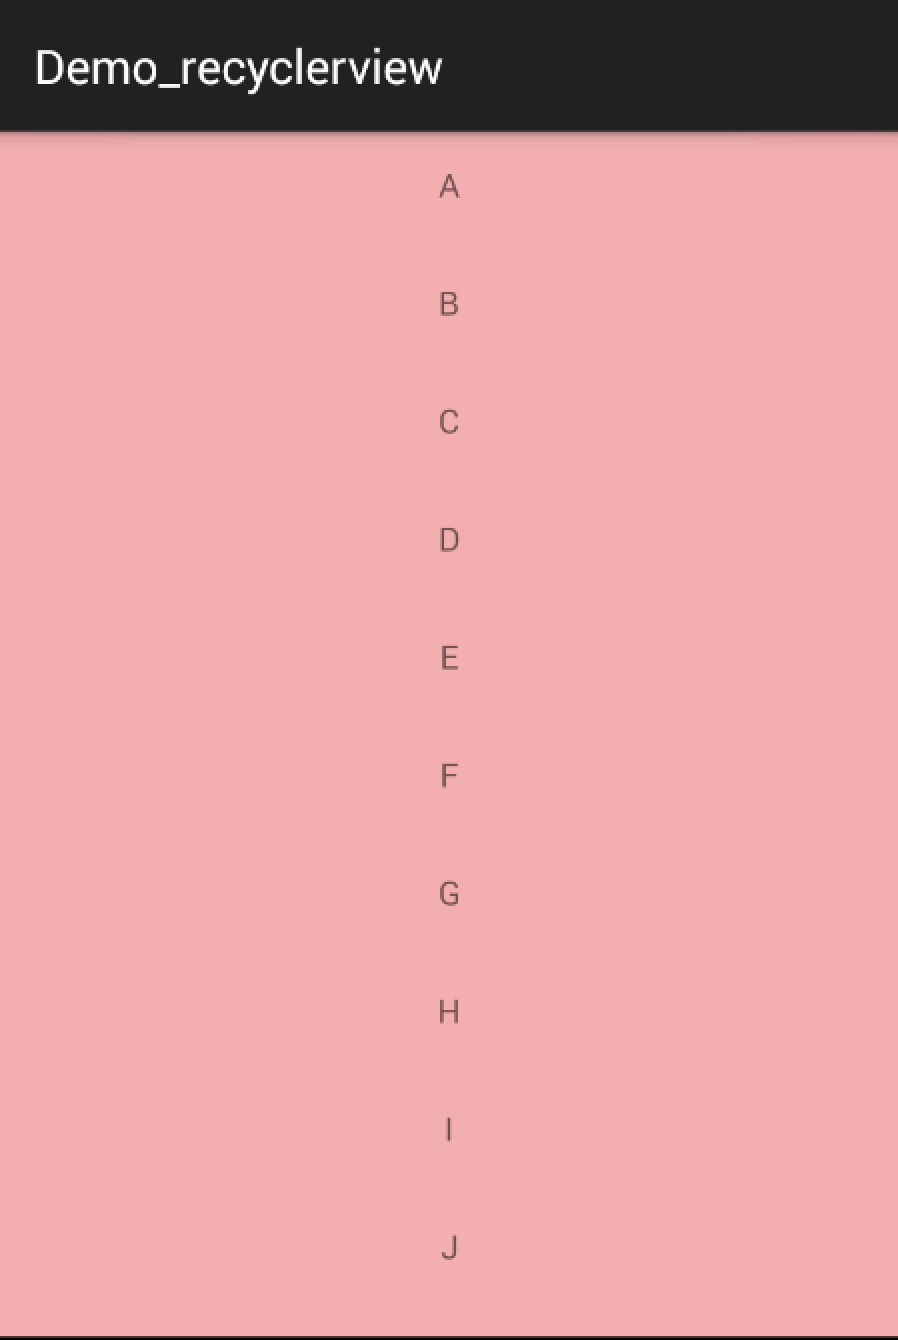 Android RecyclerView 使用解析
RecyclerView出現已經有一段時間了,相信大家肯定不陌生了,大家可以通過導入support-v7對其進行使用。 據官方的介紹,該控件用於在有限的窗口中展示大量數
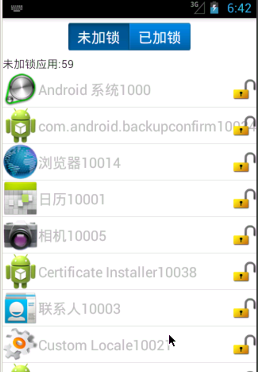 Android 開發程序鎖應用簡單實例
1.基本思路①.創建已加鎖應用的數據庫(字段:_id,packagename),如果應用已加鎖,將加鎖應用的包名維護到數據庫中②.已加鎖+未加鎖 == 手機中所有應用(A
 總結一下這兩天所學RecyclerView
recyclerView是android5.0之後推出的一款新的View布局,功能相較於ListView有過之而無不及,相信在以後的學習和工作中都將可能會用上,這兩天自己
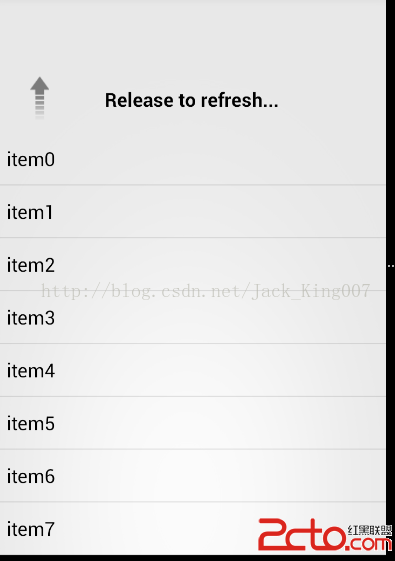
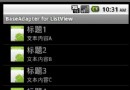 Android入門之ListView應用解析(二)
上一篇關於Android中ListView的介紹講的是如何制作一個具有兩行文本的自定義控件,作為ListView的Item的使用方法。本文接下來也是圍繞ListView和