編輯:關於Android編程
Android為藍牙設備之間的通信封裝好了一些調用接口,使得實現Android的藍牙通信功能並不困難。可通過UUID使兩個設備直接建立連接。
具體步驟:
1. 獲取BluetoothAdapter實例,注冊一個BroadcastReceiver監聽藍牙掃描過程中的狀態變化
mBluetoothAdapter = BluetoothAdapter.getDefaultAdapter();
IntentFilter filter = new IntentFilter(BluetoothDevice.ACTION_FOUND);
registerReceiver(mReceiver, filter);
private final BroadcastReceiver mReceiver = new BroadcastReceiver() {
        @Override
        public void onReceive(Context context, Intent intent) {
            String action = intent.getAction();


            // When discovery finds a device
            if (BluetoothDevice.ACTION_FOUND.equals(action))
            {
                // Get the BluetoothDevice object from the Intent
            	// 通過EXTRA_DEVICE附加域來得到一個BluetoothDevice設備
                BluetoothDevice device = intent.getParcelableExtra(BluetoothDevice.EXTRA_DEVICE);

                // If it's already paired, skip it, because it's been listed already
                // 如果這個設備是不曾配對過的,添加到list列表
                if (device.getBondState() != BluetoothDevice.BOND_BONDED)
                {
                	list.add(new ChatMessage(device.getName() + "\n" + device.getAddress(), false));
                	clientAdapter.notifyDataSetChanged();
            		mListView.setSelection(list.size() - 1);
                }
            // When discovery is finished, change the Activity title
            }
            else if (BluetoothAdapter.ACTION_DISCOVERY_FINISHED.equals(action))
            {
                setProgressBarIndeterminateVisibility(false);
                if (mListView.getCount() == 0)
                {
                	list.add(new ChatMessage("沒有發現藍牙設備", false));
                	clientAdapter.notifyDataSetChanged();
            		mListView.setSelection(list.size() - 1);
                }
            }
        }
    };
2. 打開藍牙(enable),並設置藍牙的可見性(可以被其它設備掃描到,客戶端是主動發請求的,可不設置,服務端必須設置可見)。
               if (mBluetoothAdapter != null) {
			if (!mBluetoothAdapter.isEnabled()) {
				// 發送打開藍牙的意圖,系統會彈出一個提示對話框
        		Intent enableIntent = new Intent(BluetoothAdapter.ACTION_REQUEST_ENABLE);
        		startActivityForResult(enableIntent, RESULT_FIRST_USER);

        		// 設置藍牙的可見性,最大值3600秒,默認120秒,0表示永遠可見(作為客戶端,可見性可以不設置,服務端必須要設置)
        		Intent displayIntent = new Intent(BluetoothAdapter.ACTION_REQUEST_DISCOVERABLE);
        		displayIntent.putExtra(BluetoothAdapter.EXTRA_DISCOVERABLE_DURATION, 0);
        		startActivity(displayIntent);

        		// 直接打開藍牙
        		mBluetoothAdapter.enable();
			}
		}
3. 掃描,startDiscovery()方法是一個很耗性能的操作,在掃描之前可以先使用getBondedDevices()獲取已經配對過的設備(可直接連接),避免不必要的消耗。
      private void scanDevice() {
		// TODO Auto-generated method stub
    	if (mBluetoothAdapter.isDiscovering()) {
			mBluetoothAdapter.cancelDiscovery();
		} else {

			// 每次掃描前都先判斷一下是否存在已經配對過的設備
		    Set pairedDevices = mBluetoothAdapter.getBondedDevices();
		    if (pairedDevices.size() > 0) {
		        for (BluetoothDevice device : pairedDevices) {
		            list.add(new ChatMessage(device.getName() + "\n" + device.getAddress(), true));
		        }
		    } else {
		        	list.add(new ChatMessage("No devices have been paired", true));
		        	clientAdapter.notifyDataSetChanged();
		    		mListView.setSelection(list.size() - 1);
		     }
	             /* 開始搜索 */
	             mBluetoothAdapter.startDiscovery();
		}
	}
4. 通過Mac地址發送連接請求,在這之前必須使用cancelDiscovery()方法停止掃描。
                mBluetoothAdapter.cancelDiscovery();

		// 通過Mac地址去嘗試連接一個設備
		BluetoothDevice device = mBluetoothAdapter.getRemoteDevice(BluetoothMsg.BlueToothAddress);
5. 通過UUID使兩個設備之間建立連接。
客戶端:主動發請求
     BluetoothSocket socket = device.createRfcommSocketToServiceRecord(UUID.fromString("00001101-0000-1000-8000-00805F9B34FB"));

     // 通過socket連接服務器,這是一個阻塞過程,直到連接建立或者連接失效
     socket.connect();
服務端:接受一個請求
     BluetoothServerSocket mServerSocket = mBluetoothAdapter.listenUsingRfcommWithServiceRecord(PROTOCOL_SCHEME_RFCOMM,
						UUID.fromString("00001101-0000-1000-8000-00805F9B34FB"));

     /* 接受客戶端的連接請求 */
     // 這是一個阻塞過程,直到建立一個連接或者連接失效
     // 通過BluetoothServerSocket得到一個BluetoothSocket對象,管理這個連接
     BluetoothSocket socket = mServerSocket.accept();
6. 通過InputStream/outputStream讀寫數據流,已達到通信目的。
     OutputStream os = socket.getOutputStream();
     os.write(msg.getBytes());
InputStream is = null;
try {
is = socket.getInputStream();
} catch (IOException e) {
// TODO Auto-generated catch block
e.printStackTrace();
}
7. 關閉所有線程以及socket,並關閉藍牙設備(disable)。
                        if (mClientThread != null) {
    				mClientThread.interrupt();
    				mClientThread = null;
				}
    			if (mReadThread != null) {
					mReadThread.interrupt();
					mReadThread = null;
				}
    			try {
					if (socket != null) {
						socket.close();
						socket = null;
					}
				} catch (IOException e) {
					// TODO: handle exception
				}
if (mBluetoothAdapter != null) {
mBluetoothAdapter.cancelDiscovery();
// 關閉藍牙
mBluetoothAdapter.disable();
}
unregisterReceiver(mReceiver);
 開源電商app常用標簽hot之第三方開源LabelView
先給大家展示下效果圖,看看是不是在你的意料之中哈。LabelView是在github上一個開源的標簽庫。其項目主頁是:https://github.com/linger1
 Material Design系列之Behavior上滑顯示返回頂部按鈕
效果預覽源碼在文章末尾。引文有時候我們的頁面內容過長的時候,滑動到頁面底部用戶再滑動到頂部很麻煩,Android不像iOS可以點擊statusBar回到頂部,一般都是雙擊
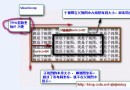
 Android仿斗魚領取魚丸文字驗證(二)
接著第一篇內容,來完成一下中間部分,中文驗證碼的部分,先看一下要實現的效果:一、分析功能分析一下,我們要實現一個驗證碼功能,隨機生成4個中文組合,文字隨機,文字顏色隨機,
 詳解Android應用開發中Scroller類的屏幕滑動功能運用
今天給大家介紹下Android中滑屏功能的一個基本實現過程以及原理初探,最後給大家重點講解View視圖中scrollTo 與scrollBy這兩個函數的區別 。