編輯:關於Android編程
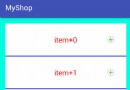
本文主要介紹Android4.4默認Home應用Launcher3的啟動過程和Launcher3的數據加載過程。Launcher的啟動是開機時,ActivityManagerService准備好後開始的,下圖是它的啟動序列圖:

step1,SystemServer中,ActivityManagerService准備好了。
step3,
    boolean resumeTopActivitiesLocked(ActivityStack targetStack, ActivityRecord target,
            Bundle targetOptions) {
        if (targetStack == null) {
            targetStack = getFocusedStack(); //獲得mHomeStack
        }
        boolean result = false;
        for (int stackNdx = mStacks.size() - 1; stackNdx >= 0; --stackNdx) {
            final ActivityStack stack = mStacks.get(stackNdx);
            if (isFrontStack(stack)) {
                if (stack == targetStack) {
                    result = stack.resumeTopActivityLocked(target, targetOptions);
                } else {
                    stack.resumeTopActivityLocked(null);
                }
            }
        }
        return result;
    }
step6,
   boolean startHomeActivityLocked(int userId) {
        if (mHeadless) {
            // Added because none of the other calls to ensureBootCompleted seem to fire
            // when running headless.
            ensureBootCompleted();
            return false;
        }
        Intent intent = getHomeIntent(); //HOME intent
        ActivityInfo aInfo =
            resolveActivityInfo(intent, STOCK_PM_FLAGS, userId);//查找home應用信息
        if (aInfo != null) {
            intent.setComponent(new ComponentName(
                    aInfo.applicationInfo.packageName, aInfo.name));
            // Don't do this if the home app is currently being
            // instrumented.
            aInfo = new ActivityInfo(aInfo);
            aInfo.applicationInfo = getAppInfoForUser(aInfo.applicationInfo, userId);
            ProcessRecord app = getProcessRecordLocked(aInfo.processName,
                    aInfo.applicationInfo.uid, true);//home應用未啟動,返回null
            if (app == null || app.instrumentationClass == null) {
                intent.setFlags(intent.getFlags() | Intent.FLAG_ACTIVITY_NEW_TASK);
                mStackSupervisor.startHomeActivity(intent, aInfo); //step7
            }
        }

        return true;
    }
    Intent getHomeIntent() {
        Intent intent = new Intent(mTopAction, mTopData != null ? Uri.parse(mTopData) : null);
        intent.setComponent(mTopComponent);
        if (mFactoryTest != SystemServer.FACTORY_TEST_LOW_LEVEL) {
            intent.addCategory(Intent.CATEGORY_HOME);//Home應用的標志
        }
        return intent;
    }
的step14之後的過程。
step11~step14,開始異步加載應用圖標,工作線程sWorkerThread。
step15~step20,加載workspace的圖標,step16讀取LauncherProvider的Favorites數據,favorites表的數據是Launcher數據庫創建時從default_workspace.xml解析讀取的。step18綁定圖標信息。
step22,睡眠等待空閒進程,然後加載主菜單的所有app圖標。
step23,從睡眠中醒來,准備加載所有app圖標,包括widget等。
step24,
        private void loadAllApps() {
            final long loadTime = DEBUG_LOADERS ? SystemClock.uptimeMillis() : 0;
            .....
            final PackageManager packageManager = mContext.getPackageManager();
            final Intent mainIntent = new Intent(Intent.ACTION_MAIN, null); //在PackageManagerService查詢所有要顯示在桌面上的app
            mainIntent.addCategory(Intent.CATEGORY_LAUNCHER);

            // Clear the list of apps
            mBgAllAppsList.clear();

            // Query for the set of apps
            final long qiaTime = DEBUG_LOADERS ? SystemClock.uptimeMillis() : 0;
            List apps = packageManager.queryIntentActivities(mainIntent, 0);
            if (DEBUG_LOADERS) {
                Log.d(TAG, queryIntentActivities took
                        + (SystemClock.uptimeMillis()-qiaTime) + ms);
                Log.d(TAG, queryIntentActivities got  + apps.size() +  apps);
            }
            // Fail if we don't have any apps
            if (apps == null || apps.isEmpty()) {
                return;
            }
            // Sort the applications by name
            final long sortTime = DEBUG_LOADERS ? SystemClock.uptimeMillis() : 0;
            Collections.sort(apps,
                    new LauncherModel.ShortcutNameComparator(packageManager, mLabelCache));//按應用名稱排序

            // Create the ApplicationInfos
            for (int i = 0; i < apps.size(); i++) {
                ResolveInfo app = apps.get(i);
                // This builds the icon bitmaps.
                mBgAllAppsList.add(new AppInfo(packageManager, app,
                        mIconCache, mLabelCache));
            }

            // Huh? Shouldn't this be inside the Runnable below?
            final ArrayList added = mBgAllAppsList.added;
            mBgAllAppsList.added = new ArrayList();

            // Post callback on main thread
            mHandler.post(new Runnable() {
                public void run() {
                    final long bindTime = SystemClock.uptimeMillis();
                    final Callbacks callbacks = tryGetCallbacks(oldCallbacks);
                    if (callbacks != null) {
                        callbacks.bindAllApplications(added); //step26,綁定
                        if (DEBUG_LOADERS) {
                            Log.d(TAG, bound  + added.size() +  apps in
                                + (SystemClock.uptimeMillis() - bindTime) + ms);
                        }
                    } else {
                        Log.i(TAG, not binding apps: no Launcher activity);
                    }
                }
            });
        }
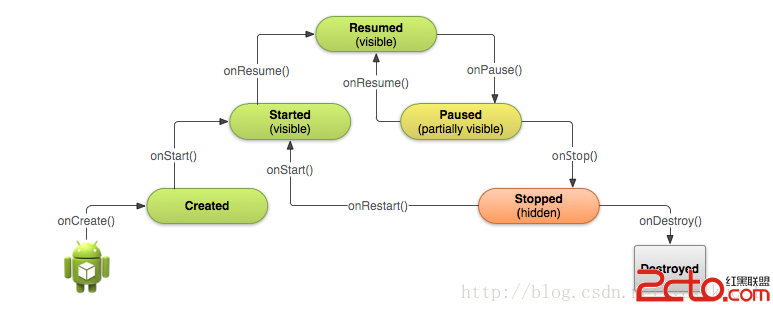 4、Android Activity的生命周期 Activity的生命周期
1、完整生命周期 3、一個新的Activity實例 系統首先調用新Activity的onCreate()方
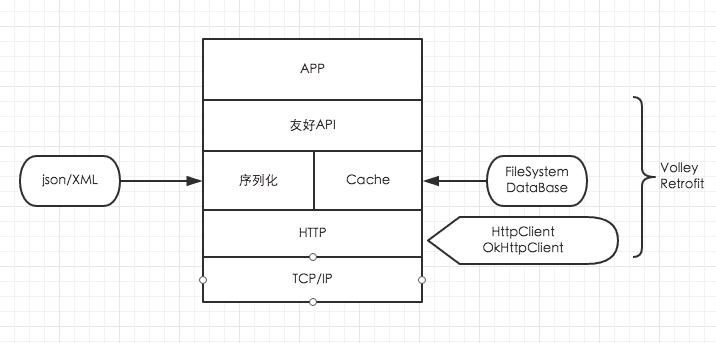
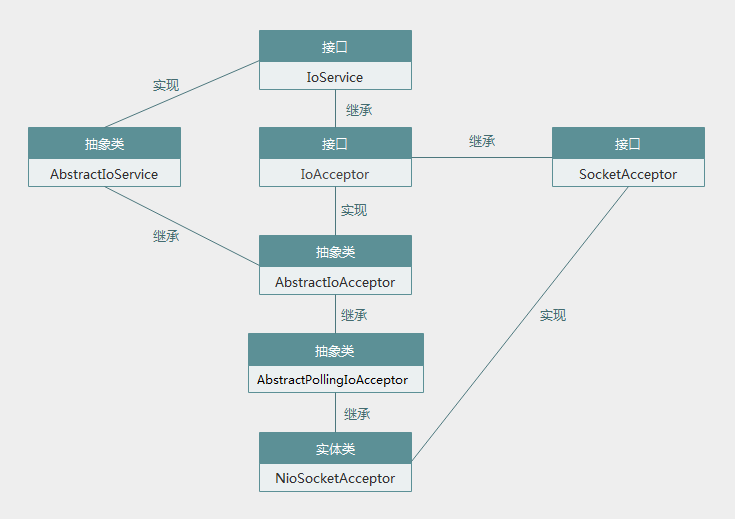 MINA框架源碼分析(二)
上一篇我們通過實例學習了MINA框架的用法,發現用起來還是挺方便的,就那麼幾步就可以了,本著學東西必知其原理的觀念,決定看看MINA的源碼實現,好了,我們開始吧!MINA
 Android,IOS 信息采集系統。
使用C++ 語言編寫,模塊化設計,可以嵌入任何語言編寫的程序中,也可以嵌入各種流行腳本中直接調用。模塊內部封裝了所有的操作,外部只需要調用相應的導出函數即
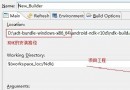 Android ndk開發
前言:我對C/C++是沒有任何基礎的,雖然大學中學了一個學期的C但是都算還給老師了。這篇文章是我做一個NDK項目積累下來的知識,可以說是一篇小白上手文章,所以高手請自行繞