編輯:關於Android編程
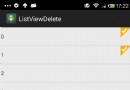
之前在網上也看到一些所謂的下拉刷新的例子,但是總感覺是把簡單的事情復雜化了,動辄300多行甚至600多行的代碼,其實主要就是對觸摸事件作出反應嘛,根本用不著這麼麻煩。下面先實現一個可上下拉動的ListView,再實現一個帶有Header的可下拉刷新的ListView:
可上下拉動的ListView的源碼如下:
/**
 * 可上下拉動的ListView
 * @author Bettar
 *
 */
public class RefreshableListView extends ListView
{
	private static final String TAG=RefreshableListView;
	private int touchSlop;
	private int initTopMargin;
	//private int initTopOfFirstChild;
	private boolean hasRecord=false;
	private float startY;
	private boolean isPulling=false;
	//private ViewGroup.LayoutParams params;
	private LinearLayout.LayoutParams params;

	public RefreshableListView(Context context, AttributeSet attrs)
	{
		super(context, attrs);
		//這樣的話就可以將設置參數讀入,從而不會與layout文件的設置產生沖突。
		params=new LinearLayout.LayoutParams(context, attrs);
		initTopMargin=params.topMargin;
		this.setLayoutParams(params);
		touchSlop=ViewConfiguration.get(context).getTouchSlop();
	}

	@Override
	public boolean onTouchEvent(MotionEvent event)
	{
		switch(event.getAction())
		{
		case MotionEvent.ACTION_DOWN:
			if(!hasRecord)
			{
				hasRecord=true;
				startY=event.getY();
				Log.i(TAG,ACTION_DOWN);
			}
			break;
		case MotionEvent.ACTION_MOVE:
			float distance=event.getY()-startY;
			if(!isPulling)
			{
				if(!couldPull(distance))
			    {
			    	Log.i(TAG,could not pull  in ACTION_MOVE);
			    	return false;
			    }
			}
		    isPulling=true;
		    Log.i(TAG,pull in ACTION_MOVE);
		    params.topMargin+=distance;
		    this.setLayoutParams(params);
		    this.setPressed(false);
		    this.setFocusable(false);
		    this.setFocusableInTouchMode(false);
		    return true;
		case MotionEvent.ACTION_UP:
			Log.i(TAG,ACTION_UP);
			params.topMargin=initTopMargin;
			this.setLayoutParams(params);
			hasRecord=false;
			this.setFocusable(true);
			this.setFocusableInTouchMode(true);
			if(isPulling)
			{
				isPulling=false;
				//注意:拉伸後放起必須返回true,否則這個事件還會被其他的事件處理器讀取,從而影響該類的外部操作,如setOnItemClickListener中的操作。
				return true;
			}
			isPulling=false;
			break;
		}
		return super.onTouchEvent(event);
	}

	private boolean couldPull(float distance)
	{
		if(Math.abs(distance)0)
		{
			Log.i(TAG,getTop()+this.getTop());
			if(this.getFirstVisiblePosition()==0&&this.getChildAt(0).getTop()==0)
			{
				return true;
			}
		}
		else
		{
			if(this.getLastVisiblePosition()==this.getCount()-1)
			{
				return true;
			}
		}
		return false;
	}

}
要注意的一個細節是ACTION_UP時的處理,如果是拉伸後放開手指的ACTION_UP,那麼要返回true而不是false,否則會影響這個自定義ListView的正常使用,因為如果返回false的話則這整個過程由於有ACTION_DOWN和ACTION_UP,會被當作一次Click,從而影響造成額外的影響。
如果要加上一定的動畫,也很簡單,使用補間動畫或者異步任務去實現,下面的代碼使用了兩種實現方式:
package com.android.customview;

import android.content.Context;
import android.os.AsyncTask;
import android.util.AttributeSet;
import android.util.Log;
import android.view.MotionEvent;
import android.view.ViewConfiguration;
import android.view.ViewGroup;
import android.view.animation.TranslateAnimation;
import android.widget.AbsListView;
import android.widget.LinearLayout;
import android.widget.ListView;
/**
 * 可上下拉動的ListView
 * @author Bettar
 *
 */
public class RefreshableListView extends ListView
{
	private static final String TAG=RefreshableListView;
	//0.5的話會感覺很粘滯,而1.0的話又感覺太滑,0.8是一個比較好的參數。
	private static final float RATIO=0.8f;
	private static final int ANIM_DURATION=1000;
	private int touchSlop;
	private int initTopMargin;
	private int[]initLocation=new int[2];
	private boolean hasRecord=false;
	private float startY;
	private boolean isPulling=false;
	//private ViewGroup.LayoutParams params;
	private LinearLayout.LayoutParams params;

	public RefreshableListView(Context context, AttributeSet attrs)
	{
		super(context, attrs);
		//params=this.getLayoutParams();
		//這樣的話就可以將設置參數讀入,從而不會與layout文件的設置產生沖突。
		params=new LinearLayout.LayoutParams(context, attrs);
		initTopMargin=params.topMargin;
		this.getLocationOnScreen(initLocation);
		//initTopOfFirstChild=this.getChildAt(0).getTop();
		this.setLayoutParams(params);
		touchSlop=ViewConfiguration.get(context).getTouchSlop();
	}

	@Override
	public boolean onTouchEvent(MotionEvent event)
	{
		switch(event.getAction())
		{
		case MotionEvent.ACTION_DOWN:
			if(!hasRecord)
			{
				hasRecord=true;
				startY=event.getY();
				Log.i(TAG,ACTION_DOWN);
			}
			break;
		case MotionEvent.ACTION_MOVE:
			float distance=event.getY()-startY;
			if(!isPulling)
			{
				if(!couldPull(distance))
			    {
			    	Log.i(TAG,could not pull  in ACTION_MOVE);
			    	return false;
			    }
			}
		    isPulling=true;
		    Log.i(TAG,pull in ACTION_MOVE);
		    params.topMargin=initTopMargin+(int)(distance*RATIO);
		    this.setLayoutParams(params);
		    this.setPressed(false);
		    this.setFocusable(false);
		    this.setFocusableInTouchMode(false);
		    return true;
		case MotionEvent.ACTION_UP:
			Log.i(TAG,ACTION_UP);
			if(isPulling)
			{
				startTranslateAnimation();
				//executeTranslateAnimation();
			}
			//重設參數,注意如果是使用自定義動畫,那麼要將此處的reset();注釋,等到異步任務執行完畢後再執行reset();否則參數會相互干擾。
		    reset();
			if(isPulling)
			{
				isPulling=false;
				//注意:拉伸後放起必須返回true,否則這個事件還會被其他的事件處理器讀取,從而影響該類的外部操作,如setOnItemClickListener中的操作。
				return true;
			}
			isPulling=false;
			break;
		}
		return super.onTouchEvent(event);
	}

	private void reset()
	{
		params.topMargin=initTopMargin;
		this.setLayoutParams(params);
		hasRecord=false;
		this.setFocusable(true);
		this.setFocusableInTouchMode(true);
	}

	private void startTranslateAnimation()
	{
		int[]location=new int[2];
		RefreshableListView.this.getLocationOnScreen(location);
		//測試發現location[0]==0而location[1]就是第一個Item上端距離頂部的距離。
		Log.i(TAG,location[0]=+location[0]+ location[1]=+location[1]);
		TranslateAnimation anim=new TranslateAnimation(location[0],initLocation[0],location[1],initLocation[1]);
		anim.setDuration(ANIM_DURATION);
		RefreshableListView.this.startAnimation(anim);
	}

	/**
	 *這其實就相當於自己去實現動畫了。
	 */
	private void executeTranslateAnimation()
	{
		new TranslateTask(20).execute();
	}

	/**
	 * 如果是使用它的話就要將params的參數等放到異步任務執行完之後再完成,否則會現相互干擾的情況。
	 * @author Bettar
	 *
	 */
	private class TranslateTask extends AsyncTask
	{
		//每次線程的睡眠時間
		private int deltaSleepTime;
		private int deltaScrollY;
		public TranslateTask(int deltaSleepTime)
		{
			this.deltaSleepTime=deltaSleepTime;
			if(deltaSleepTime>0)
			{
				deltaScrollY=0-(params.topMargin-initTopMargin)/(ANIM_DURATION/deltaSleepTime);
			}
			else
			{
				deltaScrollY=params.topMargin>initTopMargin?-20:20;
			}
			Log.i(TAG,deltaScrollY=+deltaScrollY);
		}
		@Override
		protected Integer doInBackground(Void...voidParams) {
			int topMargin=params.topMargin;
			while(true)
			{
				topMargin+=deltaScrollY;
				Log.i(TAG,topMargin=+topMargin);
				if(deltaScrollY<0)
				{
					if(topMargin<0)
					{
						topMargin=0;
						break;
					}
				}
				else
				{
					if(topMargin>0)
					{
						topMargin=0;
						break;
					}
				}
				publishProgress(topMargin);
				try
				{
					Thread.sleep(deltaSleepTime);
				}
				catch(InterruptedException ex)
				{
					ex.printStackTrace();
				}
			}
			publishProgress(0);
			return topMargin;
		}

		@Override
		protected void onProgressUpdate(Integer... values) {
			//values[0]對應上面publisProgress中的topMargin
			Log.i(TAG,values[0] i.e topMargin=+values[0]);
			params.topMargin=values[0];
			RefreshableListView.this.setLayoutParams(params);
		}
		@Override
		protected void onPostExecute(Integer result) {
			//執行完異步任務之後就可以進行參數重新設置了
			reset();
		}

	}
	/**
	 * 判斷是否可以開始拉動,如果是向下拉動,則要求第一個Item完全可見;如果是向上拉,則要求最後一個Item完全可見。
	 * @param distance
	 * @return
	 */
	private boolean couldPull(float distance)
	{
		if(Math.abs(distance)0)
		{
			Log.i(TAG,getTop()+this.getTop());
			if(this.getFirstVisiblePosition()==0&&this.getChildAt(0).getTop()==0)
			//if(this.getFirstVisiblePosition()==0&&this.getChildAt(0).getTop()==initTopOfFirstChild)
			{
				return true;
			}
		}
		else
		{
			if(this.getLastVisiblePosition()==this.getCount()-1)
			{
				return true;
			}
		}
		return false;
	}

}
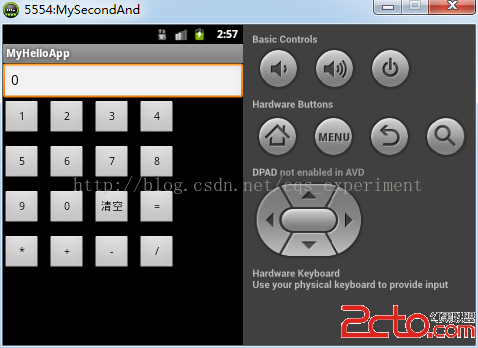 andriod first app-computer
andriod first app-computer 個人信息:就讀於燕大本科軟件工程專業 目前大三; 本人博客:google搜索“cqs_2012”即可; 個人愛
 Android對話框裡面的輸入值獲取不到,空指針異常
寫的一個Android對話框,點擊按鈕獲取EditText裡面的值,這裡一直報空指針異常,研究了很長時間終於解決了。 異常如下: 我原來的代碼://更新對
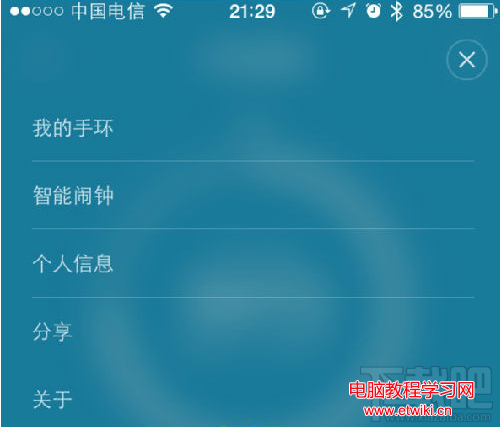
 Android M新控件之AppBarLayout,NavigationView,CoordinatorLayout,CollapsingToolbarLayout的使用
compile 'com.android.support:design:22.2.0'AppBarLayout效果圖是這樣的AppBarLay
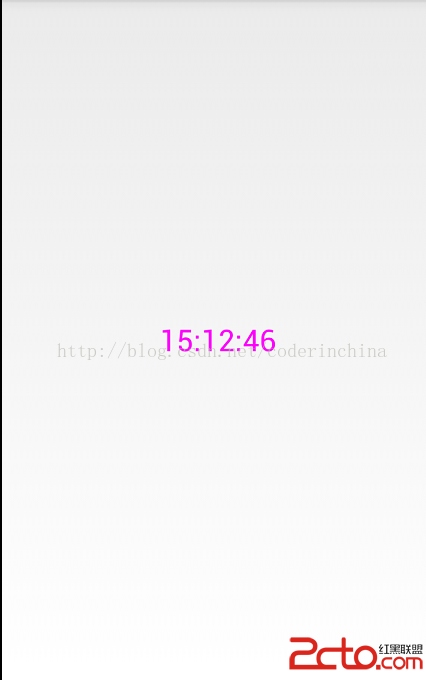
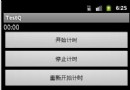 學習使用Android Chronometer計時器
本文實例為大家分享了Android Chronometer計時器基本使用方法,供大家參考,具體內容如下在默認情況下,Chronometer組件只輸出MM:SS或H:MM: