編輯:關於Android編程
MainActivity如下:
package cc.testviewstudy1;
import android.os.Bundle;
import android.app.Activity;
import android.view.LayoutInflater;
import android.view.View;
import android.view.ViewParent;
import android.widget.RelativeLayout;
/**
* Demo描述:
* 關於自定義View的學習(一)
*
* 學習資料:
* http://blog.csdn.net/guolin_blog/article/details/12921889
* Thank you very much
*
*/
public class MainActivity extends Activity {
private RelativeLayout mRelativeLayout;
private LayoutInflater mLayoutInflater;
@Override
protected void onCreate(Bundle savedInstanceState) {
super.onCreate(savedInstanceState);
init();
//test1();
test2();
test3();
}
//每個Activity由兩部分組成.
//1 title
//2 contentView
//我們可以分別設置它們
private void init(){
setTitle("This is title");
setContentView(R.layout.main);
}
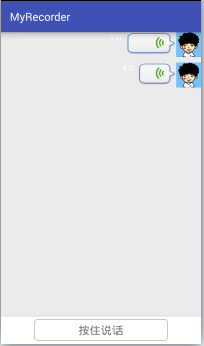
//用button_layout_wrong布局的方式來在View中新加一個Button
//是不夠准確的.因為此時我們是無法通過 android:layout_width和 android:layout_height
//指定Button的寬和高,最終Button顯示的只有wrap_content的大小.
private void test1(){
mRelativeLayout=(RelativeLayout) findViewById(R.id.relativeLayout);
mLayoutInflater=LayoutInflater.from(MainActivity.this);
View buttonView=mLayoutInflater.inflate(R.layout.button_layout_wrong, null);
mRelativeLayout.addView(buttonView);
}
//怎麼解決test1中的問題呢?
//關鍵在於android:layout_width和 android:layout_height的理解
//它指的是的控件在布局中的寬和高所以叫android:layout_width和 android:layout_height
//而不是叫android:width和 android:height.
//所以,我們要先把控件放在一個布局裡面,然後再給該控件指定寬和高.這樣才有效果.
//如:button_layout_right所示
private void test2(){
mRelativeLayout=(RelativeLayout) findViewById(R.id.relativeLayout);
mLayoutInflater=LayoutInflater.from(MainActivity.this);
View buttonView=mLayoutInflater.inflate(R.layout.button_layout_right, null);
mRelativeLayout.addView(buttonView);
}
//繼續上面的例子:
//我們在每次布局的時候不是可以在最外層的布局通過android:layout_width和 android:layout_height
//來指定該布局的寬和高麼然後setContentView()將其顯示在屏幕上的麼?
//這個最大的View沒有再嵌套一層布局為什麼可以指定寬和高呢?
//這不是和上面的例子沖突了麼?
//其實,不是的.
//因為在加載每個布局文件xml的時候.不論其根布局是什麼,都會將該布局
//外面嵌套一層FrameLayout.
//這樣就和上面的例子統一了.
private void test3(){
mRelativeLayout=(RelativeLayout) findViewById(R.id.relativeLayout);
ViewParent viewParent=mRelativeLayout.getParent();
System.out.println("每個布局文件的最外層的實質是:"+viewParent);
}
}
main.xml如下:
button_layout_wrong.xml如下:
button_layout_right.xml如下:
 用代碼理解Acticity啟動模式
本章內容Activity 四種啟動模式的理論知識 代碼理解Activity 四種啟動模式的理論知識standard默認模式,可以不用寫配置。在這個模式下,都會默認創建一個
 Android線程的優先級設置方法技巧
對於Android平台上的線程優先級設置來說可以處理很多並發線程的阻塞問題,比如很多無關緊要的線程會占用大量的CPU時間,雖然通過了MultiThread來解決慢速I/O
 讓Android中RadioGroup不顯示在輸入法上面的辦法
如果你在開發過程中經常使用 RadioGroup,那你是否遇到過下面這種情況每當你點擊EditText彈出輸入法時,RadioGroup總是向上移動到輸入法的上面。你可能
 Android 用戶登錄界面
本篇博客主要給大家演示如何一步一步地創建一個類似於下圖展示的這麼一個UI界面: 一、准備圖片資源 第二步:ImageButton設置 源