編輯:關於Android編程
package cn.testshortcut;
import java.util.List;
import android.net.Uri;
import android.os.Bundle;
import android.text.TextUtils;
import android.app.Activity;
import android.content.Context;
import android.content.Intent;
import android.content.pm.PackageInfo;
import android.content.pm.PackageManager;
import android.content.pm.ProviderInfo;
import android.content.pm.PackageManager.NameNotFoundException;
import android.database.Cursor;
/**
* Demo描述:
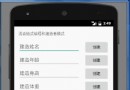
* 桌面快捷方式的設置
*
* 備注說明:
* 該方式只適合Android原生系統和非原生系統
*
* 權限設置:
* <uses-permission android:name="com.android.launcher.permission.INSTALL_SHORTCUT" />
* <uses-permission android:name="com.android.launcher.permission.UNINSTALL_SHORTCUT" />
* <uses-permission android:name="com.android.launcher.permission.READ_SETTINGS" />
*/
public class MainActivity extends Activity {
@Override
protected void onCreate(Bundle savedInstanceState) {
super.onCreate(savedInstanceState);
setContentView(R.layout.main);
addShortcutToDesktop(MainActivity.this);
}
public static void addShortcutToDesktop(Context context) {
if (!hasShortcut(context)) {
Intent shortcutIntent = new Intent("com.android.launcher.action.INSTALL_SHORTCUT");
shortcutIntent.putExtra("duplicate", false);
shortcutIntent.putExtra(Intent.EXTRA_SHORTCUT_NAME,context.getString(R.string.app_name));
shortcutIntent.putExtra(Intent.EXTRA_SHORTCUT_ICON_RESOURCE,
Intent.ShortcutIconResource.fromContext(context,R.drawable.ic_launcher));
Intent intent = new Intent(context, MainActivity.class);
intent.setAction("android.intent.action.MAIN");
intent.addCategory("android.intent.category.LAUNCHER");
shortcutIntent.putExtra(Intent.EXTRA_SHORTCUT_INTENT, intent);
context.sendBroadcast(shortcutIntent);
}
}
private static boolean hasShortcut(Context context) {
String AUTHORITY = getAuthorityFromPermission(context,"com.android.launcher.permission.READ_SETTINGS");
System.out.println(" AUTHORITY ..." + AUTHORITY);
if (AUTHORITY == null) {
return false;
}
Uri CONTENT_URI = Uri.parse("content://" + AUTHORITY+ "/favorites?notify=true");
String title = "";
final PackageManager packageManager = context.getPackageManager();
try {
title = packageManager.getApplicationLabel(
packageManager.getApplicationInfo(context.getPackageName(),
PackageManager.GET_META_DATA)).toString();
} catch (NameNotFoundException e) {
e.printStackTrace();
}
Cursor c = context.getContentResolver().
query(CONTENT_URI,new String[] { "title" }, "title=?", new String[] { title },null);
if (c != null && c.getCount() > 0) {
return true;
}
return false;
}
private static String getAuthorityFromPermission(Context context,String permission) {
if (TextUtils.isEmpty(permission)) {
return null;
}
List<PackageInfo> packageInfoList =
context.getPackageManager().getInstalledPackages(PackageManager.GET_PROVIDERS);
if (packageInfoList == null) {
return null;
}
for (PackageInfo packageInfo : packageInfoList) {
ProviderInfo[] providerInfos = packageInfo.providers;
if (providerInfos != null) {
for (ProviderInfo providerInfo : providerInfos) {
if (permission.equals(providerInfo.readPermission)||
permission.equals(providerInfo.writePermission)) {
return providerInfo.authority;
}
}
}
}
return null;
}
}
<RelativeLayout xmlns:android="http://schemas.android.com/apk/res/android"
    xmlns:tools="http://schemas.android.com/tools"
    android:layout_width="match_parent"
    android:layout_height="match_parent"
     >

    <TextView
        android:layout_width="wrap_content"
        android:layout_height="wrap_content"
        android:text="建立桌面快捷方式"
        android:layout_centerInParent="true"
    />

</RelativeLayout>
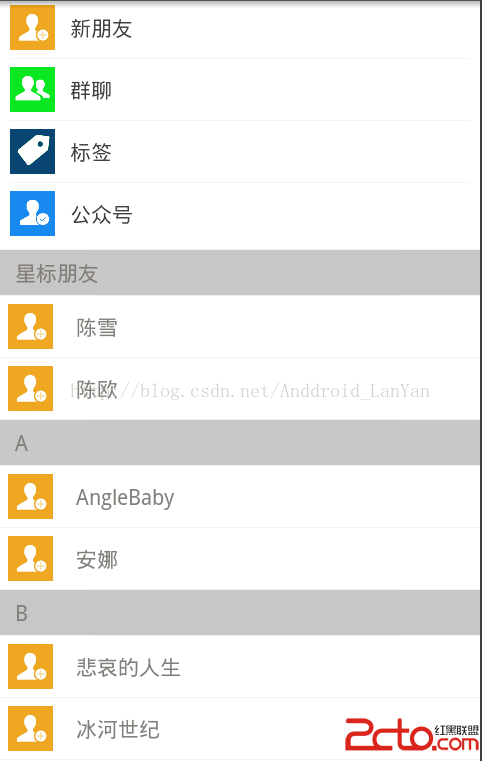 Android PinnedSectionListView 收縮
網上開源項目:https://github.com/beworker/pinned-section-listview,該項目用的是ArrayAdapter()..不太適合
 建造者模式實例之PopupView
開始說正題。先上上一次的效果圖,其展現出的效果,是建造者模式的思想精髓。關注建造產品的共性,其細節的個性則讓其自由定義(是否顯示,顯示的內容);今天要做的PopupVie
 全面介紹Android的MVVM框架 - 數據綁定
原文地址 MasteringAndroidDataBinding本教程是跟著 Data Binding Guide 學習過程中得出的一些實踐經驗,同時修改了官方教程的一
 android坐標
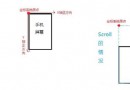
說來說去都不如 畫圖示意 簡單易懂啊!!!真是的! 來吧~~先上張圖~~! (一)首先明確一下Android中的坐標系統:屏幕的左上角是坐標系統原點(0,0)原