編輯:Android資訊
前面的文章已經講述了”隨手拍”項目圖像處理的技術部分,該篇文章主要是主界面的布局及屏幕滑動切換,並結合鴻洋大神的視頻和郭神的第一行代碼(強推兩人Android博客),完成了下面的內容:
(1).學習使用Include布局XML
(2).通過添加適配器加載fragment
(3).實現滑動觸摸切換屏幕ViewPager
(4).改變圖標及背景,並響應fragment中控件及傳遞參數
如下圖所示,滑動屏幕可以切換布局”空間”、”相冊”、”關注”.同時會有圖標顏色變藍,背景顏色加深的效果.

同時添加了按鈕事件,在fragment1中點擊按鈕顯示內容,在fragment3中點擊按鈕獲取第二個布局內容並顯示.

首先添加頭部布局top_layout.xml,采用相對布局,右邊兩圖標:
<?xml version="1.0" encoding="utf-8"?>
<RelativeLayout xmlns:android="http://schemas.android.com/apk/res/android"
    android:layout_width="match_parent"
    android:layout_height="50dp"
    android:paddingLeft="12dp"
    android:paddingRight="12dp"
    android:background="@drawable/image_toolbar_bg" >
    <LinearLayout
        android:layout_width="wrap_content"
        android:layout_height="wrap_content"
        android:layout_centerVertical="true"
        android:layout_gravity="center"
        android:orientation="horizontal" >
        <ImageView
            android:layout_width="30dp"
            android:layout_height="30dp"
            android:src="@drawable/icon_suishoupai" />
    	<TextView
    	    android:layout_width="wrap_content"
    	    android:layout_height="wrap_content"
    	    android:layout_marginLeft="12dp"
    	    android:text="隨手拍"
    	    android:textSize="15sp"
    	    android:layout_gravity="center"
    	    android:textColor="#ffffff" />
    </LinearLayout>
    <LinearLayout
        android:layout_width="wrap_content"
        android:layout_height="wrap_content"
        android:layout_centerVertical="true"
        android:layout_gravity="center"
        android:layout_alignParentRight="true"
        android:orientation="horizontal" >
        <ImageView
            android:layout_width="30dp"
            android:layout_height="30dp"
            android:src="@drawable/image_top_watch" />
        <ImageView
            android:layout_width="30dp"
            android:layout_height="30dp"
            android:src="@drawable/image_top_add" />
    </LinearLayout>
</RelativeLayout>
然後添加底部布局bottom_layout.xml,由3個LinearLayout水平布局組成,其中每個LinearLayout有ImageView和TextView組成:
<?xml version="1.0" encoding="utf-8"?>
<LinearLayout xmlns:android="http://schemas.android.com/apk/res/android"
    android:layout_width="match_parent"
    android:layout_height="40dp"
    android:background="@drawable/image_toolbar_bg"
    android:orientation="horizontal" >
	<LinearLayout
	    android:id="@+id/bottomLayout1"
        android:layout_width="wrap_content"
        android:layout_height="wrap_content"
        android:layout_weight="1"
        android:gravity="center"
        android:background="@drawable/image_toolbar_bg_sel"
		android:orientation="vertical" >
        <ImageView
            android:id="@+id/image1"
            android:layout_width="wrap_content"
            android:layout_height="wrap_content"
            android:padding="1dp"
            android:src="@drawable/image_bottom_effect" />
        <TextView
            android:layout_width="wrap_content"
            android:layout_height="15dp"
            android:text="空間"
            android:textColor="#ffffff"
            android:textSize="10dp" />
     </LinearLayout>
     <LinearLayout
        android:id="@+id/bottomLayout2"
        android:layout_width="wrap_content"
        android:layout_height="wrap_content"
        android:layout_weight="1"
        android:gravity="center"
		android:orientation="vertical" >
        <ImageView
            android:id="@+id/image2"
            android:layout_width="wrap_content"
            android:layout_height="wrap_content"
            android:padding="1dp"
            android:src="@drawable/image_bottom_frame_no" />
        <TextView
            android:layout_width="wrap_content"
            android:layout_height="15dp"
            android:text="相冊"
            android:textColor="#ffffff"
            android:textSize="10dp" />
     </LinearLayout>
     <LinearLayout
        android:id="@+id/bottomLayout3"
        android:layout_width="wrap_content"
        android:layout_height="wrap_content"
        android:layout_weight="1"
        android:gravity="center"
		android:orientation="vertical" >
        <ImageView
            android:id="@+id/image3"
            android:layout_width="wrap_content"
            android:layout_height="wrap_content"
            android:padding="1dp"
            android:src="@drawable/image_bottom_person_no" />
        <TextView
            android:layout_width="wrap_content"
            android:layout_height="15dp"
            android:text="關注"
            android:textColor="#ffffff"
            android:textSize="10dp" />
     </LinearLayout>
</LinearLayout>
最後在activity_main.xml中調用Include布局,ViewPager用於加載不同的fragment,並實現觸屏切換在該控件上:
<LinearLayout xmlns:android="http://schemas.android.com/apk/res/android"
    xmlns:tools="http://schemas.android.com/tools"
    android:id="@+id/container"
    android:layout_width="match_parent"
    android:layout_height="match_parent"
 	android:orientation="vertical">

    <include layout="@layout/top_layout"/>
    <android.support.v4.view.ViewPager
        android:id="@+id/viewpager1"
        android:layout_width="match_parent"
        android:layout_height="0dp"
        android:background="#ccffff"
        android:layout_weight="1" />
   <include layout="@layout/bottom_layout"/>

</LinearLayout>
在MainActivity.java中onCreate函數設置無標題requestWindowFeature(Window.FEATURE_NO_TITLE),在xml文件中可設置Frame預覽效果無標題,顯示布局如下圖所示:

<?xml version="1.0" encoding="utf-8"?>
<LinearLayout xmlns:android="http://schemas.android.com/apk/res/android"
    android:layout_width="match_parent"
    android:layout_height="match_parent"
    android:orientation="vertical" >
    <TextView
        android:id="@+id/textView1"
        android:layout_width="fill_parent"
        android:layout_height="wrap_content"
        android:textSize="25sp"
        android:gravity="center"
        android:text="The First Fragment" />
    <Button
        android:id="@+id/button1"
        android:layout_width="fill_parent"
        android:layout_height="wrap_content"
        android:text="Button1" />
</LinearLayout>
然後添加FragmentFirst.java、FragmentSecond.java和FragmentThird,其中FragmentSecond.java如下,其他類似:
package com.example.layouttest;

import android.os.Bundle;
import android.support.v4.app.Fragment;
import android.view.LayoutInflater;
import android.view.View;
import android.view.ViewGroup;

public class FragmentSecond extends Fragment {

	@Override
    public View onCreateView(LayoutInflater inflater, ViewGroup container,Bundle savedInstanceState) {
        return inflater.inflate(R.layout.fragment_layout2, container, false);
    }
}
PS:由於剛學習Android一個月,所以文章很基礎,在新建類中可以點擊”浏覽”自定義添加繼承超類或點擊”添加”增加接口,此處繼承Fragment.注意”import android.support.v4.app.Fragment;”所有的需要一致.
然後設置MainActivity.java,代碼如下:
package com.example.layouttest;

import java.util.ArrayList;
import java.util.List;
import android.os.Bundle;
import android.support.v4.app.Fragment;
import android.support.v4.app.FragmentActivity;
import android.support.v4.app.FragmentPagerAdapter;
import android.support.v4.view.ViewPager;
import android.view.Window;

public class MainActivity extends FragmentActivity {

	//注意:導入時均為support.v4.app/view 保持一致
	private ViewPager viewPager1;
	private FragmentPagerAdapter fpAdapter;
	private List<Fragment> listData;

    @Override
    protected void onCreate(Bundle savedInstanceState) {
        super.onCreate(savedInstanceState);
        //注意:設置無標題需要在setContentView前調用 否則會崩潰
        requestWindowFeature(Window.FEATURE_NO_TITLE);
        setContentView(R.layout.activity_main);
        //初始化設置ViewPager
        setViewPager();
    }
	private void setViewPager() {
		//初始化數據
		viewPager1 = (ViewPager) findViewById(R.id.viewpager1);
		listData = new ArrayList<Fragment>();
		FragmentFirst fragmentFirst = new FragmentFirst();
		FragmentSecond fragmentSecond = new FragmentSecond();
		FragmentThird fragmentThird = new FragmentThird();
		//三個布局加入列表
		listData.add(fragmentFirst);
		listData.add(fragmentSecond);
		listData.add(fragmentThird);
		//ViewPager相當於一組件容器 實現頁面切換
		fpAdapter =new FragmentPagerAdapter(getSupportFragmentManager())
		{
			@Override
			public int getCount()
			{
				return listData.size();
			}
			@Override
			public Fragment getItem(int arg0)
			{
				return listData.get(arg0);
			}
		};
		//設置適配器
		viewPager1.setAdapter(fpAdapter);
	}
}
此時即可實現觸屏切換效果,但同時需要注意:
(1).需要把MainActivity繼承從Activity改為FragmentActivity.
(2).可能會遇到錯誤”類型對於參數(FragmentFirst)不適用”,你需要把導入修改”import android.support.v4.app.Fragment;”同時注意support.v4.app/view 保持一致.
此時設置底部滑動切換的圖標時需要添加自定義變量:
//底部圖標
private ImageView image1;
private ImageView image2;
private ImageView image3;
private LinearLayout layout1;
private LinearLayout layout2;
private LinearLayout layout3;
然後,在setViewPager()函數中”viewPager1.setAdapter(fpAdapter)”後添加如下代碼即可實現,其中switch中0、1、2對應listData中裝入的三個布局:
//初始化圖標
image1 = (ImageView) findViewById(R.id.image1);
image2 = (ImageView) findViewById(R.id.image2);
image3 = (ImageView) findViewById(R.id.image3);
layout1 = (LinearLayout) findViewById(R.id.bottomLayout1);
layout2 = (LinearLayout) findViewById(R.id.bottomLayout2);
layout3 = (LinearLayout) findViewById(R.id.bottomLayout3);
//滑屏變換圖標
viewPager1.setOnPageChangeListener(new OnPageChangeListener() {
	@Override
	public void onPageSelected(int arg0)
	{
		switch(arg0)
		{
		case 0:
			//圖片切換
			image1.setImageDrawable(getResources().getDrawable(R.drawable.image_bottom_effect));
			image2.setImageDrawable(getResources().getDrawable(R.drawable.image_bottom_frame_no));
			image3.setImageDrawable(getResources().getDrawable(R.drawable.image_bottom_person_no));
			//背景加深
			layout1.setBackgroundResource(R.drawable.image_toolbar_bg_sel);
			layout2.setBackgroundResource(R.drawable.image_toolbar_bg);
			layout3.setBackgroundResource(R.drawable.image_toolbar_bg);
			break;
		case 1:
			//圖片切換
			image1.setImageDrawable(getResources().getDrawable(R.drawable.image_bottom_effect_no));
			image2.setImageDrawable(getResources().getDrawable(R.drawable.image_bottom_frame));
			image3.setImageDrawable(getResources().getDrawable(R.drawable.image_bottom_person_no));
			//背景加深
			layout1.setBackgroundResource(R.drawable.image_toolbar_bg);
			layout2.setBackgroundResource(R.drawable.image_toolbar_bg_sel);
			layout3.setBackgroundResource(R.drawable.image_toolbar_bg);
			break;
		case 2:
			//圖片切換
			image1.setImageDrawable(getResources().getDrawable(R.drawable.image_bottom_effect_no));
			image2.setImageDrawable(getResources().getDrawable(R.drawable.image_bottom_frame_no));
			image3.setImageDrawable(getResources().getDrawable(R.drawable.image_bottom_person));
			//背景加深
			layout1.setBackgroundResource(R.drawable.image_toolbar_bg);
			layout2.setBackgroundResource(R.drawable.image_toolbar_bg);
			layout3.setBackgroundResource(R.drawable.image_toolbar_bg_sel);
			break;
		}
	}
	@Override
	public void onPageScrolled(int arg0, float arg1, int arg2)
	{

	}
	@Override
	public void onPageScrollStateChanged(int arg0)
	{

	}
});
設置FragmentFirst.java文件,通過onActivityCreated函數實現點擊按鈕事件:
public class FragmentFirst extends Fragment {

	@Override
    public View onCreateView(LayoutInflater inflater, ViewGroup container,Bundle savedInstanceState) {
        return inflater.inflate(R.layout.fragment_layout1, container, false);
    }

	@Override
	public void onActivityCreated(Bundle savedInstanceState) {
		super.onActivityCreated(savedInstanceState);
		//添加Fragment1的響應事件
		Button button1 = (Button) getActivity().findViewById(R.id.button1);
		button1.setOnClickListener(new OnClickListener() {
            @Override
            public void onClick(View v) {
                TextView textView1 = (TextView) getActivity().findViewById(R.id.textView1);
                textView1.setText("在fragment1中點擊按鈕");
            }
        });
	}
}
FragmentThird.java實現點擊Fragment3中按鈕獲取Fragment2中數據:
public class FragmentThird extends Fragment {

	@Override
    public View onCreateView(LayoutInflater inflater, ViewGroup container,Bundle savedInstanceState) {
        return inflater.inflate(R.layout.fragment_layout3, container, false);
    }

	@Override
	public void onActivityCreated(Bundle savedInstanceState) {
		super.onActivityCreated(savedInstanceState);
		//添加Fragment3的響應事件
		Button button3 = (Button) getActivity().findViewById(R.id.button3);
		button3.setOnClickListener(new OnClickListener() {
            @Override
            public void onClick(View v) {
                TextView textView1 = (TextView) getActivity().findViewById(R.id.textView2);
                TextView textView3 = (TextView) getActivity().findViewById(R.id.textView3);
                textView3.setText("點擊按鈕獲取fragment2信息:\n"+textView1.getText());
            }
        });
	}
}
PS:是否Fragment的XML文件TextView需要設置不同的id,如果Fragment1與Fragment2設置相同的textView1程序沒有響應.
 Android 三大網絡通訊方式詳解
Android平台有三種網絡接口可以使用,他們分別是:java.net.*(標准Java接口)、Org.apache接口和Android.net.*(Androi
 傻瓜式Android APP開發入門教程
工作中有做過手機App項目,前端和android或ios程序員配合完成整個項目的開發,開發過程中與ios程序配合基本沒什麼問題,而android各種機子和rom的
 七年iOS工作經驗的我為什麼放棄了iOS而選擇了Android
本文由碼農網 – 唐李川原創翻譯,轉載請看清文末的轉載要求,歡迎參與我們的付費投稿計劃! 上周一我非常開心。因為我被允許為一個曾經工作過的客戶開始開發一個
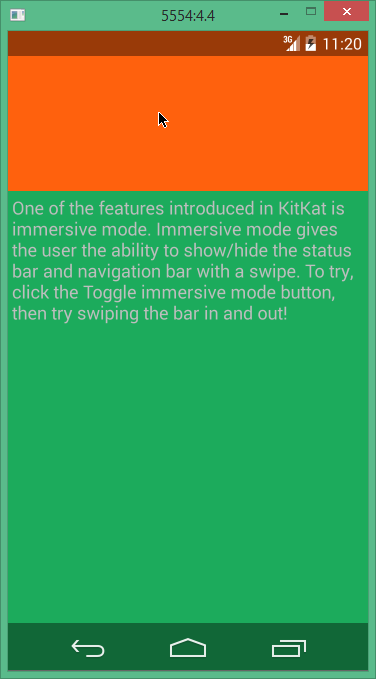 Android 沉浸式全屏的實現方法
Android 4.4 帶來了沉浸式全屏體驗, 在沉浸式全屏模式下, 狀態欄、 虛擬按鍵動態隱藏, 應用可 以使用完整的屏幕空間, 按照 Google 的說法,