編輯:關於Android編程
公司項目需要做推送,我們選擇用小米推送,經過一段時間的摸索,終於可以簡單的使用小米推送了。
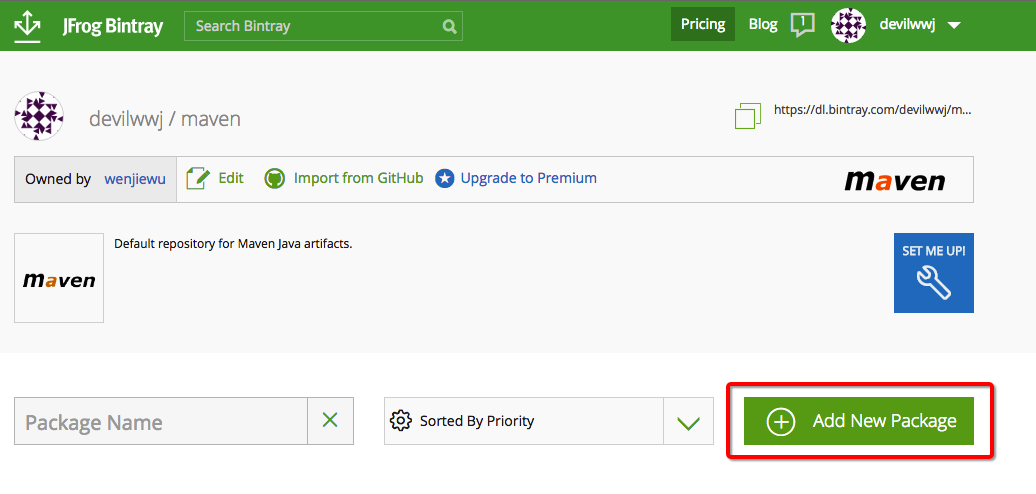
1.創建賬號登入後 登入後選擇消息推送:

2.進入後創建項目,按照步驟創建完後如下

3.後台配置完了,我們再配置代碼,第一次使用小米推送 我下了個Demo再把裡面有用的復制到自己項目中:
先把jar包復制到自己項目中

首先在繼承了Application的類中放入
private static final String APP_ID = "2882303761517483058";
 // user your appid the key.
 private static final String APP_KEY = "5951748376058";

 // 此TAG在adb logcat中檢索自己所需要的信息, 只需在命令行終端輸入 adb logcat | grep
 // com.xiaomi.mipushdemo
 public static final String TAG = "com.dodonew.epapp";
Id 和key什麼的都是在小米開放平台創建項目獲得的
再在Appliction的oncreate()方法中加入:
if (shouldInit()) {
   MiPushClient.registerPush(this, APP_ID, APP_KEY);
  }
  LoggerInterface newLogger = new LoggerInterface() {

   @Override
   public void setTag(String tag) {
    // ignore
   }

   @Override
   public void log(String content, Throwable t) {
    Log.d(TAG, content, t);
   }

   @Override
   public void log(String content) {
    Log.d(TAG, content);
   }
  };
  Logger.setLogger(this, newLogger);
  if (sHandler == null) {
   sHandler = new DemoHandler(getApplicationContext());
  }
其中shouldInit()和Handler:
private boolean shouldInit() {
  ActivityManager am = ((ActivityManager) getSystemService(Context.ACTIVITY_SERVICE));
  List<RunningAppProcessInfo> processInfos = am.getRunningAppProcesses();
  String mainProcessName = getPackageName();
  int myPid = Process.myPid();
  for (RunningAppProcessInfo info : processInfos) {
   if (info.pid == myPid && mainProcessName.equals(info.processName)) {
    return true;
   }
  }
  return false;
 }

 public static DemoHandler getHandler() {
  return sHandler;
 }
 public static class DemoHandler extends Handler {

  private Context context;

  public DemoHandler(Context context) {
   this.context = context;
  }

  @Override
  public void handleMessage(Message msg) {
   String s = (String) msg.obj;
   if (sMainActivity != null) {
    sMainActivity.refreshLogInfo();
   }
   if (!TextUtils.isEmpty(s)) {
    // Toast.makeText(context, s, Toast.LENGTH_LONG).show();
   }
  }
 }
說實話Demohander其實沒什麼用,主要是彈出toast提示而已,我不喜歡 於是隱藏了toast
其中MainActivity中的refreshLogInfo()方法:
public void refreshLogInfo() {
  String AllLog = "";
  for (String log : logList) {
   AllLog = AllLog + log + "\n\n";
  }
  System.out.println("mainActivity中消息推送::::::::"+AllLog);
 }
然後 我們要把Demo中的一個廣播類復制過來 ,由於內容一樣我就不復制了
其中有個方法很重要: onNotificationMessageClicked(Context context, MiPushMessage message)
這個方法的作用是:當有消息推送到你手機上時 你在通知欄點擊這個消息時,就能在這個方法中通過message獲取 消息的內容。
第二 加入你想點擊通知欄中的消息 跳轉到你app中指定的界面 也在這個方法中執行 只需要添加一段代碼即可:
Intent intent = new Intent(context, 指定的Activity.class);
  intent.setFlags(Intent.FLAG_ACTIVITY_NEW_TASK);
  context.startActivity(intent);
最後 我們要去配置AndroidManifest.xml
一些權限我就不放了 和以前的權限放一起了不好區分,可以去Demo中找
在權限下面放
<permission
  android:name="com.dodonew.epapp.permission.MIPUSH_RECEIVE"
  android:protectionLevel="signature" />

 <uses-permission android:name="com.dodonew.epapp.permission.MIPUSH_RECEIVE" />
 <uses-permission android:name="android.permission.VIBRATE" />
在<Appliction/>中添加
<service
   android:name="com.xiaomi.push.service.XMJobService"
   android:enabled="true"
   android:exported="false"
   android:permission="android.permission.BIND_JOB_SERVICE"
   android:process=":pushservice" />

  <service
   android:name="com.xiaomi.push.service.XMPushService"
   android:enabled="true"
   android:process=":pushservice" />

  <service
   android:name="com.xiaomi.mipush.sdk.PushMessageHandler"
   android:enabled="true"
   android:exported="true" />
  <service
   android:name="com.xiaomi.mipush.sdk.MessageHandleService"
   android:enabled="true" />

  <receiver
   android:name="com.dodonew.epapp.control.receiver.XiaoMiMessageReceiver"
   android:exported="true">
   <intent-filter>
    <action android:name="com.xiaomi.mipush.RECEIVE_MESSAGE" />
   </intent-filter>
   <intent-filter>
    <action android:name="com.xiaomi.mipush.MESSAGE_ARRIVED" />
   </intent-filter>
   <intent-filter>
    <action android:name="com.xiaomi.mipush.ERROR" />
   </intent-filter>
  </receiver>
  <receiver
   android:name="com.xiaomi.push.service.receivers.NetworkStatusReceiver"
   android:exported="true">
   <intent-filter>
    <action android:name="android.net.conn.CONNECTIVITY_CHANGE" />

    <category android:name="android.intent.category.DEFAULT" />
   </intent-filter>
  </receiver>
  <receiver
   android:name="com.xiaomi.push.service.receivers.PingReceiver"
   android:exported="false"
   android:process=":pushservice">
   <intent-filter>
    <action android:name="com.xiaomi.push.PING_TIMER" />
   </intent-filter>
  </receiver>
就可以了。
以上就是本文的全部內容,希望對大家的學習有所幫助,也希望大家多多支持本站。
 Android自定義控件實現底部菜單(上)
今天我們封裝一個底部的菜單欄,這個大多數的應用都會用到,因此我們來自定義,方便以後項目的使用。該控件的實現將分上下篇來介紹,先來看一個菜單欄的子控件–MenuItemM,
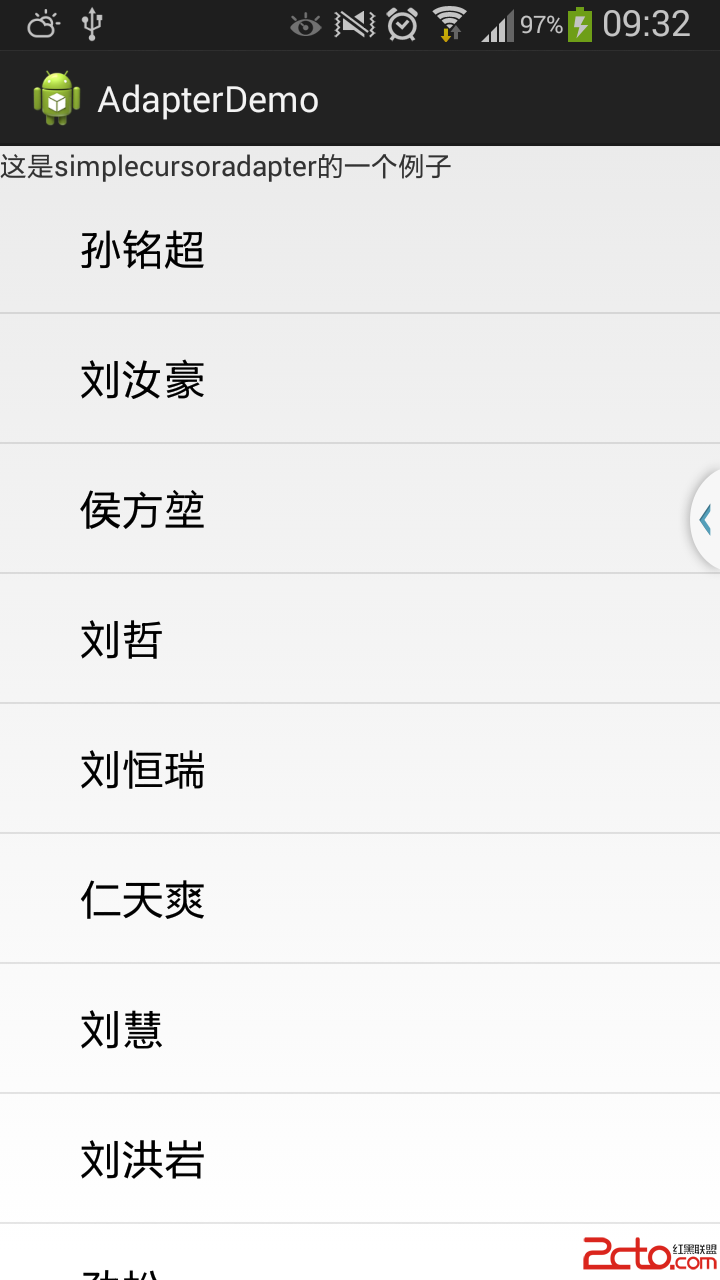 Android 適配器教程(二)
上次我寫了一個類似前言的東西,向大家粗略介紹了一下什麼是適配器,並且舉了一個最簡單的例子幫助大家理解,使用了安卓原生的ArrayAdapter,現在我們繼續
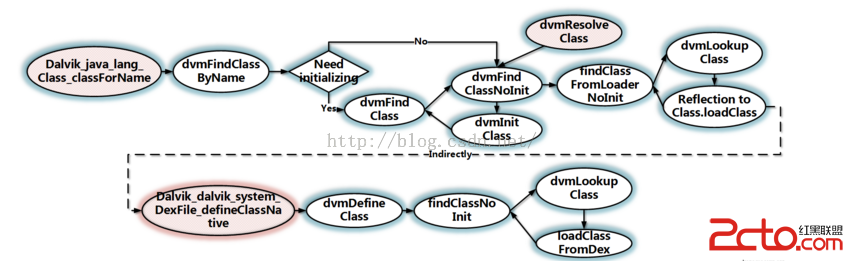 Android安全之旅系列博客導讀
總結下近一年的學習經歷,以中國的新年為節點。時間從2015年年後到今天,2015年年末。首先我必須要感謝前輩的書籍和高質量的博客。1、重新學習了一遍《Linux內核源代碼
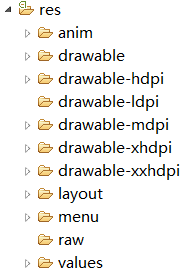 Android資源文件中各種XML的作用與解釋
眾所周知,XML是一種可擴展標記語言,它被用來傳輸和存儲數據。在Android中也會隨處可見XML文件,包括一個android項目不可缺少的AndroidManifest