編輯:關於Android編程
核心思想是通過BitmapFactory.Options來縮放圖片,主要是用到了它的inSampleSize參數(采樣率)
當inSampleSize為1的時候,采樣後的圖片大小為圖片的原始大小;
當inSampleSize為2的時候,采樣後的圖片的寬和高是原來的1/2,也就是說,它的像素點是原來的1/4,占的內存自然就是原來的1/4了。以此類推。
當inSampleSize小於1的時候,效果和等於1的時候是一樣的。
壓縮流程如下:
1.BitmapFactory.Options 的inJustDecodeBounds參數設置為true(這個時候BitmapFactory只是解析圖片的原始寬高,並不會去加載圖片)。
2.從BitmapFactory.Options 中取出圖片的原始寬高,outWidth,outHeight。
3.根據自己的需要設置合適的采樣率。
4.BitmapFactory.Options 的inJustDecodeBounds參數設置為false,然後就可以加載圖片了。
下面我們看代碼:
public Bitmap decodeSampledBitmapFromBytes(byte[] bytes,int reqWidth,int reqHeight){
    final BitmapFactory.Options options = new BitmapFactory.Options();
    options.inJustDecodeBounds = true;
    BitmapFactory.decodeByteArray(bytes,0,bytes.length,options);
    options.inSampleSize = calculateInSampleSize(options,reqWidth,reqHeight);
    options.inJustDecodeBounds = false;
    return BitmapFactory.decodeByteArray(bytes,0,bytes.length,options);
  }


public int calculateInSampleSize(BitmapFactory.Options options,int reqWidth,int reqHeight){
    if(reqWidth == 0 || reqHeight == 0){
      return 1;
    }
    final int width = options.outWidth;
    final int height = options.outHeight;
    int inSampleSize = 1;
    if( width > reqWidth || height > reqHeight){
      final int halfWidth = width / 2;
      final int halfHeight = height / 2;
      while ((halfWidth / inSampleSize) >= reqWidth && (halfHeight / inSampleSize) >= reqHeight){
        inSampleSize *=2;
      }
    }
    return inSampleSize;
  }
如此一來,就完成了一張圖片的壓縮。另外,BitmapFactory還有其它的decode方法,我們也可以仿照上面的來寫。
public Bitmap decodeSampledBitmapFromResource(Resources res,int resId,int reqWidth,int reqHeight){
    final BitmapFactory.Options options = new BitmapFactory.Options();
    options.inJustDecodeBounds = true;
    BitmapFactory.decodeResource(res,resId,options);
    options.inSampleSize = calculateInSampleSize(options,reqWidth,reqHeight);
    options.inJustDecodeBounds = false;
    return BitmapFactory.decodeResource(res,resId,options);
  }
public Bitmap decodeSampledBitmapFromDescrptor(FileDescriptor fd,int reqWidth,int reqHeight){
    final BitmapFactory.Options options = new BitmapFactory.Options();
    options.inJustDecodeBounds = true;
    BitmapFactory.decodeFileDescriptor(fd,null,options);
    options.inSampleSize = calculateInSampleSize(options,reqWidth,reqHeight);
    options.inJustDecodeBounds = false;
    return BitmapFactory.decodeFileDescriptor(fd,null,options);
  }
接下來結合一個小demo來實現一個完整的流程
先把圖片壓縮類封裝起來
public class ImageResizer {
  private static final String TAG = "ImageResizer";

  public ImageResizer(){}

  public Bitmap decodeSampledBitmapFromResource(Resources res,int resId,int reqWidth,int reqHeight){
    final BitmapFactory.Options options = new BitmapFactory.Options();
    options.inJustDecodeBounds = true;
    BitmapFactory.decodeResource(res,resId,options);
    options.inSampleSize = calculateInSampleSize(options,reqWidth,reqHeight);
    options.inJustDecodeBounds = false;
    return BitmapFactory.decodeResource(res,resId,options);
  }

  public Bitmap decodeSampledBitmapFromBytes(byte[] bytes,int reqWidth,int reqHeight){
    final BitmapFactory.Options options = new BitmapFactory.Options();
    Bitmap a = BitmapFactory.decodeByteArray(bytes,0,bytes.length,options);
    Log.d(TAG, "before bitmap : " + a.getRowBytes() * a.getHeight());
    options.inJustDecodeBounds = true;
    BitmapFactory.decodeByteArray(bytes,0,bytes.length,options);
    options.inSampleSize = calculateInSampleSize(options,reqWidth,reqHeight);
    options.inJustDecodeBounds = false;
    Bitmap b = BitmapFactory.decodeByteArray(bytes,0,bytes.length,options);
    Log.d(TAG, "after bitmap : " + b.getRowBytes() * b.getHeight());
    return b;
  }

  public Bitmap decodeSampledBitmapFromDescrptor(FileDescriptor fd,int reqWidth,int reqHeight){
    final BitmapFactory.Options options = new BitmapFactory.Options();
    options.inJustDecodeBounds = true;
    BitmapFactory.decodeFileDescriptor(fd,null,options);
    options.inSampleSize = calculateInSampleSize(options,reqWidth,reqHeight);
    options.inJustDecodeBounds = false;
    return BitmapFactory.decodeFileDescriptor(fd,null,options);
  }

  public int calculateInSampleSize(BitmapFactory.Options options,int reqWidth,int reqHeight){
    if(reqWidth == 0 || reqHeight == 0){
      return 1;
    }
    final int width = options.outWidth;
    final int height = options.outHeight;
    int inSampleSize = 1;
    if( width > reqWidth || height > reqHeight){
      final int halfWidth = width / 2;
      final int halfHeight = height / 2;
      while ((halfWidth / inSampleSize) >= reqWidth && (halfHeight / inSampleSize) >= reqHeight){
        inSampleSize *=2;
      }
    }
    return inSampleSize;
  }
}
然後就可以拿來用了:
activity_main2.xml
<RelativeLayout xmlns:android="http://schemas.android.com/apk/res/android"
  xmlns:tools="http://schemas.android.com/tools"
  android:id="@+id/activity_main2"
  android:layout_width="match_parent"
  android:layout_height="match_parent"
  android:paddingBottom="@dimen/activity_vertical_margin"
  android:paddingLeft="@dimen/activity_horizontal_margin"
  android:paddingRight="@dimen/activity_horizontal_margin"
  android:paddingTop="@dimen/activity_vertical_margin"
  tools:context="com.example.yuan.test.Main2Activity">

  <ImageView
    android:id="@+id/main2Iv"
    android:layout_width="200dp"
    android:layout_height="200dp" />

</RelativeLayout>
Main2Activity.Java
public class Main2Activity extends AppCompatActivity {

  private ImageView iv;

  @Override
  protected void onCreate(Bundle savedInstanceState) {
    super.onCreate(savedInstanceState);
    setContentView(R.layout.activity_main2);
    initView();
    testHttp(iv);
  }

  private void testHttp(final ImageView iv) {

    new Thread(new Runnable() {
      @Override
      public void run() {
        String urlString = "https://static.pexels.com/photos/295818/pexels-photo-295818.jpeg";
        HttpURLConnection urlConnection = null;
        InputStream in = null;
        ByteArrayOutputStream outStream = null;
        try {
          URL url = new URL(urlString);
          urlConnection = (HttpURLConnection) url.openConnection();
          in = urlConnection.getInputStream();
          byte[] buffer = new byte[1024];
          int len;
          outStream = new ByteArrayOutputStream();
          while ((len = in.read(buffer)) != -1){
            outStream.write(buffer,0,len);
          }
          final byte[] data = outStream.toByteArray();
          runOnUiThread(new Runnable() {
            @Override
            public void run() { //在主線程加載UI
              iv.setImageBitmap(new ImageResizer().decodeSampledBitmapFromBytes(data,200,200));
            }
          });
        } catch (IOException e) {
          e.printStackTrace();
        }finally {
          try {
            if(urlConnection !=null){
              urlConnection.disconnect();
            }
            if(in != null){
              in.close();
            }
            if(outStream != null){
              outStream.close();
            }
          } catch (IOException e) {
            e.printStackTrace();
          }
        }
      }
    }).start();
  }

  private void initView() {
    iv = (ImageView) findViewById(R.id.main2Iv);
  }
}
最後記得獲取網絡權限
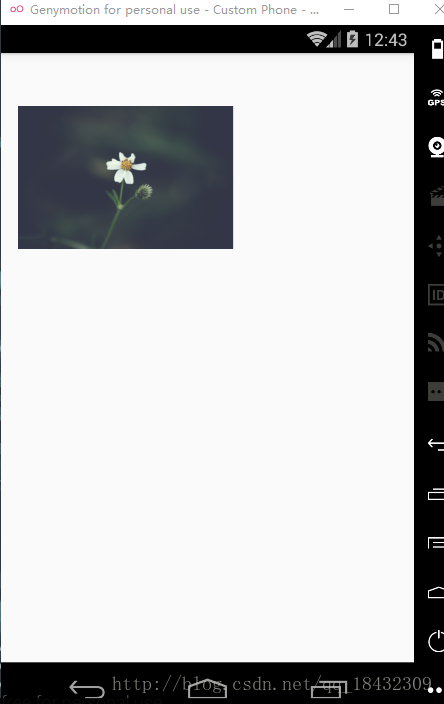
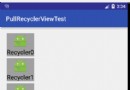
運行的結果:
壓縮前後的bitmap大小對比

壓縮前後的bitmap大小對比
以上就是本文的全部內容,希望對大家的學習有所幫助,也希望大家多多支持本站。
 Android--百度地圖密鑰申請+環境配置(一)
簡介在使用百度地圖SDK為您提供的各種LBS能力之前,您需要獲取百度地圖移動版的開發密鑰,該密鑰與您的百度賬戶相關聯。因此,您必須先有百度帳戶,才能獲得開發密鑰。並且,該
 Android RecyclerView添加上拉加載更多功能
上一篇文章已經介紹了如何為RecyclerView添加FootView,在此基礎上,要添加分頁加載的功能其實已經很簡單了。 上一篇文章地址:為RecyclerView添加
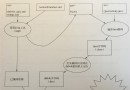 Android apk打包過程
概述android打包過程,下面這張圖取自Android開發權威指南,非常清晰。整個過程使用的工具有 名稱 功能介紹 在操作系統中的路徑 aapt An
 Android學習筆記之ContentProvider和Uri詳解
本文介紹了自定義Content Provider的相關內容,完全解析內容提供者的用法。Content Provider,內容提供者,相信大家對這個組件的名字都不陌生,可能