編輯:關於Android編程
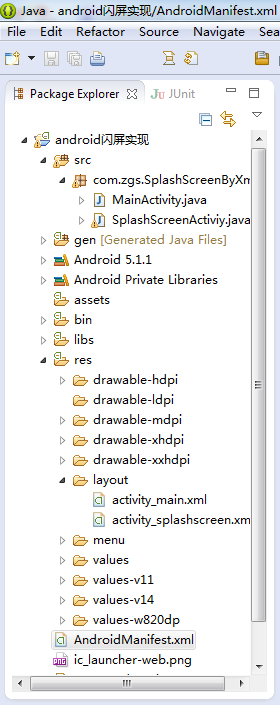
一、項目目錄結構
二、activity_main.xml代碼
<RelativeLayout xmlns:android="http://schemas.android.com/apk/res/android"
  xmlns:tools="http://schemas.android.com/tools"
  android:layout_width="match_parent"
  android:layout_height="match_parent"
  android:paddingBottom="@dimen/activity_vertical_margin"
  android:paddingLeft="@dimen/activity_horizontal_margin"
  android:paddingRight="@dimen/activity_horizontal_margin"
  android:paddingTop="@dimen/activity_vertical_margin"
  tools:context="com.zgs.SplashScreenByXml.MainActivity" >
  <TextView
    android:layout_width="wrap_content"
    android:layout_height="wrap_content"
    android:text="主頁面" />
</RelativeLayout>
三、activity_splashscreen.xml代碼
<?xml version="1.0" encoding="utf-8"?>
<LinearLayout xmlns:android="http://schemas.android.com/apk/res/android"
  android:layout_width="match_parent"
  android:layout_height="match_parent"
  android:background="@drawable/splash"
  android:orientation="vertical"
  android:id="@+id/ll_splashActivity">
  <TextView
    android:id="@+id/tv_countDown"
    android:layout_width="wrap_content"
    android:layout_height="wrap_content"
    android:layout_gravity="end"
    android:layout_marginEnd="20dp"
    android:layout_marginTop="20dp"
    android:textColor="@android:color/white"
    android:textSize="20sp" />
</LinearLayout>
四、SplashScreenActiviy.java代碼
package com.zgs.SplashScreenByXml;
import android.app.Activity;
import android.content.Intent;
import android.os.Bundle;
import android.os.CountDownTimer;
import android.os.Handler;
import android.view.View;
import android.view.Window;
import android.view.WindowManager;
import android.view.animation.Animation;
import android.view.animation.Animation.AnimationListener;
import android.view.animation.TranslateAnimation;
import android.widget.LinearLayout;
import android.widget.TextView;
import com.zgs.CommonlySplashScreen.R;
public class SplashScreenActiviy extends Activity {
  private TextView tv_countDown;
  private LinearLayout ll_splashActivity;
  @Override
  protected void onCreate(Bundle savedInstanceState) {
    super.onCreate(savedInstanceState);
    // 通過下面兩行代碼也可實現全屏無標題欄顯示activity
    // getWindow().setFlags(WindowManager.LayoutParams.FLAG_FULLSCREEN, WindowManager.LayoutParams.FLAG_FULLSCREEN);
    // this.requestWindowFeature(Window.FEATURE_NO_TITLE);
    setContentView(R.layout.activity_splashscreen);
    tv_countDown = (TextView) findViewById(R.id.tv_countDown);
    ll_splashActivity = (LinearLayout) findViewById(R.id.ll_splashActivity);
    /********************************************************************************
     *
     * 普通閃屏實現方式
     *
     * ******************************************************************************/
    /*new Handler().postDelayed(new Runnable() {
      @Override
      public void run() {
        Intent intent = new Intent(getApplicationContext(), MainActivity.class);
        startActivity(intent);
        finish();
      }
    }, 1000*4);*/
    /********************************************************************************
     *
     * 倒計時閃屏實現方式
     *
     * ******************************************************************************/
    /*MyCountDownTimer mc = new MyCountDownTimer(4000, 1000);
    mc.start();
    new Handler().postDelayed(new Runnable() {
      @Override
      public void run() {
        Intent intent = new Intent(getApplicationContext(), MainActivity.class);
        startActivity(intent);
        finish();
      }
    }, 1000*4);*/
    /********************************************************************************
     *
     * 倒計時+動畫閃屏實現方式
     *
     * ******************************************************************************/
    MyCountDownTimer mc = new MyCountDownTimer(4000, 1000);
    mc.start();
    new Handler().postDelayed(new Runnable() {
      @Override
      public void run() {
        //左移動畫
        TranslateAnimation ta = new TranslateAnimation(Animation.RELATIVE_TO_PARENT, 0, Animation.RELATIVE_TO_PARENT, -1, Animation.RELATIVE_TO_PARENT, 0, Animation.RELATIVE_TO_PARENT, 0);
        ta.setDuration(2000); //設置動畫執行的時間
        ta.setFillAfter(true);//當動畫結束後 動畫停留在結束位置,然後等啟動主界面後將其銷毀
        ll_splashActivity.startAnimation(ta);
        ta.setAnimationListener(new AnimationListener() {
          @Override
          public void onAnimationStart(Animation arg0) {
          }
          @Override
          public void onAnimationRepeat(Animation arg0) {
          }
          @Override
          public void onAnimationEnd(Animation arg0) {
            Intent intent = new Intent(getApplicationContext(), MainActivity.class);
            startActivity(intent);
            finish();
          }
        });
      }
    }, 1000*4);
  }
  class MyCountDownTimer extends CountDownTimer {
    //millisInFuture:倒計時的總數,單位毫秒
    //例如 millisInFuture=1000;表示1秒
    //countDownInterval:表示間隔多少毫秒,調用一次onTick方法()
    //例如: countDownInterval =1000;表示每1000毫秒調用一次onTick()
    public MyCountDownTimer(long millisInFuture, long countDownInterval) {
      super(millisInFuture, countDownInterval);
    }
    public void onFinish() {
      tv_countDown.setText("開始跳轉……");
    }
    public void onTick(long millisUntilFinished) {
      tv_countDown.setText("倒計時(" + millisUntilFinished / 1000 + ")");
    }
  }
}
五、MainActivity.java代碼
package com.zgs.SplashScreenByXml;
import android.app.Activity;
import android.os.Bundle;
import com.zgs.CommonlySplashScreen.R;
public class MainActivity extends Activity {
  @Override
  protected void onCreate(Bundle savedInstanceState) {
    super.onCreate(savedInstanceState);
    setContentView(R.layout.activity_main);
    //為了讓閃屏結束後更自然的過度到主界面,去除主界面的啟動動畫,將下面函數的第一個參數設為0即可
    overridePendingTransition(0, 0);
  }
}
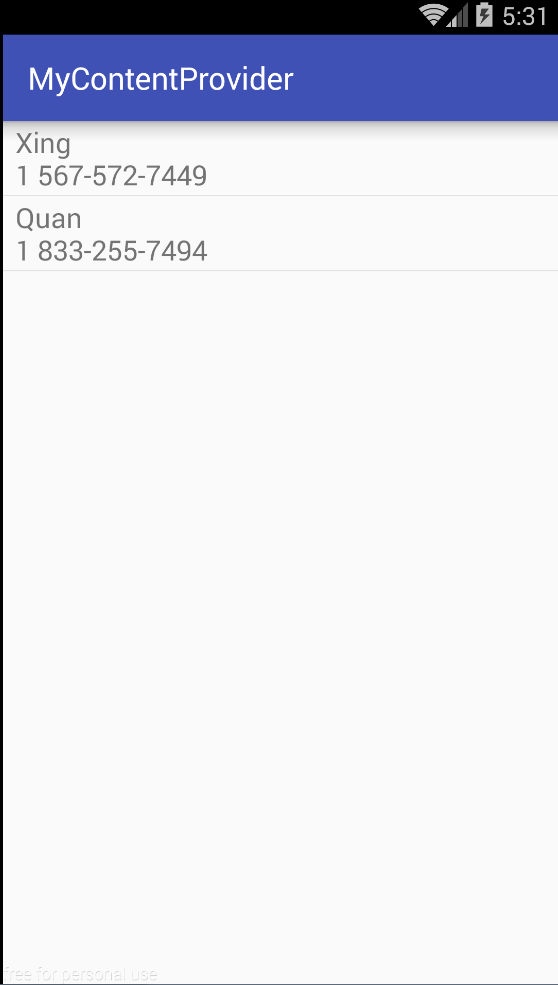
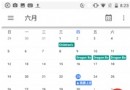
六、操作演示
以上所述是小編給大家介紹的Android中閃屏實現方法小結(普通閃屏、倒計時閃屏、倒計時+動畫閃屏),希望對大家有所幫助,如果大家有任何疑問請給我留言,小編會及時回復大家的。在此也非常感謝大家對本站網站的支持!
 Android N上一些新特性的介紹
隨著6月份google的Android N preview 4版本的發布,筆者也借著東風在N6P上體驗了一把新系統,試玩之後認為有幾點新的感受特記錄之。1.分屏多任務進入
 Android WebView填坑記錄
前言在應用程序開發過程中,經常會采用webview來展現某些界面,這樣就可以不受發布版本控制,實時更新,遇到問題可以快速修復。但是在Android開發中,由於Androi
 Android平台調用Web Service:示例
最近在學習Android,隨著移動設備的流行,當軟件走上商業化的道路,為了爭奪市場,肯定需要支持Android的,所以開始接觸了Android,不過只了解皮毛就好,因為我
 Android實現軟件列表的點擊啟動另外一個程序功能【附demo源碼下載】
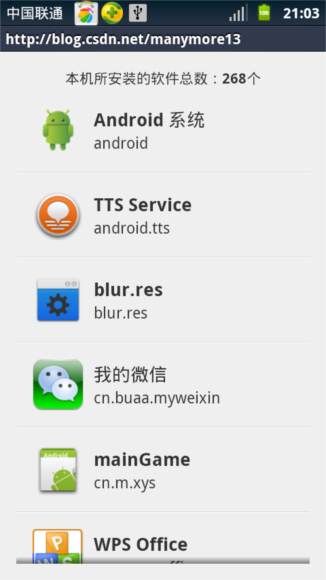
本文實例講述了Android實現軟件列表的點擊啟動另外一個程序功能。分享給大家供大家參考,具體如下:目前面世的許多軟件中有這麼一個功能:設備中安裝了哪些軟件,他們會以一個