編輯:關於Android編程
使用Android Studio
一、在build.gradle(Module:app)添加代碼 下載,調用插件
apply plugin: 'com.android.application'
android {
 compileSdkVersion 24
 buildToolsVersion "24.0.1"

 defaultConfig {
  applicationId "com.example.ly.scanrfid"
  minSdkVersion 19
  targetSdkVersion 24
  versionCode 1
  versionName "1.0"
 }
 buildTypes {
  release {
   minifyEnabled false
   proguardFiles getDefaultProguardFile('proguard-android.txt'), 'proguard-rules.pro'
  }
 }
 repositories {
  mavenCentral()
  maven {
  url "http://dl.bintray.com/journeyapps/maven"
  }
 }
}
dependencies {
 compile fileTree(dir: 'libs', include: ['*.jar'])
 testCompile 'junit:junit:4.12'
 compile 'com.android.support:appcompat-v7:24.2.1'
 // Supports Android 4.0.3 and later (API level 15)
 compile 'com.journeyapps:zxing-android-embedded:2.0.1@aar'
 // Supports Android 2.1 and later (API level 7), but not optimal for later Android versions.
 // If you only plan on supporting Android 4.0.3 and up, you don't need to include this.
 compile 'com.journeyapps:zxing-android-legacy:2.0.1@aar'
 // Convenience library to launch the scanning and encoding Activities.
 // It automatically picks the best scanning library from the above two, depending on the
 // Android version and what is available.
 compile 'com.journeyapps:zxing-android-integration:2.0.1@aar'
 // Version 3.0.x of zxing core contains some code that is not compatible on Android 2.2 and earlier.
 // This mostly affects encoding, but you should test if you plan to support these versions.
 // Older versions e.g. 2.2 may also work if you need support for older Android versions.
 compile 'com.google.zxing:core:3.0.1'
}
二、添加權限
<?xml version="1.0" encoding="utf-8"?>
<manifest xmlns:android="http://schemas.android.com/apk/res/android"
   package="com.example.ly.scanrfid">
 <uses-permission android:name="android.permission.CAMERA"/>
 <uses-permission android:name="android.permission.VIBRATE"/>
 <uses-permission android:name="android.permission.INTERNET"/>
 <application
  android:allowBackup="true"
  android:icon="@mipmap/ic_launcher"
  android:label="@string/app_name"
  android:supportsRtl="true"
  android:theme="@style/AppTheme">
  <activity android:name=".MainActivity">
   <intent-filter>
    <action android:name="android.intent.action.MAIN"/>
    <category android:name="android.intent.category.LAUNCHER"/>
   </intent-filter>
  </activity>
 </application>
</manifest>
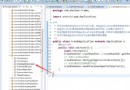
三、Activity代碼
package com.example.ly.scanrfid;
import android.content.Intent;
import android.support.v7.app.AppCompatActivity;
import android.os.Bundle;
import android.util.Log;
import android.view.View;
import android.widget.Toast;
import com.google.zxing.integration.android.IntentIntegrator;
import com.google.zxing.integration.android.IntentResult;
public class MainActivity extends AppCompatActivity {
 @Override
 protected void onCreate(Bundle savedInstanceState) {
  super.onCreate(savedInstanceState);
  setContentView(R.layout.activity_main);
 }
 // 掃描按鈕點擊監聽事件
 public void clickScan(View view) {
  //掃描操作
  IntentIntegrator integrator = new IntentIntegrator(MainActivity.this);
  integrator.initiateScan();
 }
 @Override
 protected void onActivityResult(int requestCode, int resultCode, Intent data) {
  // 跳轉掃描頁面返回掃描數據
  IntentResult scanResult = IntentIntegrator.parseActivityResult(requestCode, resultCode, data);
  //  判斷返回值是否為空
  if (scanResult != null) {
   //返回條形碼數據
   String result = scanResult.getContents();
   Log.d("code", result);
   Toast.makeText(this, result, Toast.LENGTH_LONG).show();
  }
 }
}
以上就是本文的全部內容,希望本文的內容對大家的學習或者工作能帶來一定的幫助,同時也希望多多支持本站!
 Android客戶端項目全局異常處理和服務器數據保存
愛生活,愛Android!相信每一個Android開發人員都喜愛自己的工作,每天不停的生產代碼,不停的解決Bug, 樂在其中,不斷的學習,不斷的總結,我們應該積累出自己寫
 Android 自定義ViewGroup 實戰篇 -) 實現FlowLayout
1、概述 上一篇已經基本給大家介紹了如何自定義ViewGroup,如果你還不了解,請查看:Android 手把手教您自定ViewGroup ,本篇將使用上篇
 android 自定義控件實現流式布局
什麼是流式布局呢?也不知道哪個高手把它稱之為流失布局,叫什麼不重要,重要的是要知道怎麼實現,今天就實現下這個功能,先看下圖什麼就知道是什麼是流式布局了,做過電商的app或
 史上最詳細的Android Studio系列教程一--下載和安裝
背景相信大家對Android Studio已經不陌生了,Android Studio是Google於2013 I/O大會針對Android開發推出的新的開發工具,目前很多