編輯:關於Android編程
本文實例講述了Android編程開發之NotiFication用法。分享給大家供大家參考,具體如下:
notification就是通知的意思,安卓中指通知欄,一般用在電話,短信,郵件,鬧鐘鈴聲,在手機的狀態欄上就會出現一個小圖標,提示用戶處理這個快訊,這時手從上方滑動狀態欄就可以展開並處理這個快訊。
在幫助文檔中,是這麼說的, notification類表示一個持久的通知,將提交給用戶使用NotificationManager。已添加的Notification.Builder,使其更容易構建通知。
notification是一種讓你的應用程序在沒有開啟情況下或在後台運行警示用戶。它是看不見的程序組件(Broadcast Receiver,Service和不活躍的Activity)警示用戶有需要注意的事件發生的最好途徑。
先來區分以下狀態欄和狀態條的區別:
1、狀態條就是手機屏幕最上方的一個條形狀的區域;
在狀態條有好多信息量:比如usb連接圖標,手機信號圖標,電池電量圖標,時間圖標等等;

2、狀態欄就是手從狀態條滑下來的可以伸縮的view;
在狀態欄中一般有兩類(使用FLAG_標記):
(1)正在進行的程序; (2)是通知事件;

一個Notification傳送的信息有:
1、一個狀態條圖標;
2、在拉伸的狀態欄窗口中顯示帶有大標題,小標題,圖標的信息,並且有處理該點擊事件:比如調用該程序的入口類;
3、閃光,LED,或者震動;
下面對Notification類中的一些常量,字段,方法簡單介紹一下:
常量:
DEFAULT_ALL 使用所有默認值,比如聲音,震動,閃屏等等
DEFAULT_LIGHTS 使用默認閃光提示
DEFAULT_SOUNDS 使用默認提示聲音
DEFAULT_VIBRATE 使用默認手機震動
注意:在加入手機震動效果時一定要在項目清單文件中加入手機震動權限:
復制代碼 代碼如下:<uses-permission android:name="android.permission.VIBRATE" />
下面通過簡單額小實例來具體實現notification功能:
MainActivity.java:
package com.example.lession16_notifi;
import android.app.Activity;
import android.app.Notification;
import android.app.NotificationManager;
import android.app.PendingIntent;
import android.content.res.Resources.NotFoundException;
import android.os.Bundle;
import android.view.View;
import android.widget.Toast;
public class MainActivity extends Activity {
  private NotificationManager notificationManager;
  @Override
  protected void onCreate(Bundle savedInstanceState) {
    super.onCreate(savedInstanceState);
    setContentView(R.layout.activity_main);
    // 第一步:通過getSystemService()方法得到NotificationManager對象;
    notificationManager = (NotificationManager) getSystemService(NOTIFICATION_SERVICE);
  }
  // 測試
  public void test1(View v) {
    showNotification("來短信了", "5557", "hello!", R.drawable.ic_launcher,
        R.drawable.ic_launcher);
  }
  // 第二步:對Notification的一些屬性進行設置比如:內容,圖標,標題,相應notification的動作進行處理等等;
  public void showNotification(String tickerText, String contentTitle,
      String contentText, int iconId, int notiId) {
    // 創建一個Notification
    Notification notification = new Notification();
    // 設置通知 消息 圖標
    notification.icon = iconId;
    // 設置發出消息的內容
    notification.tickerText = tickerText;
    // 設置發出通知的時間
    notification.when = System.currentTimeMillis();
    // 設置顯示通知時的默認的發聲、振動、Light效果
    notification.defaults = Notification.DEFAULT_VIBRATE;// 振動
    // Notification notification = new Notification(R.drawable.ic_launcher,"有新的消息", System.currentTimeMillis());
    // 3步:PendingIntent android系統負責維護
    PendingIntent pendingIntent = PendingIntent.getActivity(this, 0,getIntent(), 0);
    // 4步:設置更加詳細的信息
    notification.setLatestEventInfo(this, contentTitle, contentText,pendingIntent);
    // 5步:使用notificationManager對象的notify方法 顯示Notification消息 需要制定
    // Notification的標識
    notificationManager.notify(notiId, notification);
  }
  // 6步:使用notificationManager對象的cancelAll()方法取消
  public void clearNoti(View v) {
    notificationManager.cancelAll();// 清除所有
  }
}
布局文件activity_main.xml:
<RelativeLayout xmlns:android="http://schemas.android.com/apk/res/android"
  xmlns:tools="http://schemas.android.com/tools"
  android:layout_width="match_parent"
  android:layout_height="match_parent"
  android:paddingBottom="@dimen/activity_vertical_margin"
  android:paddingLeft="@dimen/activity_horizontal_margin"
  android:paddingRight="@dimen/activity_horizontal_margin"
  android:paddingTop="@dimen/activity_vertical_margin"
  tools:context=".MainActivity" >
  <Button
    android:id="@+id/button1"
    android:layout_width="wrap_content"
    android:layout_height="wrap_content"
    android:layout_alignParentLeft="true"
    android:layout_alignParentRight="true"
    android:layout_alignParentTop="true"
    android:layout_marginTop="22dp"
    android:onClick="test1"
    android:text="@string/text_notifi" />
  <Button
    android:id="@+id/button2"
    android:layout_width="match_parent"
    android:layout_height="wrap_content"
    android:layout_alignLeft="@+id/button1"
    android:layout_below="@+id/button1"
    android:layout_marginTop="60dp"
    android:onClick="clearNoti"
    android:text="@string/text_clear" />
</RelativeLayout>
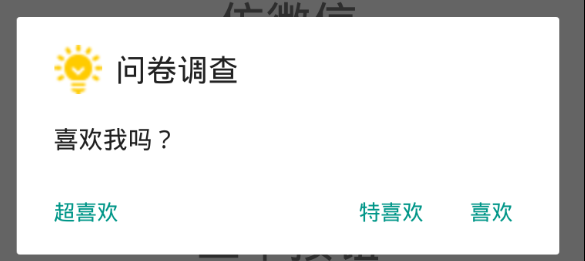
布局效果:

切記實現震動效果在清單文件中加入權限:
復制代碼 代碼如下:<uses-permission android:name="android.permission.VIBRATE" />
實現效果如下:


希望本文所述對大家Android程序設計有所幫助。
 Android控件之CheckBox、RadioButton用法實例分析
本文實例講述了Android控件之CheckBox、RadioButton用法。分享給大家供大家參考。具體如下:CheckBox和RadioButton控件都只有選中和未
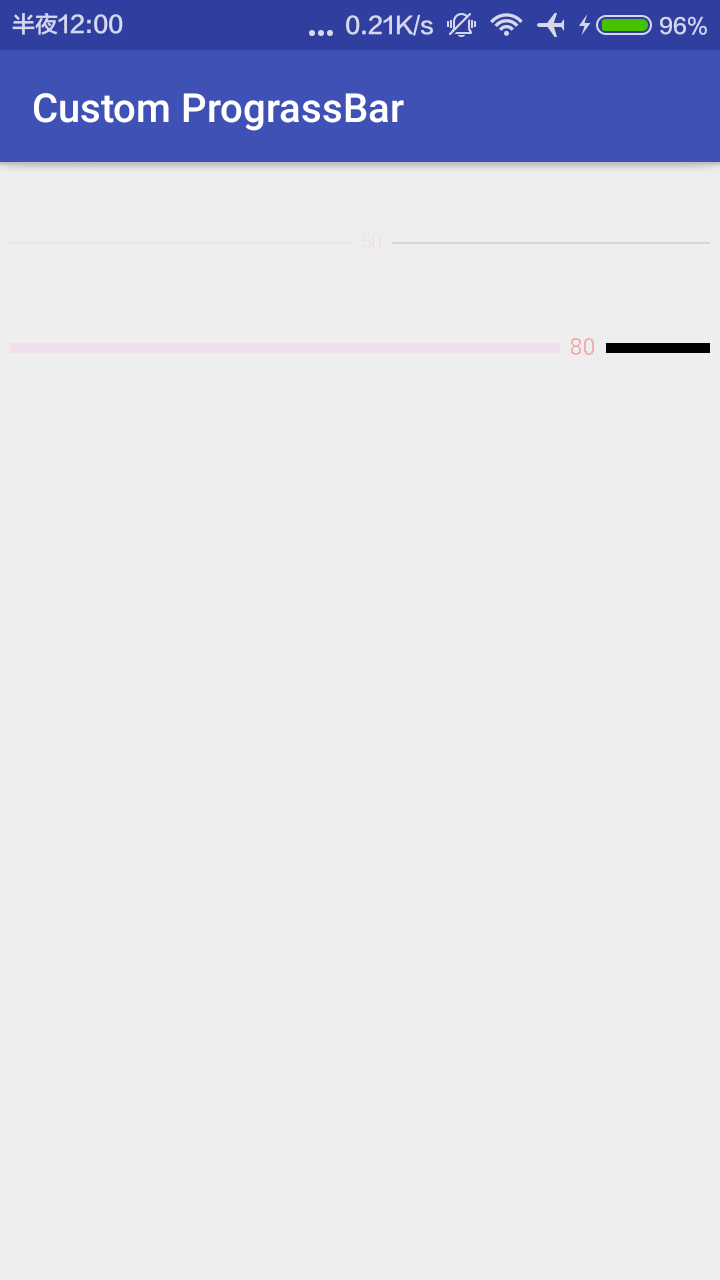 Android自定義水平的帶進度的刻度條
如何自定義控件?1.自定義屬性的聲明和獲取;2.測量onMeasure;3.布局onLayout(ViewGroup);4.繪制onDraw;5.onTouchEvent
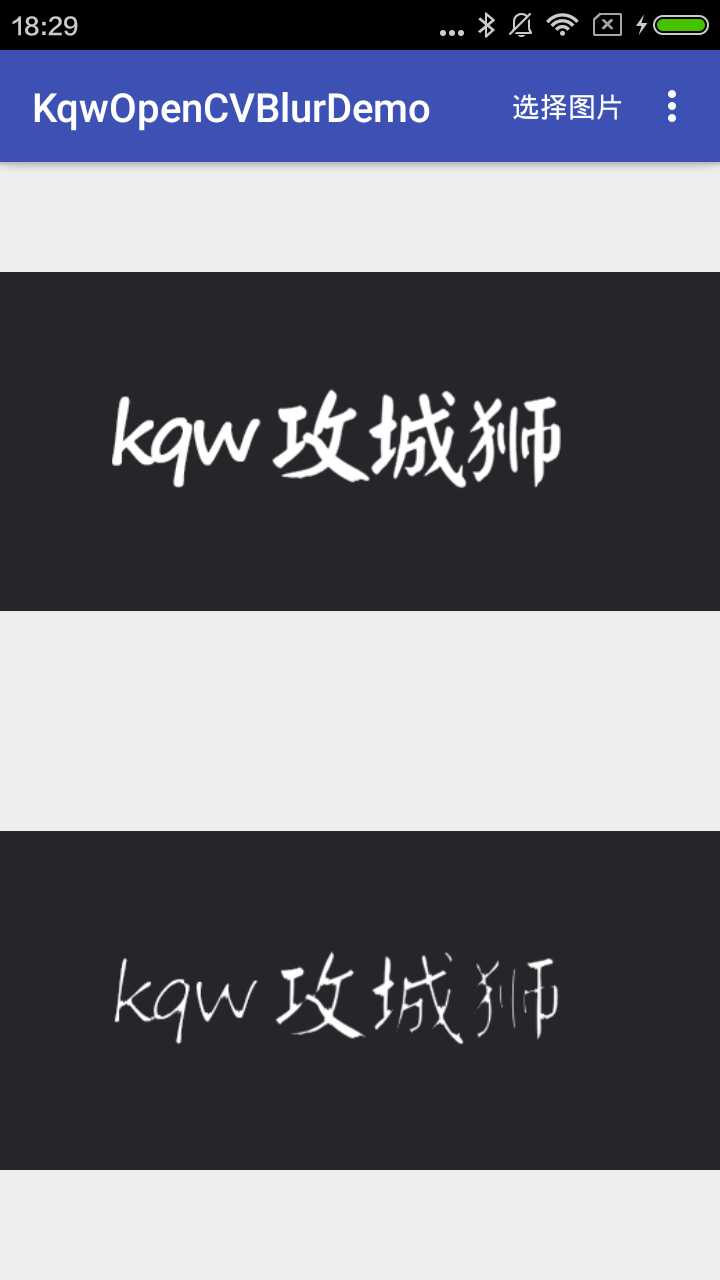 OpenCV實現圖像暗區擴張(腐蝕圖片)
效果圖源碼KqwOpenCVBlurDemo暗區擴張,也叫腐蝕,要實現這樣的效果,我們可以選取一個合適大小的核,用被核覆蓋的最小值代替錨點像素。我們首先定義一個合適大小的
 C++調用Android函數彈出一個提示框中出現的問題總結
(1) 在Jni.cpp中使用了全局變量 JNIEnv *g_env;jobject g_object;然後在第一個傳入了JNIEnv和jobject的函數中初