編輯:關於Android編程
SurfaceFlinger是一個獨立的進程,我們來看下init.rc關於SurfaceFlinger的代碼,我們可以看到SurfaceFlinger是屬於core服務的。
service surfaceflinger /system/bin/surfaceflinger
    class core
    user system
    group graphics drmrpc
    onrestart restart zygote
    writepid /dev/cpuset/system-background/tasks
SurfaceFlinger的main函數在framework/native/services/surfaceflinger/main_surfaceflinger.cpp中
int main(int, char**) {
    // When SF is launched in its own process, limit the number of
    // binder threads to 4.
    ProcessState::self()->setThreadPoolMaxThreadCount(4);//設置了Binder線程池最大線程為4

    // start the thread pool
    sp ps(ProcessState::self());
    ps->startThreadPool();

    // instantiate surfaceflinger
    sp flinger = new SurfaceFlinger();//創建SurfaceFlinger對象

    setpriority(PRIO_PROCESS, 0, PRIORITY_URGENT_DISPLAY);

    set_sched_policy(0, SP_FOREGROUND);

    // initialize before clients can connect
    flinger->init();//調用SurfaceFlinger的init函數

    // publish surface flinger
    sp sm(defaultServiceManager());
    sm->addService(String16(SurfaceFlinger::getServiceName()), flinger, false);//像serviceManager注冊SurfaceFlinger服務

    // run in this thread
    flinger->run();//運行

    return 0;
}
在主函數中先設置了該進程的binder線程池最大數為4,然後創建了SurfaceFlinger對象,並且調用了其init函數,接著把SurfaceFlinger服務注冊到ServiceManager中,然後調用了run方法。
我們先來看下init函數
void SurfaceFlinger::init() {
ALOGI( "SurfaceFlinger's main thread ready to run. "
"Initializing graphics H/W...");
Mutex::Autolock _l(mStateLock);
// initialize EGL for the default display 將EGL初始化成缺省的顯示
mEGLDisplay = eglGetDisplay(EGL_DEFAULT_DISPLAY);
eglInitialize(mEGLDisplay, NULL, NULL);
// start the EventThread
sp vsyncSrc = new DispSyncSource(&mPrimaryDispSync,
vsyncPhaseOffsetNs, true, "app");
mEventThread = new EventThread(vsyncSrc);
sp sfVsyncSrc = new DispSyncSource(&mPrimaryDispSync,
sfVsyncPhaseOffsetNs, true, "sf");
mSFEventThread = new EventThread(sfVsyncSrc);
mEventQueue.setEventThread(mSFEventThread);
// Initialize the H/W composer object. There may or may not be an
// actual hardware composer underneath.
mHwc = new HWComposer(this,//顯示硬件抽象類
*static_cast(this));
// get a RenderEngine for the given display / config (can't fail)
mRenderEngine = RenderEngine::create(mEGLDisplay, mHwc->getVisualID());
// retrieve the EGL context that was selected/created
mEGLContext = mRenderEngine->getEGLContext();
LOG_ALWAYS_FATAL_IF(mEGLContext == EGL_NO_CONTEXT,
"couldn't create EGLContext");
// initialize our non-virtual displays 初始化顯示設備
for (size_t i=0 ; iisConnected(i) || type==DisplayDevice::DISPLAY_PRIMARY) {
// All non-virtual displays are currently considered secure.
bool isSecure = true;
createBuiltinDisplayLocked(type);
wp token = mBuiltinDisplays[i];
sp producer;
sp consumer;
BufferQueue::createBufferQueue(&producer, &consumer,
new GraphicBufferAlloc());
sp<framebuffersurface> fbs = new FramebufferSurface(*mHwc, i,
consumer);
int32_t hwcId = allocateHwcDisplayId(type);
sp hw = new DisplayDevice(this,
type, hwcId, mHwc->getFormat(hwcId), isSecure, token,
fbs, producer,
mRenderEngine->getEGLConfig());
if (i > DisplayDevice::DISPLAY_PRIMARY) {
// FIXME: currently we don't get blank/unblank requests
// for displays other than the main display, so we always
// assume a connected display is unblanked.
ALOGD("marking display %zu as acquired/unblanked", i);
hw->setPowerMode(HWC_POWER_MODE_NORMAL);
}
mDisplays.add(token, hw);
}
}
// make the GLContext current so that we can create textures when creating Layers
// (which may happens before we render something)
getDefaultDisplayDevice()->makeCurrent(mEGLDisplay, mEGLContext);
mEventControlThread = new EventControlThread(this);
mEventControlThread->run("EventControl", PRIORITY_URGENT_DISPLAY);
// set a fake vsync period if there is no HWComposer
if (mHwc->initCheck() != NO_ERROR) {
mPrimaryDispSync.setPeriod(16666667);
}
// initialize our drawing state
mDrawingState = mCurrentState;
// set initial conditions (e.g. unblank default device)
initializeDisplays();//初始化顯示設備
// start boot animation
startBootAnim();//啟動開機動畫
} </framebuffersurface>
init函數主要工作:
1.初始化OpenGL ES圖形庫。
2. 創建顯示設備的抽象代表,負責和顯示設備打交道。
3. 創建顯示設備對象。
4. 啟動EventThread。監聽和處理SurfaceFlinger中的事件。
5.設置軟件VSync信號周期。
6.初始化顯示設備,調用initializeDisplays完成。
7.啟動開機動畫,調用了startBootAnim函數,只是設置了兩個屬性,其中一個ctl.start是啟動了bootanim進程。
void SurfaceFlinger::startBootAnim() {
    // start boot animation
    property_set("service.bootanim.exit", "0");
    property_set("ctl.start", "bootanim");
}
MessageQueue和用於消息和事件的分發,這個和之前博客分析過得消息機制原理差不多。
我們先來看看MessageQueue的主要成員變量
class MessageQueue {
    ......
    sp mFlinger;//指向SurfaceFlinger
    sp mLooper;//消息機制Looper對象
    sp mEventThread;//關聯的EventThread
    sp mEvents;
    sp mEventTube;
    sp mHandler;//消息處理器
其中mEventThread主要是用來分析VSync信號的。
在SurfaceFlinger中有一個類型為MessageQueue的成員變量mEventQueue,在SurfaceFlinger的onFirstRef函數中會調用其init函數
void SurfaceFlinger::onFirstRef()
{
    mEventQueue.init(this);
}
在這個函數中創建了Looper和Handler對象,並且把flinger保存在mFlinger中。
void MessageQueue::init(const sp我們來看下Handler這個類,它是MessageQueue類的一個內部類,這個類主要處理3個消息。& flinger) { mFlinger = flinger; mLooper = new Looper(true); mHandler = new Handler(*this); }
    class Handler : public MessageHandler {
        enum {
            eventMaskInvalidate     = 0x1,//invalidate消息
            eventMaskRefresh        = 0x2,//刷新消息
            eventMaskTransaction    = 0x4
        };
        MessageQueue& mQueue;
        int32_t mEventMask;
    public:
        Handler(MessageQueue& queue) : mQueue(queue), mEventMask(0) { }
        virtual void handleMessage(const Message& message);
        void dispatchRefresh();
        void dispatchInvalidate();
        void dispatchTransaction();
    };
我們再來看在SurfaceFlinger主函數最後調用了下面方法。
flinger->run();
SurfaceFlinger::run代碼如下
void SurfaceFlinger::run() {
    do {
        waitForEvent();
    } while (true);
}
waitForEvent函數如下:
void SurfaceFlinger::waitForEvent() {
    mEventQueue.waitMessage();
}
然後又調用了EventQueue的waitMessage方法,記住這裡是在主線程中循環調用的。
下面我們來看下waitMessage方法,flushCommands之前在分析Binder的博客中有提到,主要是清理工作的,和Binder驅動的交互關了。而pollOnce是消息機制,主要調用了epoll_wait函數,會阻塞,阻塞完了會分發消息隊列中的消息。這裡的消息只有自己在Handler中發的消息,還有在setEventThread中自己添加的fd。
void MessageQueue::waitMessage() {
    do {
        IPCThreadState::self()->flushCommands();
        int32_t ret = mLooper->pollOnce(-1);
        switch (ret) {
            case Looper::POLL_WAKE:
            case Looper::POLL_CALLBACK:
                continue;
            case Looper::POLL_ERROR:
                ALOGE("Looper::POLL_ERROR");
            case Looper::POLL_TIMEOUT:
                // timeout (should not happen)
                continue;
            default:
                // should not happen
                ALOGE("Looper::pollOnce() returned unknown status %d", ret);
                continue;
        }
    } while (true);
}
下面是Handler中發送消息,這個會在pollOnce中處理。
void MessageQueue::Handler::dispatchRefresh() {
    if ((android_atomic_or(eventMaskRefresh, &mEventMask) & eventMaskRefresh) == 0) {
        mQueue.mLooper->sendMessage(this, Message(MessageQueue::REFRESH));
    }
}

void MessageQueue::Handler::dispatchInvalidate() {
    if ((android_atomic_or(eventMaskInvalidate, &mEventMask) & eventMaskInvalidate) == 0) {
        mQueue.mLooper->sendMessage(this, Message(MessageQueue::INVALIDATE));
    }
}

void MessageQueue::Handler::dispatchTransaction() {
    if ((android_atomic_or(eventMaskTransaction, &mEventMask) & eventMaskTransaction) == 0) {
        mQueue.mLooper->sendMessage(this, Message(MessageQueue::TRANSACTION));
    }
}
在SurfaceFlinger的init函數還調用了如下函數
    mSFEventThread = new EventThread(sfVsyncSrc);
    mEventQueue.setEventThread(mSFEventThread);
我們來看setEventThread函數會調用Looper的addFd,這個最終也會在pollOnce中執行。mEventThread是一個EventThread對象,調用createEventConnection來創建一個連接。EventThread是一個線程類用來分發VSync消息。這個我們後面講解VSync信號的時候還會詳細分析。
void MessageQueue::setEventThread(const sp& eventThread)
{
    mEventThread = eventThread;
    mEvents = eventThread->createEventConnection();
    mEventTube = mEvents->getDataChannel();
    mLooper->addFd(mEventTube->getFd(), 0, Looper::EVENT_INPUT,
            MessageQueue::cb_eventReceiver, this);
}
DisplayDevice是顯示設備的抽象,定義了3中類型的顯示設備。
1.DISPLAY_PRIMARY:主顯示設備,通常是LCD屏
2.DISPLAY_EXTERNAL:擴展顯示設備。通過HDMI輸出的顯示信號
3.DISPLAY_VIRTUAL:虛擬顯示設備,通過WIFI輸出信號
這3鐘設備,第一種是基本配置,另外兩種需要硬件支持。這裡我們主要講解第一種。
SurfaceFlinger中需要顯示的圖層(layer)將通過DisplayDevice對象傳遞到OpenGLES中進行合成,合成之後的圖像再通過HWComposer對象傳遞到Framebuffer中顯示。DisplayDevice對象中的成員變量mVisibleLayersSortedByZ保存了所有需要顯示在本顯示設備中顯示的Layer對象,同時DisplayDevice對象也保存了和顯示設備相關的顯示方向、顯示區域坐標等信息。
上節在SurfaceFlinger的init函數中有一段代碼來創建DisplayDevice對象
for (size_t i=0 ; iisConnected(i) || type==DisplayDevice::DISPLAY_PRIMARY) {
// All non-virtual displays are currently considered secure.
bool isSecure = true;
createBuiltinDisplayLocked(type);//給顯示設備分配一個token
wp token = mBuiltinDisplays[i];
sp producer;
sp consumer;
BufferQueue::createBufferQueue(&producer, &consumer,
new GraphicBufferAlloc());
sp<framebuffersurface> fbs = new FramebufferSurface(*mHwc, i,
consumer);
int32_t hwcId = allocateHwcDisplayId(type);
sp hw = new DisplayDevice(this,
type, hwcId, mHwc->getFormat(hwcId), isSecure, token,
fbs, producer,
mRenderEngine->getEGLConfig());
if (i > DisplayDevice::DISPLAY_PRIMARY) {
// FIXME: currently we don't get blank/unblank requests
// for displays other than the main display, so we always
// assume a connected display is unblanked.
ALOGD("marking display %zu as acquired/unblanked", i);
hw->setPowerMode(HWC_POWER_MODE_NORMAL);
}
mDisplays.add(token, hw);//把顯示設備對象保存在mDisplays列表中
}
} </framebuffersurface>
所有顯示設備的輸出都要通過HWComposer對象完成,因此上面這段代碼先調用了HWComposer的isConnected來檢查顯示設備是否已連接,只有和顯示設備連接的DisplayDevice對象才會被創建出來。即使沒有任何物理顯示設備被檢測到,SurfaceFlinger都需要一個DisplayDevice對象才能正常工作,因此,DISPLAY_PRIMARY類型的DisplayDevice對象總是會被創建出來。
createBuiltinDisplayLocked函數就是為顯示設備對象創建一個BBinder類型的Token而已。
void SurfaceFlinger::createBuiltinDisplayLocked(DisplayDevice::DisplayType type) {
    ALOGW_IF(mBuiltinDisplays[type],
            "Overwriting display token for display type %d", type);
    mBuiltinDisplays[type] = new BBinder();
    DisplayDeviceState info(type);
    // All non-virtual displays are currently considered secure.
    info.isSecure = true;
    mCurrentState.displays.add(mBuiltinDisplays[type], info);
}
然後會調用createBufferQueue函數創建一個producer和consumer,這個之前分析過。然後又創建了一個FramebufferSurface對象。這裡我們看到在新建FramebufferSurface對象時把consumer參數傳入了代表是一個消費者。而在DisplayDevice的構造函數中,會創建一個Surface對象傳遞給底層的OpenGL ES使用,而這個Surface是一個生產者。在OpenGl ES中合成好了圖像之後會將圖像數據寫到Surface對象中,這將觸發consumer對象的onFrameAvailable函數被調用:
這就是Surface數據好了就通知消費者來拿數據做顯示用,在onFrameAvailable函數匯總,通過nextBuffer獲得圖像數據,然後調用HWComposer對象mHwc的fbPost函數輸出。
void FramebufferSurface::onFrameAvailable(const BufferItem& /* item */) {
    sp buf;
    sp acquireFence;
    status_t err = nextBuffer(buf, acquireFence);
    if (err != NO_ERROR) {
        ALOGE("error latching nnext FramebufferSurface buffer: %s (%d)",
                strerror(-err), err);
        return;
    }
    err = mHwc.fbPost(mDisplayType, acquireFence, buf);
    if (err != NO_ERROR) {
        ALOGE("error posting framebuffer: %d", err);
    }
}
fbPost函數最後通過調用Gralloc模塊的post函數來輸出圖像。
我們再來看看DisplayDevice的構造函數
DisplayDevice::DisplayDevice(
        const sp& flinger,
        DisplayType type,
        int32_t hwcId,
        int format,
        bool isSecure,
        const wp& displayToken,
        const sp& displaySurface,
        const sp& producer,
        EGLConfig config)
    : lastCompositionHadVisibleLayers(false),
      mFlinger(flinger),
      mType(type), mHwcDisplayId(hwcId),
      mDisplayToken(displayToken),
      mDisplaySurface(displaySurface),
      mDisplay(EGL_NO_DISPLAY),
      mSurface(EGL_NO_SURFACE),
      mDisplayWidth(), mDisplayHeight(), mFormat(),
      mFlags(),
      mPageFlipCount(),
      mIsSecure(isSecure),
      mSecureLayerVisible(false),
      mLayerStack(NO_LAYER_STACK),
      mOrientation(),
      mPowerMode(HWC_POWER_MODE_OFF),
      mActiveConfig(0)
{
    mNativeWindow = new Surface(producer, false);//創建Surface對象
    ANativeWindow* const window = mNativeWindow.get();

    /*
     * Create our display's surface
     */

    EGLSurface surface;
    EGLDisplay display = eglGetDisplay(EGL_DEFAULT_DISPLAY);
    if (config == EGL_NO_CONFIG) {
        config = RenderEngine::chooseEglConfig(display, format);
    }
    surface = eglCreateWindowSurface(display, config, window, NULL);
    eglQuerySurface(display, surface, EGL_WIDTH,  &mDisplayWidth);
    eglQuerySurface(display, surface, EGL_HEIGHT, &mDisplayHeight);

    // Make sure that composition can never be stalled by a virtual display
    // consumer that isn't processing buffers fast enough. We have to do this
    // in two places:
    // * Here, in case the display is composed entirely by HWC.
    // * In makeCurrent(), using eglSwapInterval. Some EGL drivers set the
    //   window's swap interval in eglMakeCurrent, so they'll override the
    //   interval we set here.
    if (mType >= DisplayDevice::DISPLAY_VIRTUAL)//虛擬設備不支持圖像合成
        window->setSwapInterval(window, 0);

    mConfig = config;
    mDisplay = display;
    mSurface = surface;
    mFormat  = format;
    mPageFlipCount = 0;
    mViewport.makeInvalid();
    mFrame.makeInvalid();

    // virtual displays are always considered enabled 虛擬設備屏幕認為是不關閉的
    mPowerMode = (mType >= DisplayDevice::DISPLAY_VIRTUAL) ?
                  HWC_POWER_MODE_NORMAL : HWC_POWER_MODE_OFF;

    // Name the display.  The name will be replaced shortly if the display
    // was created with createDisplay().
    switch (mType) {//顯示設備名稱
        case DISPLAY_PRIMARY:
            mDisplayName = "Built-in Screen";
            break;
        case DISPLAY_EXTERNAL:
            mDisplayName = "HDMI Screen";
            break;
        default:
            mDisplayName = "Virtual Screen";    // e.g. Overlay #n
            break;
    }

    // initialize the display orientation transform.
    setProjection(DisplayState::eOrientationDefault, mViewport, mFrame);
}
上面構造函數主要功能是創建了一個Surface對象mNativeWindow,同時用它作為參數創建EGLSurface對象,這個EGLSurface對象是OpenGL ES中繪圖需要的。
這樣,在DisplayDevice中就建立了一個通向Framebuffer的通道,只要向DisplayDevice的mSurface寫入數據。就會到消費者FrameBufferSurface的onFrameAvailable函數,然後到HWComposer在到Gralloc模塊,最後輸出到顯示設備。
swapBuffers函數將內部緩沖區的圖像數據刷新到顯示設備的Framebuffer中,它通過調用eglSwapBuffers函數來完成緩沖區刷新工作。但是注意調用swapBuffers輸出圖像是在顯示設備不支持硬件composer的情況下。
void DisplayDevice::swapBuffers(HWComposer& hwc) const {
    // We need to call eglSwapBuffers() if:
    //  (1) we don't have a hardware composer, or
    //  (2) we did GLES composition this frame, and either
    //    (a) we have framebuffer target support (not present on legacy
    //        devices, where HWComposer::commit() handles things); or
    //    (b) this is a virtual display
    if (hwc.initCheck() != NO_ERROR ||
            (hwc.hasGlesComposition(mHwcDisplayId) &&
             (hwc.supportsFramebufferTarget() || mType >= DISPLAY_VIRTUAL))) {
        EGLBoolean success = eglSwapBuffers(mDisplay, mSurface);
        if (!success) {
            EGLint error = eglGetError();
            if (error == EGL_CONTEXT_LOST ||
                    mType == DisplayDevice::DISPLAY_PRIMARY) {
                LOG_ALWAYS_FATAL("eglSwapBuffers(%p, %p) failed with 0x%08x",
                        mDisplay, mSurface, error);
            } else {
                ALOGE("eglSwapBuffers(%p, %p) failed with 0x%08x",
                        mDisplay, mSurface, error);
            }
        }
    }
    else if(hwc.supportsFramebufferTarget() || mType >= DISPLAY_VIRTUAL)
    {
        EGLBoolean success = eglSwapBuffersVIV(mDisplay, mSurface);
        if (!success) {
            EGLint error = eglGetError();
            ALOGE("eglSwapBuffersVIV(%p, %p) failed with 0x%08x",
                        mDisplay, mSurface, error);
        }
    }

    status_t result = mDisplaySurface->advanceFrame();
    if (result != NO_ERROR) {
        ALOGE("[%s] failed pushing new frame to HWC: %d",
                mDisplayName.string(), result);
    }
}
在之前的博客分析過,當VSync信號到來時會調用HWComposer類中的vsync函數
void HWComposer::vsync(int disp, int64_t timestamp) {
    if (uint32_t(disp) < HWC_NUM_PHYSICAL_DISPLAY_TYPES) {
        {
            Mutex::Autolock _l(mLock);

            // There have been reports of HWCs that signal several vsync events
            // with the same timestamp when turning the display off and on. This
            // is a bug in the HWC implementation, but filter the extra events
            // out here so they don't cause havoc downstream.
            if (timestamp == mLastHwVSync[disp]) {
                ALOGW("Ignoring duplicate VSYNC event from HWC (t=%" PRId64 ")",
                        timestamp);
                return;
            }

            mLastHwVSync[disp] = timestamp;
        }

        char tag[16];
        snprintf(tag, sizeof(tag), "HW_VSYNC_%1u", disp);
        ATRACE_INT(tag, ++mVSyncCounts[disp] & 1);

        mEventHandler.onVSyncReceived(disp, timestamp);
    }
}
這個函數主要是調用了mEventHandler.onVSyncReceived函數,讓我們先來看下mEventHandler的構造,看HWComposer的構造函數,mEventHandler是傳入的參數handler。
HWComposer::HWComposer(
        const sp& flinger,
        EventHandler& handler)
    : mFlinger(flinger),
      mFbDev(0), mHwc(0), mNumDisplays(1),
      mCBContext(new cb_context),
      mEventHandler(handler),
      mDebugForceFakeVSync(false)
那麼我們就要看新建HWComposer的地方了,是在SurfaceFlinger的init函數中新建的,這handler就是SurfaceFlinger對象。
    mHwc = new HWComposer(this,
            *static_cast(this));
因此上面的mEventHandler.onVSyncReceived函數,就是調用了SurfaceFlinger的onVSyncReceived函數
void SurfaceFlinger::onVSyncReceived(int type, nsecs_t timestamp) {
    bool needsHwVsync = false;

    { // Scope for the lock
        Mutex::Autolock _l(mHWVsyncLock);
        if (type == 0 && mPrimaryHWVsyncEnabled) {
            needsHwVsync = mPrimaryDispSync.addResyncSample(timestamp);
        }
    }

    if (needsHwVsync) {
        enableHardwareVsync();
    } else {
        disableHardwareVsync(false);
    }
}
上面函數我們主要看下DispSync的addResyncSample函數,看這個函數之前先看下DispSync的構造函數,在構造函數中啟動了DispSyncThread線程
DispSync::DispSync() :
        mRefreshSkipCount(0),
        mThread(new DispSyncThread()) {

    mThread->run("DispSync", PRIORITY_URGENT_DISPLAY + PRIORITY_MORE_FAVORABLE);
我們再來看addResyncSample函數,將VSync信號的時間戳保存大搜了數組mResyncSamples中。然後調用了updateModelLocked函數繼續分發VSync信號。
bool DispSync::addResyncSample(nsecs_t timestamp) {
    Mutex::Autolock lock(mMutex);

    size_t idx = (mFirstResyncSample + mNumResyncSamples) % MAX_RESYNC_SAMPLES;
    mResyncSamples[idx] = timestamp;

    if (mNumResyncSamples < MAX_RESYNC_SAMPLES) {
        mNumResyncSamples++;
    } else {
        mFirstResyncSample = (mFirstResyncSample + 1) % MAX_RESYNC_SAMPLES;
    }

    updateModelLocked();

    if (mNumResyncSamplesSincePresent++ > MAX_RESYNC_SAMPLES_WITHOUT_PRESENT) {
        resetErrorLocked();
    }

    if (kIgnorePresentFences) {
        // If we don't have the sync framework we will never have
        // addPresentFence called.  This means we have no way to know whether
        // or not we're synchronized with the HW vsyncs, so we just request
        // that the HW vsync events be turned on whenever we need to generate
        // SW vsync events.
        return mThread->hasAnyEventListeners();
    }

    return mPeriod == 0 || mError > kErrorThreshold;
}
updateModelLocked主要顯示利用數組mResyncSamples中的值計算mPeriod和mPhase這兩個時間值。然後最後調用了mThread的updateModel函數。mThread是DispSyncThread類。
void DispSync::updateModelLocked() {
    if (mNumResyncSamples >= MIN_RESYNC_SAMPLES_FOR_UPDATE) {
        ......
        //計算mPeriod和mPhase

        mThread->updateModel(mPeriod, mPhase);
    }
}
我們來看下DispSyncThread的updateModel函數,這個函數只是保存了參數,然後調用了Condition的signal喚醒線程。
    void updateModel(nsecs_t period, nsecs_t phase) {
        Mutex::Autolock lock(mMutex);
        mPeriod = period;
        mPhase = phase;
        mCond.signal();
    }
我們再來看DispSyncThread的threadLoop函數,主要這個函數比較計算時間來決定是否要發送信號。如果沒有信號發送就會在mCond等待,有信號發送前面會在updateModel中調用mCond的singal函數,這裡線程就喚醒了。gatherCallbackInvocationsLocked函數獲取本次VSync信號的回調函數列表,這些回調函數是通過DispSync類的addEventListener函數加入的。接著就調用fireCallbackInvocations來依次調用列表中所有對象的onDispSyncEvent函數。
    virtual bool threadLoop() {
        ......
        while (true) {
            Vector callbackInvocations;

            nsecs_t targetTime = 0;

            { // Scope for lock
                ......

                if (now < targetTime) {
                    err = mCond.waitRelative(mMutex, targetTime - now);
                    ......
                }

                now = systemTime(SYSTEM_TIME_MONOTONIC);
                ......

                callbackInvocations = gatherCallbackInvocationsLocked(now);
            }

            if (callbackInvocations.size() > 0) {
                fireCallbackInvocations(callbackInvocations);
            }
        }

        return false;
    }
fireCallbackInvocations函數就是遍歷回調列表調用其onDispSyncEvent函數。
    void fireCallbackInvocations(const Vector& callbacks) {
        for (size_t i = 0; i < callbacks.size(); i++) {
            callbacks[i].mCallback->onDispSyncEvent(callbacks[i].mEventTime);
        }
    }
這裡我們先不往下分析DispSync遍歷調用回調,我們先來看看EventThread的threadLoop函數,這個函數邏輯很簡單。調用waitForEvent來獲取事件,然後調用每個連接的postEvent來發送Event。
bool EventThread::threadLoop() {
    DisplayEventReceiver::Event event;
    Vector< sp > signalConnections;
    signalConnections = waitForEvent(&event);//獲取Event

    // dispatch events to listeners...
    const size_t count = signalConnections.size();
    for (size_t i=0 ; i& conn(signalConnections[i]);
        // now see if we still need to report this event
        status_t err = conn->postEvent(event);//發送Event
        if (err == -EAGAIN || err == -EWOULDBLOCK) {
            // The destination doesn't accept events anymore, it's probably
            // full. For now, we just drop the events on the floor.
            // FIXME: Note that some events cannot be dropped and would have
            // to be re-sent later.
            // Right-now we don't have the ability to do this.
            ALOGW("EventThread: dropping event (%08x) for connection %p",
                    event.header.type, conn.get());
        } else if (err < 0) {
            // handle any other error on the pipe as fatal. the only
            // reasonable thing to do is to clean-up this connection.
            // The most common error we'll get here is -EPIPE.
            removeDisplayEventConnection(signalConnections[i]);
        }
    }
    return true;
}
我們再來看下waitForEvent函數中下面代碼段,timestamp為0表示沒有時間,waitForSync為true表示至少有一個客戶和EventThread建立了連接。這段代碼一旦有客戶連接,就調用enableVSyncLocked接收DispSyncSource的VSync信號。如果在接受信號中,所有客戶都斷開了連接,則調用disableVSyncLocked函數停止接受DispSyncSource對象的信號。
        // Here we figure out if we need to enable or disable vsyncs
        if (timestamp && !waitForVSync) {
            // we received a VSYNC but we have no clients
            // don't report it, and disable VSYNC events
            disableVSyncLocked();
        } else if (!timestamp && waitForVSync) {
            // we have at least one client, so we want vsync enabled
            // (TODO: this function is called right after we finish
            // notifying clients of a vsync, so this call will be made
            // at the vsync rate, e.g. 60fps.  If we can accurately
            // track the current state we could avoid making this call
            // so often.)
            enableVSyncLocked();
        }
我們先來看下enableVSyncLocked函數
void EventThread::enableVSyncLocked() {
    if (!mUseSoftwareVSync) {
        // never enable h/w VSYNC when screen is off
        if (!mVsyncEnabled) {
            mVsyncEnabled = true;
            mVSyncSource->setCallback(static_cast(this));
            mVSyncSource->setVSyncEnabled(true);
        }
    }
    mDebugVsyncEnabled = true;
    sendVsyncHintOnLocked();
}
我們先來看看mVSyncSource->setCallback函數。先要知道這個mVSyncSource是在SurfaceFlinger的init函數中。
    sp vsyncSrc = new DispSyncSource(&mPrimaryDispSync,
            vsyncPhaseOffsetNs, true, "app");
    mEventThread = new EventThread(vsyncSrc);
    sp sfVsyncSrc = new DispSyncSource(&mPrimaryDispSync,
            sfVsyncPhaseOffsetNs, true, "sf");
    mSFEventThread = new EventThread(sfVsyncSrc);
    mEventQueue.setEventThread(mSFEventThread);
看到上面這段代碼,我們知道這個mVsyncSource是DispSyncSource類,我們先來看起setCallback函數,就是把callback保存起來
    virtual void setCallback(const sp& callback) {
        Mutex::Autolock lock(mCallbackMutex);
        mCallback = callback;
    }
再來看setVSyncEnabled函數,這裡參數enable是true,就是調用了DispSync的addEventListenter。這裡就回到了上一小節了,這裡我們就在DispSync中注冊了回調了
    virtual void setVSyncEnabled(bool enable) {
        Mutex::Autolock lock(mVsyncMutex);
        if (enable) {
            status_t err = mDispSync->addEventListener(mPhaseOffset,
                    static_cast(this));
            if (err != NO_ERROR) {
                ALOGE("error registering vsync callback: %s (%d)",
                        strerror(-err), err);
            }
            //ATRACE_INT(mVsyncOnLabel.string(), 1);
        } else {
            status_t err = mDispSync->removeEventListener(
                    static_cast(this));
            if (err != NO_ERROR) {
                ALOGE("error unregistering vsync callback: %s (%d)",
                        strerror(-err), err);
            }
            //ATRACE_INT(mVsyncOnLabel.string(), 0);
        }
        mEnabled = enable;
    }
這樣回想上一節在fireCallbackInvocations中遍歷所有的回調時,就調用了DispSyncSource類的onDispSyncEvent函數,而這個函數主要是調用了其成員變量mCallback的onVSyncEvent,這個mCallback就是之前在EventThread中的waitForEvent注冊的,就是EventThread自己。
    virtual void onDispSyncEvent(nsecs_t when) {
        sp callback;
        {
            Mutex::Autolock lock(mCallbackMutex);
            callback = mCallback;

            if (mTraceVsync) {
                mValue = (mValue + 1) % 2;
                ATRACE_INT(mVsyncEventLabel.string(), mValue);
            }
        }

        if (callback != NULL) {
            callback->onVSyncEvent(when);
        }
    }
因此最後到了EventThread的onVsyncEvent函數,這個函數把數據放在mVSyncEvent數組第一個,然後調用了Condition的broadcast函數。
void EventThread::onVSyncEvent(nsecs_t timestamp) {
    Mutex::Autolock _l(mLock);
    mVSyncEvent[0].header.type = DisplayEventReceiver::DISPLAY_EVENT_VSYNC;
    mVSyncEvent[0].header.id = 0;
    mVSyncEvent[0].header.timestamp = timestamp;
    mVSyncEvent[0].vsync.count++;
    mCondition.broadcast();
}
最後之前在EventThread的threadLoop函數中調用waitForEvent會阻塞,當這裡調用Condition的broadcast之後,waitForEvent就喚醒,並且得到了mVsynEvent中的數據。緊接著就是在EventThread中的threadLoop調用conn->postEvent來發送Event。這裡是通過BitTube對象中的socket發送到MessageQueue中。這個我們在第二節中分析過了。
我們來回顧下,在MessageQueue中有下面這個函數。這樣當EventThread通過BitTube傳送數據的話,pollOnce會喚醒epoll_wait然後就到這個cb_eventReceiver這個回調函數
void MessageQueue::setEventThread(const sp& eventThread)
{
    mEventThread = eventThread;
    mEvents = eventThread->createEventConnection();
    mEventTube = mEvents->getDataChannel();
    mLooper->addFd(mEventTube->getFd(), 0, Looper::EVENT_INPUT,
            MessageQueue::cb_eventReceiver, this);
}
cb_eventReceiver就是調用了eventReceiver函數。
int MessageQueue::cb_eventReceiver(int fd, int events, void* data) {
    MessageQueue* queue = reinterpret_cast(data);
    return queue->eventReceiver(fd, events);
}

int MessageQueue::eventReceiver(int /*fd*/, int /*events*/) {
    ssize_t n;
    DisplayEventReceiver::Event buffer[8];
    while ((n = DisplayEventReceiver::getEvents(mEventTube, buffer, 8)) > 0) {
        for (int i=0 ; idispatchInvalidate();
#else
                mHandler->dispatchRefresh();
#endif
                break;
            }
        }
    }
    return 1;
}
這裡我們支持VSync信號就會調用mHandler的dispatchRefresh函數。
void MessageQueue::Handler::dispatchRefresh() {
    if ((android_atomic_or(eventMaskRefresh, &mEventMask) & eventMaskRefresh) == 0) {
        mQueue.mLooper->sendMessage(this, Message(MessageQueue::REFRESH));
    }
}
而在Hander的處理中,最終是調用了SurfaceFlinger的onMessageReceived函數
        case REFRESH:
            android_atomic_and(~eventMaskRefresh, &mEventMask);
            mQueue.mFlinger->onMessageReceived(message.what);
            break;
而在SurfaceFlinger的onMessageReceived函數最終會調用了handleMessageRefresh函數。
void SurfaceFlinger::onMessageReceived(int32_t what) {
    ATRACE_CALL();
    switch (what) {
        ......
        case MessageQueue::REFRESH: {
            handleMessageRefresh();
            break;
        }
    }
}
handleMessageRefresh函數負責刷新系統的顯示。這樣我們就分析了從底層發送VSync信號最終到達SurfaceFlinger的handleMessageRefresh函數。
我們回顧下整個流程,VSync信號從底層產生後,經過幾個函數,保存到了SurfaceFlinger的mPrimaryDispSync變量(DisySync類)的數組中,這樣設計的目的讓底層的調用盡快結束,否則會耽擱下次VSync信號的發送。然後在mPrimaryDispSync變量關聯的線程開始分發數組中的VSync信號,分發的過程也調用了幾個回調函數,最終結果是放在EventThread對象的數組中。EventThread是轉發VSync信號的中心。不但會把VSync信號發給SurfaceFlinger,還會把信號發送到用戶進程中去。EventThread的工作比較重,因此SurfaceFlinger中使用了兩個EventThread對象來轉發VSync信號。確保能及時轉發。SurfaceFlinger中的MessageQueue收到Event後,會將Event轉化成消息發送,這樣最終就能在主線程調用SurfaceFlinger的函數處理VSync信號了。
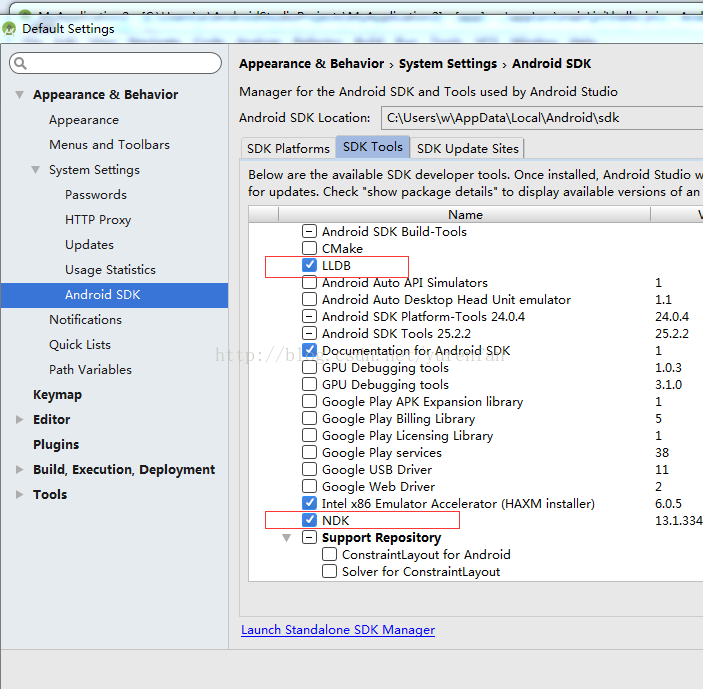 Android Studio2.2.2 配置NDK
環境主機:WIN 7開發環境:Android Studio2.2.2步驟安裝NDK打開Tools->Android->SDK Manager->SDK
 Django-Restful框架
1.准備工作 安裝django框架 安裝django-rsetful 框架 pip install djangorestframework 2.一個小d
 Android仿QQ好友列表實現列表收縮與展開
ExpandableListView是一個垂直滾動顯示兩級列表項的視圖,與ListView不同的是,它可以有兩層:每一層都能夠被獨立的展開並顯示其子項。好友QQ列表,可以
 Android開源項目SlidingMenu深入剖析
SlidingMenu簡介: SlidingMenu的是一種比較新的設置界面或配置界面效果,在主界面左滑或者右滑出現設置界面,能方便的進行各種操作.目前有大量的應用都在使