編輯:關於Android編程
以下分析是基於MTK Android4.4原生的SystemUI與Google 的SystemUI有微小的區別,但兩者的整體框架是差不多的。
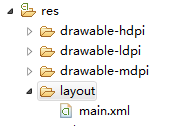
這一篇是分析SystemUI的第一篇,先從最簡單的PowerUI著手,源碼路徑:/frameworks/base/packages/SystemUI 程序目錄結構如下:
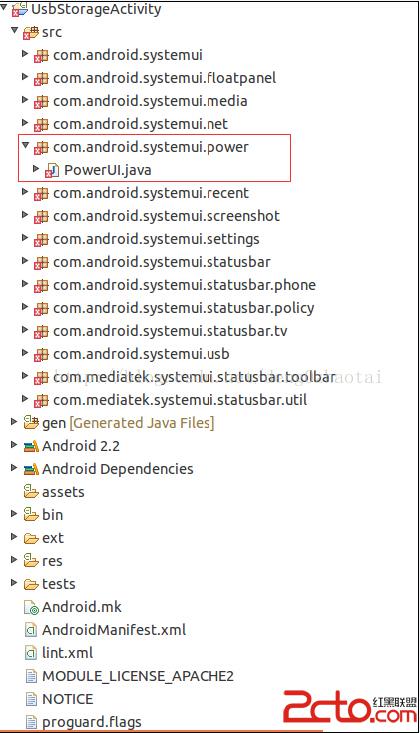
我導入Eclipse編輯,報錯的原因是因為找不到Framework上的一些包和資源,這個沒有關系;修改完後在使用mmm模塊編譯,再push到手機(eng版本)上進行調試,push後需要重啟才能生效。
在AndroidManifest.xml上沒有Activity注冊
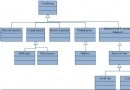
所以整個程序啟動是從外部啟動SystemUIService的。那麼是如何啟動SystemUIService的呢?看下這個文件:/frameworks/base/services/java/com/android/server/SystemServer.java在這個文件中可以找到
    static final void startSystemUi(Context context) {
        Intent intent = new Intent();
        intent.setComponent(new ComponentName("com.android.systemui",
                    "com.android.systemui.SystemUIService"));
        //Slog.d(TAG, "Starting service: " + intent);
        context.startServiceAsUser(intent, UserHandle.OWNER);
    }
所以SystemUI在SystemService啟動時就被調用了。
SystemUIService的關鍵代碼如下:
package com.android.systemui;

import android.app.Service;
import android.content.Intent;
import android.content.res.Configuration;
import android.os.IBinder;
import android.util.Log;

import java.io.FileDescriptor;
import java.io.PrintWriter;
import java.util.HashMap;

public class SystemUIService extends Service {
    private static final String TAG = "SystemUIService";

    /**
     * The classes of the stuff to start.
     */
    private final Class[] SERVICES = new Class[] {
            com.android.systemui.recent.Recents.class,
            com.android.systemui.statusbar.SystemBars.class,
            com.android.systemui.usb.StorageNotification.class,
            com.android.systemui.power.PowerUI.class,
            com.android.systemui.media.RingtonePlayer.class,
            com.android.systemui.settings.SettingsUI.class,
        };

    /**
     * Hold a reference on the stuff we start.
     */
    private final SystemUI[] mServices = new SystemUI[SERVICES.length];

    @Override
    public void onCreate() {
        HashMap, Object> components = new HashMap, Object>();
        final int N = SERVICES.length;
        for (int i=0; i cl = SERVICES[i];
            Log.d(TAG, "loading: " + cl);
            Log.d("dzt", "loading: " + cl);
            try {
                mServices[i] = (SystemUI)cl.newInstance();
            } catch (IllegalAccessException ex) {
                throw new RuntimeException(ex);
            } catch (InstantiationException ex) {
                throw new RuntimeException(ex);
            }
            mServices[i].mContext = this;
            mServices[i].mComponents = components;
            Log.d(TAG, "running: " + mServices[i]);
            Log.d("dzt", "running: " + mServices[i]);
            mServices[i].start();
        }
    }
}
這些類
com.android.systemui.recent.Recents.class,
            com.android.systemui.statusbar.SystemBars.class,
            com.android.systemui.usb.StorageNotification.class,
            com.android.systemui.power.PowerUI.class,
            com.android.systemui.media.RingtonePlayer.class,
            com.android.systemui.settings.SettingsUI.class,
下面就分析最簡單的com.android.systemui.power.PowerUI.class
在PowerUI的start()方法中,注冊一些監聽器
public void start() {

        mLowBatteryAlertCloseLevel = mContext.getResources().getInteger(
                com.android.internal.R.integer.config_lowBatteryCloseWarningLevel);
        mLowBatteryReminderLevels[0] = mContext.getResources().getInteger(
                com.android.internal.R.integer.config_lowBatteryWarningLevel);
        mLowBatteryReminderLevels[1] = mContext.getResources().getInteger(
                com.android.internal.R.integer.config_criticalBatteryWarningLevel);

        final PowerManager pm = (PowerManager) mContext.getSystemService(Context.POWER_SERVICE);
        mScreenOffTime = pm.isScreenOn() ? -1 : SystemClock.elapsedRealtime();

        // Register for Intent broadcasts for...
        IntentFilter filter = new IntentFilter();
        filter.addAction(Intent.ACTION_BATTERY_CHANGED);
        filter.addAction(Intent.ACTION_SCREEN_OFF);
        filter.addAction(Intent.ACTION_SCREEN_ON);
        /// M: Support show battery level when configuration changed. @{
        filter.addAction(Intent.ACTION_CONFIGURATION_CHANGED);
        /// M: Support show battery level when configuration changed. @}
        /// M: Hide low battery dialog when PowerOffAlarm ring. @{
        filter.addAction("android.intent.action.normal.boot");
        filter.addAction("android.intent.action.ACTION_SHUTDOWN_IPO");
        /// M: Hide low battery dialog when PowerOffAlarm ring. @}
        mContext.registerReceiver(mIntentReceiver, filter, null, mHandler);
    }
例如監聽ACTION_BATTERY_CHANGED判斷電量的大小,如果低電給一個提示給用戶,其它的ACTION也都是根據廣播來處理一些特定的事情,如果跟電源相關功能需要定制或添加新的監聽器都可以在這個類中修改。
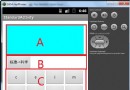
 Android布局大全
Android的界面是有布局和組件協同完成的,布局好比是建築裡的框架,而組件則相當於建築裡的磚瓦。組件按照布局的要求依次排列,就組成了用戶所看見的界面。所有的布局方式都可
 Android開發學習之路--Camera之初體驗
顧名思義Camera就是拍照和錄像的功能,像微信裡面,我們想拍照傳一下照片,就可以通過camera來拍照,然後存儲照片,發送給好友。那麼微信的app裡面是不會直接通過ca
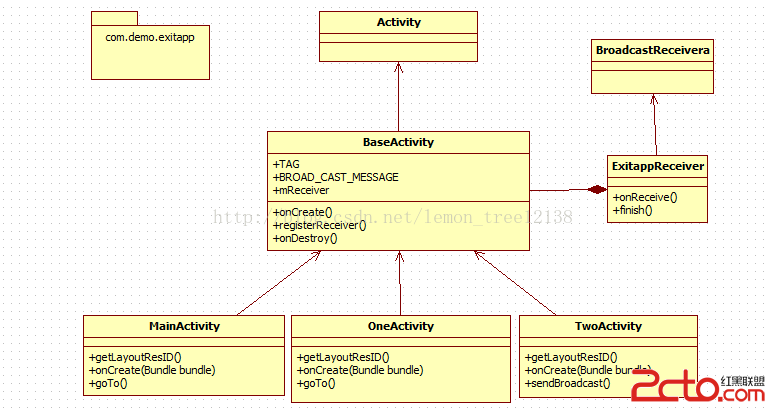 Android退出程序(下)——利用廣播機制
概述: 基於上一篇博客《Android退出程序(上)——單例模式》的學習,我們知道了如何利用單例和循環遍歷的方式來退出我們的應用程序。這篇博客則要從另一個角度來解決問題—
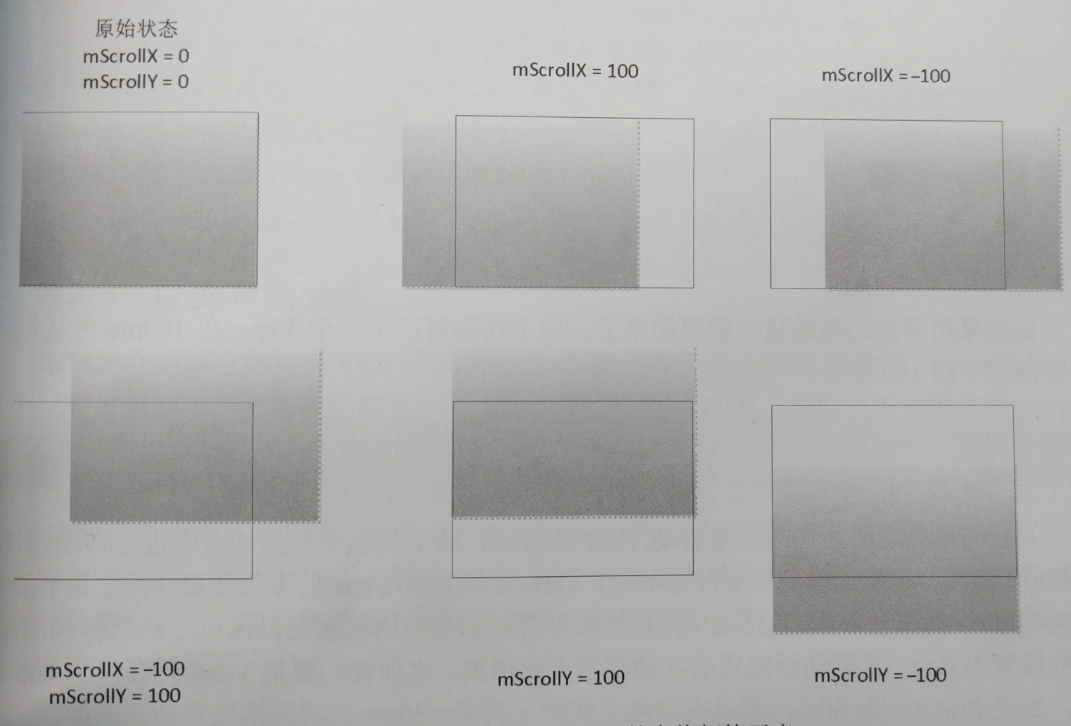 scrollTo + Scroller + ViewDragHelper
看標題就知道這篇文章講的主要是view滑動的相關內容。 ScrollTo && ScrollBy 先看下源碼: public void sc