編輯:關於Android編程
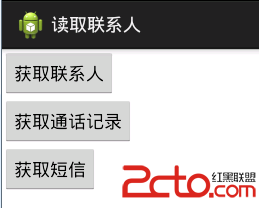
正如我們知道的一樣,Android的通訊錄和短信管理是通過contentprovider來向開發者來開發接口的。必須從ContentResolver入手去解決。其中通訊錄操作涉及到系統源碼api的使用,特別是在表的uri上面容易弄混。在接下來的幾篇文章中蝸牛將陸續為大家推出Android通訊管理相關知識的文章。其中包括聯系人獲取、通話記錄獲取、短信獲取、短信詳情獲取發送短信。廢話不多說先上圖
先看看聯系人的表的結構
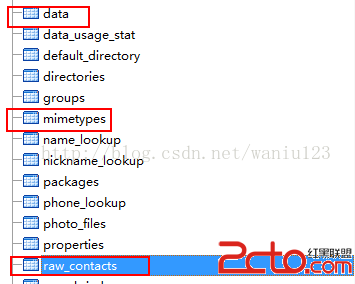
其中對於開發這來說主要關注以上三個表,其中要用到聯合查詢,關於三張表的設計可以百度到相關文章。
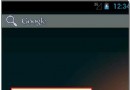
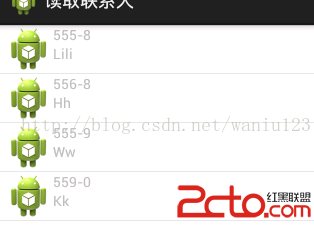
代碼最終效果圖
聯系人:
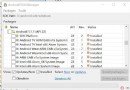
想要源碼的童鞋可以在下載http://download.csdn.net/detail/waniu123/8554533;
package cn.zxw.contact.domain;

/**
 * 聯系人
 * @author zhan
 *
 */
public class ContactsInfo {
	public int _id;
	public String name;
	public String phone;
	public String email;
	public ContactsInfo() {
		super();
	}

	public ContactsInfo(int _id, String name, String phone, String email) {
		super();
		this._id = _id;
		this.name = name;
		this.phone = phone;
		this.email = email;
	}

	@Override
	public String toString() {
		return "PersonInfo [_id=" + _id + ", name=" + name + ", phone=" + phone
				+ ", email=" + email + "]";
	}

}
獲取聯系人/** * 獲取聯系人 * * @param context * @return */ public static ListgetContactsInfos(Context context) { ContentResolver resolver = context.getContentResolver(); List infos = new ArrayList (); // 獲取聯系人數據 訪問聯系人的內容提供者 // ContactsContract.AUTHORITY com.android.contacts 授權 // 該內容提供者操作是需要讀寫權限 // matcher.addURI(ContactsContract.AUTHORITY, "raw_contacts", // RAW_CONTACTS); // matcher.addURI(ContactsContract.AUTHORITY, "raw_contacts/#/data", // RAW_CONTACTS_DATA); Uri uri = Uri.parse("content://com.android.contacts/raw_contacts"); Cursor cursor1 = resolver.query(uri, new String[] { "_id" }, null, null, null); while (cursor1.moveToNext()) { int _id = cursor1.getInt(0); ContactsInfo info = new ContactsInfo(); uri = Uri.parse("content://com.android.contacts/raw_contacts/" + _id + "/data"); Cursor cursor2 = resolver.query(uri, new String[] { "data1", "mimetype" }, null, null, null); while (cursor2.moveToNext()) { String data1 = cursor2.getString(0); String mimetype = cursor2.getString(1); if ("vnd.android.cursor.item/phone_v2".equals(mimetype)) {// 號碼 info.phone = data1; } else if ("vnd.android.cursor.item/name".equals(mimetype)) {// 姓名 info.name = data1; } } cursor2.close(); infos.add(info); } cursor1.close(); return infos; } /** * 獲取所有的通話記錄 * * @param context * @return */ public List getCallLog(Context context) { List infos = new ArrayList (); ContentResolver cr = context.getContentResolver(); Uri uri = Calls.CONTENT_URI; String[] projection = new String[] { Calls.NUMBER, Calls.DATE, Calls.TYPE }; Cursor cursor = cr.query(uri, projection, null, null, null); while (cursor.moveToNext()) { String number = cursor.getString(0); long date = cursor.getLong(1); int type = cursor.getInt(2); infos.add(new CallLogInfo(number, date, type)); } cursor.close(); return infos; }
package cn.zxw.contact;

import java.util.ArrayList;

import java.util.List;

import cn.zxw.contact.domain.ContactsInfo;
import cn.zxw.contact.utils.ContactsMsgUtils;
import android.os.Bundle;
import android.view.View;
import android.view.ViewGroup;
import android.widget.BaseAdapter;
import android.widget.ListView;
import android.widget.TextView;

import android.app.Activity;

/**
 * 聯系人
 *
 * @author zhan
 *
 */

public class ContactsActivity extends Activity {

	private ListView lv;

	@Override
	protected void onCreate(Bundle savedInstanceState) {
		super.onCreate(savedInstanceState);
		setContentView(R.layout.activity_contacts_msg_calllog);
		lv = (ListView) findViewById(R.id.lv);

		List infos = ContactsMsgUtils
				.getContactsInfos(getApplicationContext());
		MyAdapter adapter = new MyAdapter(infos);
		lv.setAdapter(adapter);
	}

	private class MyAdapter extends BaseAdapter {
		//
		List infos = new ArrayList();
		private TextView tv_number;
		private TextView tv_name;

		public MyAdapter(List infos) {
			super();
			this.infos = infos;
		}

		@Override
		public int getCount() {
			return infos.size();
		}

		@Override
		public Object getItem(int position) {
			return null;
		}

		@Override
		public long getItemId(int position) {
			return 0;
		}

		@Override
		public View getView(int position, View convertView, ViewGroup parent) {
			View view = View.inflate(getApplicationContext(),
					R.layout.contacts_list_item, null);
			tv_number = (TextView) view.findViewById(R.id.tv_number);
			tv_name = (TextView) view.findViewById(R.id.tv_name);
			ContactsInfo info = infos.get(position);
			tv_number.setText(info.phone);
			tv_name.setText(info.name);
			return view;
		}

	}
}
 Android實現帶數字的圓形進度條(自定義進度條)
開發設計搞了一個帶圓形進度的進度條,在GitHub上逛了一圈,發現沒有,自己撸吧。先看界面效果:主要思路是寫一個繼承ProgressBar的自定義View,不廢話,直接上
 Android基礎入門教程——2.4.7 構建一個可復用的自定義BaseAdapter
Android基礎入門教程——2.4.7 構建一個可復用的自定義BaseAdapter標簽(空格分隔): Android基礎入門教程本節引言: 如
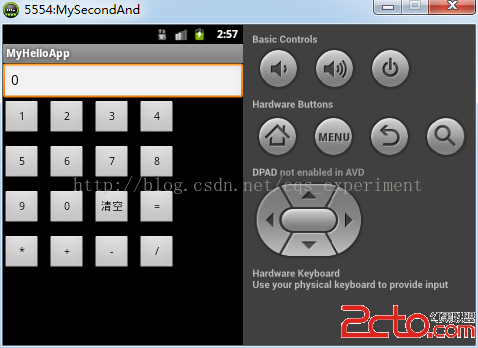 andriod first app-computer
andriod first app-computer 個人信息:就讀於燕大本科軟件工程專業 目前大三; 本人博客:google搜索“cqs_2012”即可; 個人愛
 Android編程單選項框RadioGroup綜合應用示例
本文實例講述了Android編程單選項框RadioGroup用法。分享給大家供大家參考,具體如下:今天介紹的是RadioGroup 的組事件.RadioGroup 可將各