編輯:關於Android編程
第一個為大家介紹圖片如何轉高斯模擬:
1.方法的實現:
public static void updateBgToBlur(Activity a, Bitmap bmpToBlur, View view, int resId) {
    BitmapFactory.Options opt = new BitmapFactory.Options();
    opt.inJustDecodeBounds = true;
    opt.inSampleSize = 8;
    opt.inJustDecodeBounds = false;
    Bitmap bmp = BitmapFactory.decodeResource(a.getResources(), resId, opt);
    if (Build.VERSION.SDK_INT > Build.VERSION_CODES.JELLY_BEAN) {
      view.setBackground(null);
    } else {
      view.setBackgroundDrawable(null);
    }
    if (bmpToBlur != null && !bmpToBlur.isRecycled()) {
      bmpToBlur.recycle();
    }
    bmpToBlur = blurBitmap(a, bmp);
    if (Build.VERSION.SDK_INT >= Build.VERSION_CODES.JELLY_BEAN) {
      view.setBackground(new BitmapDrawable(a.getResources(), bmpToBlur));
    } else {
      view.setBackgroundDrawable(new BitmapDrawable(a.getResources(), bmpToBlur));
    }
  }


  public static Bitmap blurBitmap(Context c, Bitmap bitmap) {

    //Let's create an empty bitmap with the same size of the bitmap we want to blur
    Bitmap outBitmap = Bitmap.createBitmap(bitmap.getWidth(), bitmap.getHeight(), Bitmap.Config.ARGB_4444);

    //Instantiate a new Renderscript
    RenderScript rs = RenderScript.create(c.getApplicationContext());

    //Create an Intrinsic Blur Script using the Renderscript
    ScriptIntrinsicBlur blurScript = ScriptIntrinsicBlur.create(rs, Element.U8_4(rs));

    //Create the Allocations (in/out) with the Renderscript and the in/out bitmaps
    Allocation allIn = Allocation.createFromBitmap(rs, bitmap);
    Allocation allOut = Allocation.createFromBitmap(rs, outBitmap);

    //Set the radius of the blur
    blurScript.setRadius(25.f);

    //Perform the Renderscript
    blurScript.setInput(allIn);
    blurScript.forEach(allOut);

    //Copy the final bitmap created by the out Allocation to the outBitmap
    allOut.copyTo(outBitmap);

    //recycle the original bitmap
    bitmap.recycle();

    //After finishing everything, we destroy the Renderscript.
    rs.destroy();

    return outBitmap;
  }
2 調用:
 Bitmap bitmap=null;
    if (Build.VERSION.SDK_INT > Build.VERSION_CODES.KITKAT) {
      ImageUtil.updateBgToBlur(getActivity(), bitmap, slidingUpPanelLayout, R.drawable.bg_tageditor);
    } else {
      slidingUpPanelLayout.setBackgroundResource(R.drawable.bg_tageditor);
    }
二、高斯模糊布局:
項目需求: 現有一個紫色背景圖片, 相冊圖片覆蓋在背景圖片 , 一個Framlayout 覆蓋在這個含有相冊圖片的背景圖中 ,實現模糊蓋在上面的高斯模擬效果:
1 引用BlurView:
 compile 'com.eightbitlab:supportrenderscriptblur:1.0.0'
 compile 'com.eightbitlab:blurview:1.3.3'


 defaultConfig {
    renderscriptTargetApi 25 //must match target sdk and build tools, 23+
    renderscriptSupportModeEnabled true
 }
2 .調用:
final float radius = 20;

    final View decorView = getActivity().getWindow().getDecorView();
    //Activity's root View. Can also be root View of your layout (preferably)
    final ViewGroup rootView = (ViewGroup) decorView.findViewById(android.R.id.content);
    //set background, if your root layout doesn't have one
    final Drawable windowBackground = decorView.getBackground();


    if (Build.VERSION.SDK_INT >= Build.VERSION_CODES.JELLY_BEAN_MR1) {
      mBlurView.setupWith(rootView)
          .windowBackground(windowBackground)
          .blurAlgorithm(new RenderScriptBlur(getActivity()))
          .blurRadius(radius);
    }else {
      mBlurView.setupWith(rootView)
          .windowBackground(windowBackground)
          .blurAlgorithm(new SupportRenderScriptBlur(getActivity()))
          .blurRadius(radius);
    }
3 xml
 <eightbitlab.com.blurview.BlurView
   android:id="@+id/blurView"
   android:layout_width="match_parent"
   android:layout_height="wrap_content"
   app:blurOverlayColor="@color/colorOverlay">

    <!--Any child View here, TabLayout for example-->

 </eightbitlab.com.blurview.BlurView>
以上就是本文的全部內容,希望對大家的學習有所幫助,也希望大家多多支持本站。
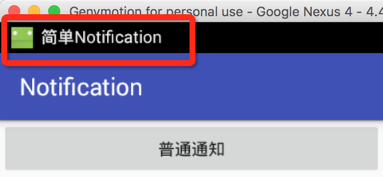 Android Notification 樣式!
代碼中用的自定義常量 public static final int TYPE_Normal = 1; public static final int TYP
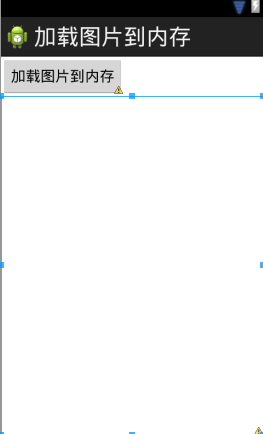 android中圖片加載到內存的實例代碼
本文演示android中圖片加載到內存首先設計界面:代碼如下:<LinearLayout xmlns:android=http://schemas.android.
 Android4.2.2 SurfaceFlinger之Layer和Bufferqueue的創建過程
本文均屬自己閱讀源碼的點滴總結,轉賬請注明出處謝謝。 歡迎和大家交流。qq:1037701636 email:gzzaigcn2012@gmail.com Androi
 Android ListView的item背景色設置
1.如何改變item的背景色和按下顏色 listview默認情況下,item的背景色是黑色,在用戶點擊時是黃色的。如果需要修改為自定義的背景顏色,一般情況下有三種