編輯:關於Android編程
寫在前面
現在,越來越多的App裡面使用了模糊效果,這種模糊效果稱之為高斯模糊。大家都知道,在Android平台上進行模糊渲染是一個相當耗CPU也相當耗時的操作,一旦處理不好,卡頓是在所難免的。一般來說,考慮到效率,渲染一張圖片最好的方法是使用OpenGL,其次是使用C++/C,使用Java代碼是效率是最低,速度也是最慢的。但是Android推出RenderScript之後,我們就有了選擇,測試表明,使用RederScript的渲染效率和使用C++/C不相上下,但是使用RenderScript卻比使用JNI簡單得多!同時,Android團隊提供了RenderScript的支持庫,使得在低版本的Android平台上也能使用。
不過在使用RenderScript之前,對於模糊一張圖片,需要注意的是,我們應該盡量不要使用原尺寸分辨率的圖片,最好將圖片縮小比例,這小渲染的效率要高一些,速度也更快一些。
什麼是RenderScript
RenderScript是一種低級的高性能編程語言,用於3D渲染和處理密集型計算(3D播放等和關於CPU密集型的計算)。一直以來Android 在繪圖性能的表現一直差強人意,引入NDK之後才有所改善,而在Honeycomb 中發布了RenderScript 這一殺手級在Framework 後,大大的增加了Android本地語言的執行能力和計算能力。現在網上介紹RenderScript的文章非常少,附上一篇博客,大家可以能更好理解這門語言。
關於Android RenderScript 的詳細說明和一些實用文檔
如果需要詳細了解,可以查看官方文檔RenderScript
動態模糊的實現
使用之前,先要在Module build.gradle裡面作下面的定義:

MainActivity.java
package com.jackie.blurimage;

import android.graphics.Bitmap;
import android.graphics.BitmapFactory;
import android.os.Bundle;
import android.support.v7.app.AppCompatActivity;
import android.widget.ImageView;
import android.widget.SeekBar;
import android.widget.TextView;

public class MainActivity extends AppCompatActivity {
  private ImageView mBlurImage, mOriginImage;
  private SeekBar mSeekBar;
  private TextView mSeekProgress;

  private int mAlpha;

  @Override
  protected void onCreate(Bundle savedInstanceState) {
    super.onCreate(savedInstanceState);
    setContentView(R.layout.activity_main);

    initView();
    initData();
    initEvent();
  }

  private void initView() {
    mBlurImage = (ImageView) findViewById(R.id.blur_image);
    mOriginImage = (ImageView) findViewById(R.id.origin_image);
    mSeekBar = (SeekBar) findViewById(R.id.seek_bar);
    mSeekProgress = (TextView) findViewById(R.id.seek_progress);
  }

  private void initData() {
    // 獲取圖片
    Bitmap originBitmap = BitmapFactory.decodeResource(getResources(), R.drawable.blur);
    Bitmap blurBitmap = BlurUtils.blur(this, originBitmap);

    // 填充模糊後的圖像和原圖
    mBlurImage.setImageBitmap(blurBitmap);
    mOriginImage.setImageBitmap(originBitmap);
  }

  private void initEvent() {
    mSeekBar.setMax(100);

    mSeekBar.setOnSeekBarChangeListener(new SeekBar.OnSeekBarChangeListener() {
      @Override
      public void onProgressChanged(SeekBar seekBar, int progress, boolean fromUser) {
        mAlpha = progress;

        mOriginImage.setAlpha((int) (255 - mAlpha * 2.55));
        mSeekProgress.setText(String.valueOf(mAlpha));
      }

      @Override
      public void onStartTrackingTouch(SeekBar seekBar) {

      }

      @Override
      public void onStopTrackingTouch(SeekBar seekBar) {

      }
    });
  }
}
activity_main.xml
<?xml version="1.0" encoding="utf-8"?>
<LinearLayout
  xmlns:android="http://schemas.android.com/apk/res/android"
  android:layout_width="match_parent"
  android:layout_height="match_parent"
  android:orientation="vertical">

  <FrameLayout
    android:layout_width="match_parent"
    android:layout_weight="1"
    android:layout_height="0dp">

    <ImageView
      android:id="@+id/blur_image"
      android:layout_width="match_parent"
      android:layout_height="match_parent"
      android:scaleType="centerCrop"
      android:src="@drawable/blur"/>

    <ImageView
      android:id="@+id/origin_image"
      android:layout_width="match_parent"
      android:layout_height="match_parent"
      android:scaleType="centerCrop"/>
  </FrameLayout>

  <LinearLayout
    android:layout_width="match_parent"
    android:layout_height="80dp"
    android:orientation="vertical">

    <SeekBar
      android:id="@+id/seek_bar"
      android:layout_width="match_parent"
      android:layout_height="wrap_content"
      android:layout_marginLeft="16dp"
      android:layout_marginRight="16dp"
      android:layout_marginTop="@dimen/activity_vertical_margin"/>

    <TextView
      android:id="@+id/seek_progress"
      android:layout_width="wrap_content"
      android:layout_height="wrap_content"
      android:layout_gravity="center"
      android:text="0"
      android:textSize="24sp"/>
  </LinearLayout>
</LinearLayout>
從上面的代碼可以看出,在FrameLayout上放了兩張圖片,然後動態更改圖片的透明度來達到動態模糊效果。
BlurUtils.java
package com.jackie.blurimage;

import android.content.Context;
import android.graphics.Bitmap;
import android.renderscript.Allocation;
import android.renderscript.Element;
import android.renderscript.RenderScript;
import android.renderscript.ScriptIntrinsicBlur;

/**
 * Created by Jackie on 2017/1/21.
 * 高斯模糊工具類
 */

public class BlurUtils {
  /**
   * 圖片縮放比例
   */
  private static final float SCALE_DEGREE = 0.4f;
  /**
   * 最大模糊度(在0.0到25.0之間)
   */
  private static final float BLUR_RADIUS = 25f;

  /**
   * 模糊圖片
   * @param context  上下文
   * @param bitmap  需要模糊的圖片
   * @return     模糊處理後的圖片
   */
  public static Bitmap blur(Context context,Bitmap bitmap) {
    //計算圖片縮小的長寬
    int width = Math.round(bitmap.getWidth() * SCALE_DEGREE);
    int height = Math.round(bitmap.getHeight() * SCALE_DEGREE);

    //將縮小後的圖片作為預渲染的圖片
    Bitmap inputBitmap = Bitmap.createScaledBitmap(bitmap, width, height, false);
    //創建一張渲染後的輸入圖片
    Bitmap outputBitmap = Bitmap.createBitmap(inputBitmap);

    //創建RenderScript內核對象
    RenderScript renderScript = RenderScript.create(context);
    //創建一個模糊效果的RenderScript的工具對象
    ScriptIntrinsicBlur scriptIntrinsicBlur = ScriptIntrinsicBlur.create(renderScript, Element.U8_4(renderScript));

    /**
     * 由於RenderScript並沒有使用VM來分配內存,所以需要使用Allocation類來創建和分配內存空間。
     * 創建Allocation對象的時候其實內存是空的,需要使用copyTo()將數據填充進去。
     */
    Allocation inputAllocation = Allocation.createFromBitmap(renderScript, inputBitmap);
    Allocation outputAllocation = Allocation.createFromBitmap(renderScript, outputBitmap);

    //設置渲染的模糊程度,25f是最大模糊度
    scriptIntrinsicBlur.setRadius(BLUR_RADIUS);
    //設置ScriptIntrinsicBlur對象的輸入內存
    scriptIntrinsicBlur.setInput(inputAllocation);
    //將ScriptIntrinsicBlur輸出數據保存到輸出內存中
    scriptIntrinsicBlur.forEach(outputAllocation);

    //將數據填充到Allocation中
    outputAllocation.copyTo(outputBitmap);

    return outputBitmap;
  }
}
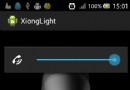
效果圖如下,妹紙一枚!

以上就是本文的全部內容,希望對大家的學習有所幫助,也希望大家多多支持本站。
 Android開發之使用sqlite3工具操作數據庫的兩種方式
使用 sqlite3 工具操作數據庫的兩種方式 請尊重他人的勞動成果,轉載請注明出處:Android開發之使用sqlite3工具操作數據庫的兩種方式 http://bl
 記一次內存洩露優化過程
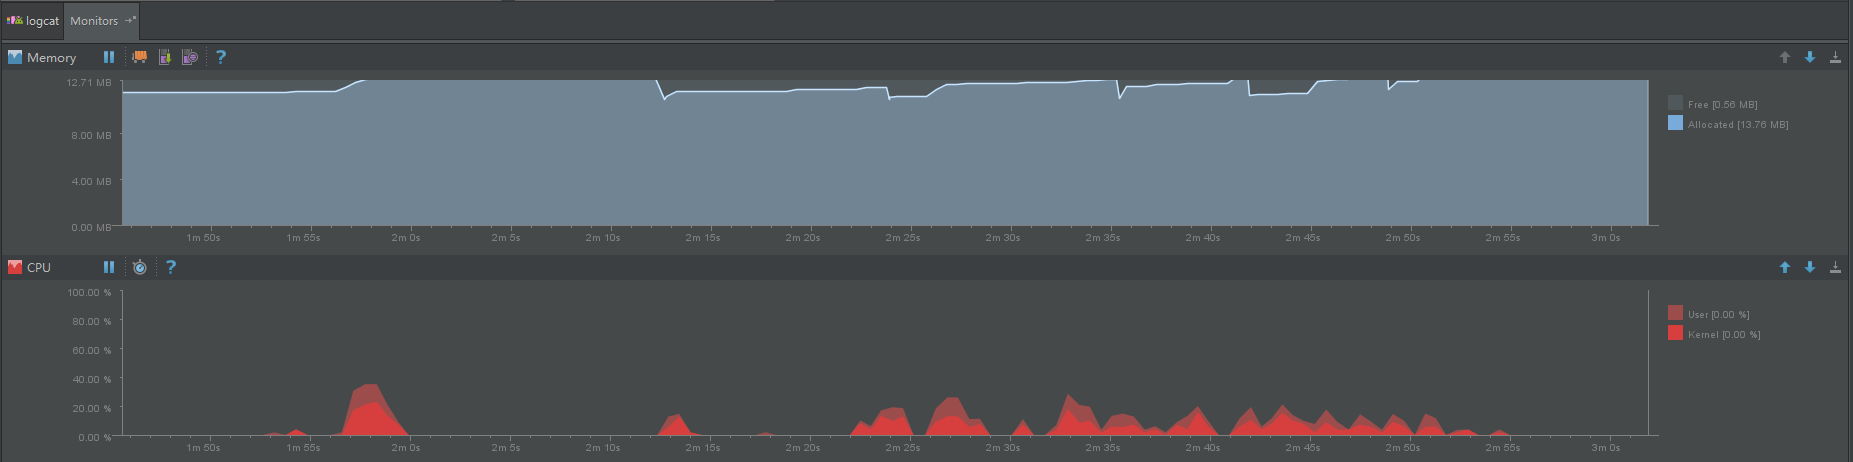
背景項目目前存在使用久了或者重復打開關閉某個頁面,內存會一直飙升,居高不下,頻繁發生GC。靜置一段時間後,情況有所改善,但是問題依舊明顯,如圖1-1、1-2。圖1-1.操
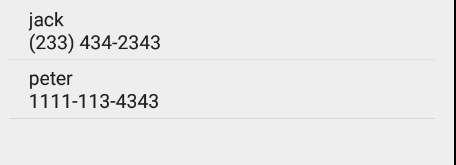
 Android破解微信獲取聊天記錄和通訊錄信息(靜態方式)
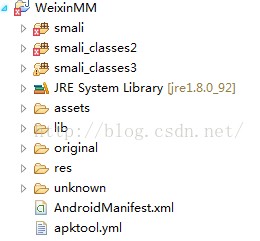
一、猜想數據存放路徑微信現在是老少皆宜,大街小巷都在使用,已經替代了傳統的短信聊天方式了,只要涉及到聊天就肯定有隱私消息,那麼本文就來講解如何獲取微信的聊天記錄以及通訊錄
 Android中使用achartengine生成圖表的具體方法
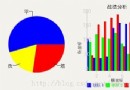
今天在做項目的時候用到了圖表功能,記錄下來achartengine是google的一個開源項目,可以在https://code.google.com/p/acharten