編輯:關於Android編程
Bluetooth結構
1、JAVA層
frameworks/base/core/java/android/bluetooth/
包含了bluetooth的JAVA類。
2、JNI層
frameworks/base/core/jni/android_bluetooth_開頭的文件
定義了bluez通過JNI到上層的接口。
frameworks/base/core/jni/android_server_bluetoothservice.cpp
調用硬件適配層的接口system/bluetooth/bluedroid/bluetooth.c
3、bluez庫
external/bluez/
這是bluez用戶空間的庫,開源的bluetooth代碼,包括很多協議,生成libbluetooth.so。
4、硬件適配層
system/bluetooth/bluedroid/bluetooth.c
包含了對硬件操作的接口
system/bluetooth/data/*
一些配置文件,復制到/etc/bluetooth/。
還有其他一些測試代碼和工具。
簡略介紹Bluetooth開發使用到的類
1、BluetoothAdapter,藍牙適配器,可判斷藍牙設備是否可用等功能。
常用方法列舉如下:
cancelDiscovery() ,取消搜索過程,在進行藍牙設備搜索時,如果調用該方法會停止搜索。(搜索過程會持續12秒)
disable()關閉藍牙,也就是我們常說的禁用藍牙。
enable()打開藍牙,這個方法打開藍牙但不會彈出提示,正常流程操作下,我們會讓系統提示用戶是否打開藍牙設備。如下兩行代碼可輕松搞定。
Intent enabler=new Intent(BluetoothAdapter.ACTION_REQUEST_ENABLE);
startActivityForResult(enabler,reCode);//同startActivity(enabler);(在主Activity啟動一個二級Activity,reCode一般等於3,一定記得要在AndroidManifest.xml裡面添加藍牙權限)
getAddress()獲取本地藍牙地址
getDefaultAdapter()獲取默認BluetoothAdapter,實際上,也只有這一種方法獲取BluetoothAdapter
getName()獲取本地藍牙名稱
getRemoteDevice(String address)根據藍牙地址獲取遠程藍牙設備
getState()獲取本地藍牙適配器當前狀態(感覺可能調試的時候更需要)
isDiscovering()判斷當前是否正在查找設備,是返回true
isEnabled()判斷藍牙是否打開,已打開返回true,否則,返回false
listenUsingRfcommWithServiceRecord(String name,UUID uuid)根據名稱,UUID創建並返回
BluetoothServerSocket,這是創建BluetoothSocket服務器端的第一步
startDiscovery()開始搜索,這是搜索的第一步
2.BluetoothDevice看名字就知道,這個類描述了一個藍牙設備
createRfcommSocketToServiceRecord(UUIDuuid)根據UUID創建並返回一個BluetoothSocket
這個方法也是我們獲取BluetoothDevice的目的——創建BluetoothSocket
這個類其他的方法,如getAddress(),getName(),同BluetoothAdapter
這個類有幾個隱藏方法,涉及到藍牙的自動配對,setPin,createBond,cancelPairingUserInput,等方法(需要通過java的反射,調用這幾個隱藏方法)
3.BluetoothServerSocket如果去除了Bluetooth相信大家一定再熟悉不過了,既然是Socket,方法就應該都差不多,
這個類一種只有三個方法
兩個重載的accept(),accept(inttimeout)兩者的區別在於後面的方法指定了過時時間,需要注意的是,執行這兩個方法的時候,直到接收到了客戶端的請求(或是過期之後),都會阻塞線程,應該放在新線程裡運行!
還有一點需要注意的是,這兩個方法都返回一個BluetoothSocket,最後的連接也是服務器端與客戶端的兩個BluetoothSocket的連接
close()關閉!
4.BluetoothSocket,跟BluetoothServerSocket相對,是客戶端
一共5個方法,不出意外,都會用到
close(),關閉
connect()連接
getInptuStream()獲取輸入流
getOutputStream()獲取輸出流
getRemoteDevice()獲取遠程設備,這裡指的是獲取bluetoothSocket指定連接的那個遠程藍牙設備
二、藍牙設備的發現、查找。
1.基於安全性考慮,設置開啟可被搜索後,Android系統會默認給出120秒的時間,其他設備能在這120秒內搜索到它。
Intent enable = new Intent(BluetoothAdapter.ACTION_REQUEST_DISCOVERABLE);
startActivityForResult(enalbe,REQUEST_DISCOVERABLE);
2.搜索藍牙設備
BluetoothAdapter _bluetooth = BluetoothAdapter.getDefaultAdapter();
_bluetooth.startDiscovery();
3.關閉藍牙設備
BluetoothAdapter _bluetooth = BluetoothAdapter.getDefaultAdapter();
_bluetooth.disable();
4.創建藍牙客戶端
BluetoothSocket socket = device.createRfcommSocketToServiceRecord(UUID.fromString(UUID號));
socket.connect();
4.創建藍牙服務端
BluetoothServerSocket _serverSocket = _bluetooth.listenUsingRfcommWithServiceRecord(服務端名稱,UUID.fromeString(UUID號));
BluetoothSocket socket = _serverSocket.accept();
InputStream inputStream = socket.getInputStream();
TCP/IP通信相關代碼實現
注:tcp_ip模塊需要在系統setting模塊中,完成藍牙的配對,只有配對成功的,才能進行socket通信(具體如何配對和如何自動配對,將在bluetoot3或者4中進行講解)
AndridManifest.xml
<manifest xmlns:android="http://schemas.android.com/apk/res/android"
 package="com.example.thecaseforbluetooth"
 android:versionCode="1"
 android:versionName="1.0" >

 <uses-sdk
  android:minSdkVersion="8"
  android:targetSdkVersion="15" />
<uses-permission android:name="android.permission.BLUETOOTH_ADMIN" />
<uses-permission android:name="android.permission.BLUETOOTH" />
 <application
  android:icon="@drawable/ic_launcher"
  android:label="@string/app_name"
  android:theme="@style/AppTheme" >
  <activity
   android:name=".BluetoothActivity"
   android:label="@string/title_activity_bluetooth" >
   <intent-filter>
    <action android:name="android.intent.action.MAIN" />

    <category android:name="android.intent.category.LAUNCHER" />
   </intent-filter>
  </activity>
 </application>

</manifest>
main.xml
<LinearLayout xmlns:android="http://schemas.android.com/apk/res/android"
 xmlns:tools="http://schemas.android.com/tools"
 android:id="@+id/LinearLayout1"
 android:layout_width="match_parent"
 android:layout_height="match_parent"
 android:orientation="vertical" >
 <Button
 android:layout_width="wrap_content"
 android:layout_height="wrap_content"
 android:id="@+id/btnSearch"
 android:text="查找設備"
/>
<Button
 android:layout_width="wrap_content"
 android:layout_height="wrap_content"
 android:id="@+id/btnExit"
 android:text="退出應用"
/>
<Button
 android:layout_width="wrap_content"
 android:layout_height="wrap_content"
 android:id="@+id/btnDis"
 android:text="設置可被發現"
/>
<Button
 android:layout_width="wrap_content"
 android:layout_height="wrap_content"
 android:id="@+id/btnserver"
 android:text="啟動服務端"
/>
<ToggleButton
android:layout_width="wrap_content"
 android:layout_height="wrap_content"
 android:id="@+id/tbtnSwitch"
 android:text="開/關 藍牙設備"
/>
<ListView
 android:layout_width="fill_parent"
 android:layout_height="wrap_content"
 android:id="@+id/lvDevices"

/>
</LinearLayout>
BluetoothActivity.java
package com.example.thecaseforbluetooth;

import java.util.ArrayList;
import java.util.Set;

import android.app.Activity;
import android.bluetooth.BluetoothAdapter;
import android.bluetooth.BluetoothDevice;
import android.content.BroadcastReceiver;
import android.content.Context;
import android.content.Intent;
import android.content.IntentFilter;
import android.os.Bundle;
import android.view.Menu;
import android.view.View;
import android.view.View.OnClickListener;
import android.widget.AdapterView;
import android.widget.AdapterView.OnItemClickListener;
import android.widget.ArrayAdapter;
import android.widget.Button;
import android.widget.ListView;
import android.widget.Toast;
import android.widget.ToggleButton;

public class BluetoothActivity extends Activity {
 public Button searchBtn;//搜索藍牙設備
 public Button exitBtn;//退出應用
 public Button discoverBtn;//設置可被發現
 public ToggleButton openBtn;//開關藍牙設備
 public Button serverbtn;
 public ListView listView;//藍牙設備清單
 public ArrayAdapter<String> adapter;
 public ArrayList<String> list =new ArrayList<String>();
 private BluetoothAdapter bluetoothAdapter = BluetoothAdapter.getDefaultAdapter();
 Set<BluetoothDevice> bondDevices ;
 public Context context ;
 @Override
 public void onCreate(Bundle savedInstanceState) {
  super.onCreate(savedInstanceState);
  setContentView(R.layout.main);
  searchBtn = (Button)findViewById(R.id.btnSearch);
  exitBtn = (Button)findViewById(R.id.btnExit);
  discoverBtn = (Button)findViewById(R.id.btnDis);
  openBtn = (ToggleButton)findViewById(R.id.tbtnSwitch);
  serverbtn = (Button)findViewById(R.id.btnserver);
  listView = (ListView)findViewById(R.id.lvDevices);
  context = getApplicationContext();
  adapter = new ArrayAdapter<String>(this, android.R.layout.simple_list_item_1,list);
  listView.setAdapter(adapter);
  openBtn.setChecked(false);
  //注冊廣播接收信號
  IntentFilter intent = new IntentFilter();
  intent.addAction(BluetoothDevice.ACTION_FOUND);// 用BroadcastReceiver來取得搜索結果
  intent.addAction(BluetoothAdapter.ACTION_SCAN_MODE_CHANGED); //每當掃描模式變化的時候,應用程序可以為通過ACTION_SCAN_MODE_CHANGED值來監聽全局的消息通知。比如,當設備停止被搜尋以後,該消息可以被系統通知給應用程序。
  intent.addAction(BluetoothAdapter.ACTION_STATE_CHANGED); //每當藍牙模塊被打開或者關閉,應用程序可以為通過ACTION_STATE_CHANGED值來監聽全局的消息通知。
  registerReceiver(searchReceiver, intent);
  //顯示已配對設備以及搜索未配對設備
  searchBtn.setOnClickListener(new OnClickListener() {
   @Override
   public void onClick(View v) {
    // TODO Auto-generated method stub
    if(bluetoothAdapter.isDiscovering()){
     bluetoothAdapter.cancelDiscovery();
    }
    list.clear();
    bondDevices = bluetoothAdapter.getBondedDevices();

    for(BluetoothDevice device : bondDevices) {
     String str = " 已配對完成 " + device.getName() +" "
     + device.getAddress();
     list.add(str);
     adapter.notifyDataSetChanged();
    }
    bluetoothAdapter.startDiscovery();
   }
  });
  //退出應用
  exitBtn.setOnClickListener(new OnClickListener() {

   @Override
   public void onClick(View v) {
    // TODO Auto-generated method stub
    BluetoothActivity.this.finish();
   }
  });
  //設置藍牙設備可發現
  discoverBtn.setOnClickListener(new OnClickListener() {

   @Override
   public void onClick(View v) {
    // TODO Auto-generated method stub
    Intent discoverIntent = new Intent(BluetoothAdapter.ACTION_REQUEST_DISCOVERABLE);
    discoverIntent.putExtra(BluetoothAdapter.EXTRA_DISCOVERABLE_DURATION, 300);
    startActivity(discoverIntent);
   }
  });
  //開關藍牙設備
  openBtn.setOnClickListener(new OnClickListener() {

   @Override
   public void onClick(View v) {
    // TODO Auto-generated method stub
    if(openBtn.isChecked() == true){
     bluetoothAdapter.disable();
    }
    else if(openBtn.isChecked() == false){
     bluetoothAdapter.enable();
    }
   }
  });
  //作為服務端開啟
  serverbtn.setOnClickListener(new OnClickListener() {

   @Override
   public void onClick(View v) {
    // TODO Auto-generated method stub
    ServerThread serverThread = new ServerThread(bluetoothAdapter, context);
    Toast.makeText(context, "server 端啟動", 5000).show();
    serverThread.start();
   }
  });
  listView.setOnItemClickListener(new ItemClickListener());
 }
 @Override
 public void onStart() {
  super.onStart();
  // If BT is not on, request that it be enabled.
  if(bluetoothAdapter == null){
   Toast.makeText(context, "藍牙設備不可用", 5000).show();
  }
   if (!bluetoothAdapter.isEnabled()) {
   Intent enableIntent = new Intent(
     BluetoothAdapter.ACTION_REQUEST_ENABLE);
   startActivityForResult(enableIntent, 3);
  }

 }
 @Override
 public boolean onCreateOptionsMenu(Menu menu) {
  getMenuInflater().inflate(R.menu.main, menu);
  return true;
 }

 private final BroadcastReceiver searchReceiver = new BroadcastReceiver() {

  @Override
  public void onReceive(Context context, Intent intent) {
   // TODO Auto-generated method stub
    String action = intent.getAction();
    BluetoothDevice device = null;
    if(BluetoothDevice.ACTION_FOUND.equals(action)){
     device = intent.getParcelableExtra(BluetoothDevice.EXTRA_DEVICE);
     if (device.getBondState() == BluetoothDevice.BOND_NONE) {
     Toast.makeText(context, device.getName()+"", 5000).show();
     String str = " 未配對完成 " + device.getName() +" "
     + device.getAddress();
     if (list.indexOf(str) == -1)// 防止重復添加
      list.add(str);
     }
     adapter.notifyDataSetChanged();
    }

  }
 };
  public class ItemClickListener implements OnItemClickListener {

  @Override
  public void onItemClick(AdapterView<?> arg0, View arg1, int arg2,
    long arg3) {
   // TODO Auto-generated method stub
    if(bluetoothAdapter.isDiscovering())
     bluetoothAdapter.cancelDiscovery();
    String str = list.get(arg2);
    String address = str.substring(str.length() - 17);
    BluetoothDevice btDev = bluetoothAdapter.getRemoteDevice(address);
    ClientThread clientThread = new ClientThread(btDev, context);
    clientThread.start();
  }}
}
Bluetoothprotocol.java
package com.example.thecaseforbluetooth;

public interface Bluetoothprotocol {
 public static final String PROTOCOL_SCHEME_L2CAP = "btl2cap";
 public static final String PROTOCOL_SCHEME_RFCOMM = "btspp";
 public static final String PROTOCOL_SCHEME_BT_OBEX = "btgoep";
 public static final String PROTOCOL_SCHEME_TCP_OBEX = "tcpobex";
}
ServerThread.java
package com.example.thecaseforbluetooth;

import java.io.IOException;
import java.io.InputStream;
import java.io.OutputStream;
import java.util.UUID;

import android.bluetooth.BluetoothAdapter;
import android.bluetooth.BluetoothServerSocket;
import android.bluetooth.BluetoothSocket;
import android.content.Context;
import android.os.Message;
import android.util.Log;
import android.widget.Toast;

public class ServerThread extends Thread {
 public BluetoothServerSocket mserverSocket;
 public BluetoothAdapter bluetoothAdapter;
 public BluetoothSocket socket;
 public Context context;
 public ServerThread(BluetoothAdapter bluetoothAdapter,Context context) {
  this.bluetoothAdapter = bluetoothAdapter;
  this.context = context;
 }

 public void run() {

  try {
   /* 創建一個藍牙服務器
    * 參數分別:服務器名稱、UUID */
   mserverSocket = bluetoothAdapter.listenUsingRfcommWithServiceRecord(Bluetoothprotocol.PROTOCOL_SCHEME_RFCOMM,
     UUID.fromString("00001101-0000-1000-8000-00805F9B34FB"));
//   /* 接受客戶端的連接請求 */
   socket = mserverSocket.accept();
   //下面代碼作者偷懶,讀寫另外起一個線程最好
   //接收數據
    byte[] buffer = new byte[1024];
    int bytes;
    InputStream mmInStream = null;

    try {
     mmInStream = socket.getInputStream();
    } catch (IOException e1) {
     // TODO Auto-generated catch block
     e1.printStackTrace();
    }
    System.out.println("zhoulc server");
    while(true){
      if( (bytes = mmInStream.read(buffer)) > 0 )
      {
       byte[] buf_data = new byte[bytes];
       for(int i=0; i<bytes; i++)
       {
        buf_data[i] = buffer[i];
       }
       String s = new String(buf_data);
       System.out.println(s+"zhoulc server is in");
    }
    }
  } catch (Exception e) {
   // TODO Auto-generated catch block
   e.printStackTrace();
  }

}

}
ClientThread.java
package com.example.thecaseforbluetooth;

import java.io.IOException;
import java.io.OutputStream;
import java.util.UUID;

import android.bluetooth.BluetoothDevice;
import android.bluetooth.BluetoothSocket;
import android.content.Context;
import android.widget.Toast;

public class ClientThread extends Thread {
 public BluetoothSocket socket;
 public BluetoothDevice device;
 public Context context;
 public ClientThread(BluetoothDevice device,Context context){
  this.device = device;
  this.context = context;
 }
 public void run() {
  try {
   //創建一個Socket連接:只需要服務器在注冊時的UUID號
   socket = device.createRfcommSocketToServiceRecord(UUID.fromString("00001101-0000-1000-8000-00805F9B34FB"));
   //連接
   socket.connect();
   //下面代碼作者偷懶,讀寫另外起一個線程最好
   //發送數據
   if (socket == null)
   {
    Toast.makeText(context, "鏈接失敗", 5000).show();
    return;
   }
   System.out.println("zhoulc client");
   while(true){
    try {
     System.out.println("zhoulc client is in");
     String msg = "hello everybody I am client";
     OutputStream os = socket.getOutputStream();
     os.write(msg.getBytes());
    } catch (IOException e) {
     // TODO Auto-generated catch block
     e.printStackTrace();
    }
   }
  }
  catch (IOException e)
  {
   e.printStackTrace();
  }
 }
}
藍牙設備之間自動配對
1、藍牙設備之間自動配對,需要兩個設備都安裝進行配對的apk(網上好多自動配對的帖子都沒有說明情況)
2、在自動匹配的時候想通過反射調用BluetoothDevice的setPin、createBond、cancelPairingUserInput實現設置密鑰、配對請求創建、取消密鑰信息輸入等。
1)createBond()創建,最終會調到源碼的BluetoothService的createBond(String address)方法,通過對源碼淺顯的了解,createBond主要是寫入匹配密鑰(BluetoothService的writeDockPin())以及進入jni注冊回調函數onCreatePairedDeviceResult觀察匹配結果
比如: // Pins did not match, or remote device did not respond to pin
// request in time
// We rejected pairing, or the remote side rejected pairing. This
// happens if either side presses 'cancel' at the pairing dialog.
// Not sure if this happens
// Other device is not responding at all
// already bonded
等,在jni中創建了進行匹配的device("CreatePairedDevice"),這時bluetooth會發送一個ACTION_PAIRING_REQUEST的廣播,只有當前會出現密鑰框的藍牙設備收到。寫完密鑰之後,發送廣播給另外一個藍牙設備接收,然後打開密鑰輸入框進行匹配。
2)setPin()設置密鑰,通過查看setting源碼,發現在確認輸入密鑰之後會調用setPin()(如果點取消,就會調用cancelPairingUserInput,取消密鑰框),setPin具體通過D-BUS做了什麼沒有去深究,但是在調用setPin的時候會remove掉一個map裡面的鍵值對(address:int),也就是我們在調用setPin之後如果再去調用onCreatePairedDeviceResult,則該方法一定返回false,並且出現下面的打印提示:cancelUserInputNative(B8:FF:FE:55:EF:D6) called but no native data available, ignoring. Maybe the PasskeyAgent Request was already cancelled by the remote or by bluez.(因為該方法也會remove掉一個鍵值對)
3)cancelPairingUserInput()取消用戶輸入密鑰框,個人覺得一般情況下不要和setPin(setPasskey、setPairingConfirmation、setRemoteOutOfBandData)一起用,這幾個方法都會remove掉map裡面的key:value(也就是互斥的)。
3、藍牙耳機、手柄等一些無法手動配置的設備是如何完成自動配對的。
在源碼裡面有一個自動配對的方法,也就是把pin值自動設為“0000”
/*package*/ synchronized boolean attemptAutoPair(String address) {
if (!mBondState.hasAutoPairingFailed(address) &&
!mBondState.isAutoPairingBlacklisted(address)) {
mBondState.attempt(address);
setPin(address, BluetoothDevice.convertPinToBytes("0000"));
return true;
}
return false;
}
該方法是在底層回調到java層的onRequestPinCode方法時被調用,首先 Check if its a dock(正常輸入的密鑰,走正常配對方式,雙方輸入匹配值),然後再 try 0000 once if the device looks dumb(涉及到Device.AUDIO_VIDEO相關部分如:耳機,免提等進入自動匹配模式)進行自動配對。
言歸正傳,雖然個人覺得自動配對需要雙方乃至多方藍牙設備都需要裝上實現自動配對的apk,已經失去了自動配對的意義,但有可能還是會派上用場。下面我們看看現實情況的自動配對是什麼樣的吧。
由於BluetoothDevice配對的方法都是hide的,所以我們需要通過反射調用被隱藏的方法,現在基本都是通用的工具類型了,網上模式基本一樣。
ClsUtils.java
package cn.bluetooth;

import java.lang.reflect.Field;
import java.lang.reflect.Method;
import android.bluetooth.BluetoothAdapter;
import android.bluetooth.BluetoothDevice;
import android.util.Log;
public class ClsUtils
{
 public static BluetoothDevice remoteDevice=null;
  /**
  * 與設備配對 參考源碼:platform/packages/apps/Settings.git
  * /Settings/src/com/android/settings/bluetooth/CachedBluetoothDevice.java
  */
  @SuppressWarnings("unchecked")
 static public boolean createBond(@SuppressWarnings("rawtypes") Class btClass, BluetoothDevice btDevice)
    throws Exception
  {
   Method createBondMethod = btClass.getMethod("createBond");
   Boolean returnValue = (Boolean) createBondMethod.invoke(btDevice);
   return returnValue.booleanValue();
  }

  /**
  * 與設備解除配對 參考源碼:platform/packages/apps/Settings.git
  * /Settings/src/com/android/settings/bluetooth/CachedBluetoothDevice.java
  */
  @SuppressWarnings("unchecked")
 static public boolean removeBond(Class btClass, BluetoothDevice btDevice)
    throws Exception
  {
   Method removeBondMethod = btClass.getMethod("removeBond");
   Boolean returnValue = (Boolean) removeBondMethod.invoke(btDevice);
   return returnValue.booleanValue();
  }

  @SuppressWarnings("unchecked")
 static public boolean setPin(Class btClass, BluetoothDevice btDevice,
    String str) throws Exception
  {
   try
   {
    Method removeBondMethod = btClass.getDeclaredMethod("setPin",
      new Class[]
      {byte[].class});
    Boolean returnValue = (Boolean) removeBondMethod.invoke(btDevice,
      new Object[]
      {str.getBytes()});
    Log.d("returnValue", "setPin is success " +btDevice.getAddress()+ returnValue.booleanValue());
   }
   catch (SecurityException e)
   {
    // throw new RuntimeException(e.getMessage());
    e.printStackTrace();
   }
   catch (IllegalArgumentException e)
   {
    // throw new RuntimeException(e.getMessage());
    e.printStackTrace();
   }
   catch (Exception e)
   {
    // TODO Auto-generated catch block
    e.printStackTrace();
   }
   return true;

  }

  // 取消用戶輸入
  @SuppressWarnings("unchecked")
 static public boolean cancelPairingUserInput(Class btClass,
    BluetoothDevice device)

  throws Exception
  {
   Method createBondMethod = btClass.getMethod("cancelPairingUserInput");
   // cancelBondProcess()
   Boolean returnValue = (Boolean) createBondMethod.invoke(device);
   Log.d("returnValue", "cancelPairingUserInput is success " + returnValue.booleanValue());
   return returnValue.booleanValue();
  }

  // 取消配對
  @SuppressWarnings("unchecked")
 static public boolean cancelBondProcess(Class btClass,
    BluetoothDevice device)

  throws Exception
  {
   Method createBondMethod = btClass.getMethod("cancelBondProcess");
   Boolean returnValue = (Boolean) createBondMethod.invoke(device);
   return returnValue.booleanValue();
  }

  /**
  *
  * @param clsShow
  */
  @SuppressWarnings("unchecked")
 static public void printAllInform(Class clsShow)
  {
   try
   {
    // 取得所有方法
    Method[] hideMethod = clsShow.getMethods();
    int i = 0;
    for (; i < hideMethod.length; i++)
    {
     //Log.e("method name", hideMethod.getName() + ";and the i is:"
     //  + i);
    }
    // 取得所有常量
    Field[] allFields = clsShow.getFields();
    for (i = 0; i < allFields.length; i++)
    {
     //Log.e("Field name", allFields.getName());
    }
   }
   catch (SecurityException e)
   {
    // throw new RuntimeException(e.getMessage());
    e.printStackTrace();
   }
   catch (IllegalArgumentException e)
   {
    // throw new RuntimeException(e.getMessage());
    e.printStackTrace();
   }
   catch (Exception e)
   {
    // TODO Auto-generated catch block
    e.printStackTrace();
   }
  }
}
Bluetooth1.java 主activity,所有界面操作實現地方
package cn.bluetooth;
import java.io.IOException;
import java.util.ArrayList;
import java.util.List;

import android.app.Activity;
import android.bluetooth.BluetoothAdapter;
import android.bluetooth.BluetoothDevice;
import android.bluetooth.BluetoothSocket;
import android.content.BroadcastReceiver;
import android.content.Context;
import android.content.Intent;
import android.content.IntentFilter;
import android.os.Bundle;
import android.util.Log;
import android.view.Menu;
import android.view.View;
import android.widget.AdapterView;
import android.widget.ArrayAdapter;
import android.widget.Button;
import android.widget.ListView;
import android.widget.Toast;
import android.widget.ToggleButton;
public class Bluetooth1 extends Activity {
 /** Called when the activity is first created. */
  Button btnSearch, btnDis, btnExit;
  ToggleButton tbtnSwitch;
  ListView lvBTDevices;
  ArrayAdapter<String> adtDevices;
  List<String> lstDevices = new ArrayList<String>();
  BluetoothAdapter btAdapt;
  public static BluetoothSocket btSocket;
  @Override
  public void onCreate(Bundle savedInstanceState) {
   super.onCreate(savedInstanceState);
   setContentView(R.layout.main);
   // Button 設置
   btnSearch = (Button) this.findViewById(R.id.btnSearch);
   btnSearch.setOnClickListener(new ClickEvent());
   btnExit = (Button) this.findViewById(R.id.btnExit);
   btnExit.setOnClickListener(new ClickEvent());
   btnDis = (Button) this.findViewById(R.id.btnDis);
   btnDis.setOnClickListener(new ClickEvent());

   // ToogleButton設置
   tbtnSwitch = (ToggleButton) this.findViewById(R.id.tbtnSwitch);
   tbtnSwitch.setOnClickListener(new ClickEvent());

   // ListView及其數據源 適配器
   lvBTDevices = (ListView) this.findViewById(R.id.lvDevices);
   adtDevices = new ArrayAdapter<String>(this,
     android.R.layout.simple_list_item_1, lstDevices);
   lvBTDevices.setAdapter(adtDevices);
   lvBTDevices.setOnItemClickListener(new ItemClickEvent());

   btAdapt = BluetoothAdapter.getDefaultAdapter();// 初始化本機藍牙功能

   // ========================================================
   // modified by wiley
   /*
   * if (btAdapt.getState() == BluetoothAdapter.STATE_OFF)// 讀取藍牙狀態並顯示
   * tbtnSwitch.setChecked(false); else if (btAdapt.getState() ==
   * BluetoothAdapter.STATE_ON) tbtnSwitch.setChecked(true);
   */
   if (btAdapt.isEnabled()) {
    tbtnSwitch.setChecked(false);
   } else {
    tbtnSwitch.setChecked(true);
   }
   // ============================================================
   // 注冊Receiver來獲取藍牙設備相關的結果
   IntentFilter intent = new IntentFilter();
   intent.addAction(BluetoothDevice.ACTION_FOUND);// 用BroadcastReceiver來取得搜索結果
   intent.addAction(BluetoothDevice.ACTION_BOND_STATE_CHANGED);
   intent.addAction(BluetoothAdapter.ACTION_SCAN_MODE_CHANGED);
   intent.addAction(BluetoothAdapter.ACTION_STATE_CHANGED);
   registerReceiver(searchDevices, intent);
  }

  private final BroadcastReceiver searchDevices = new BroadcastReceiver() {
   @Override
 public void onReceive(Context context, Intent intent) {

    String action = intent.getAction();
    Bundle b = intent.getExtras();
    Object[] lstName = b.keySet().toArray();

    // 顯示所有收到的消息及其細節
    for (int i = 0; i < lstName.length; i++) {
     String keyName = lstName.toString();
     Log.e(keyName, String.valueOf(b.get(keyName)));
    }
    BluetoothDevice device = null;
    // 搜索設備時,取得設備的MAC地址
    if (BluetoothDevice.ACTION_FOUND.equals(action)) {
     device = intent.getParcelableExtra(BluetoothDevice.EXTRA_DEVICE);
     if (device.getBondState() == BluetoothDevice.BOND_NONE) {
      String str = "   未配對|" + device.getName() + "|"
        + device.getAddress();
      if (lstDevices.indexOf(str) == -1)// 防止重復添加
       lstDevices.add(str); // 獲取設備名稱和mac地址
      adtDevices.notifyDataSetChanged();
     }
    }else if(BluetoothDevice.ACTION_BOND_STATE_CHANGED.equals(action)){
     device = intent.getParcelableExtra(BluetoothDevice.EXTRA_DEVICE);

     switch (device.getBondState()) {
     case BluetoothDevice.BOND_BONDING:
      Log.d("BlueToothTestActivity", "正在配對......");
      break;
     case BluetoothDevice.BOND_BONDED:
      Log.d("BlueToothTestActivity", "完成配對");
      //connect(device);//連接設備
      break;
     case BluetoothDevice.BOND_NONE:
      Log.d("BlueToothTestActivity", "取消配對");
     default:
      break;
     }
    }

   }
  };

  @Override
  protected void onDestroy() {
   this.unregisterReceiver(searchDevices);
   super.onDestroy();
   android.os.Process.killProcess(android.os.Process.myPid());
  }

  class ItemClickEvent implements AdapterView.OnItemClickListener {

   @Override
   public void onItemClick(AdapterView<?> arg0, View arg1, int arg2,
     long arg3) {
    if(btAdapt.isDiscovering())btAdapt.cancelDiscovery();
    String str = lstDevices.get(arg2);
    String[] values = str.split("\\|");
    String address = values[2];
    Log.e("address", values[2]);
    BluetoothDevice btDev = btAdapt.getRemoteDevice(address);
    try {
     Boolean returnValue = false;
     if (btDev.getBondState() == BluetoothDevice.BOND_NONE) {
      Toast.makeText(Bluetooth1.this, "遠程設備發送藍牙配對請求", 5000).show();
      //這裡只需要createBond就行了
     ClsUtils.createBond(btDev.getClass(), btDev);
     }else if(btDev.getBondState() == BluetoothDevice.BOND_BONDED){
      Toast.makeText(Bluetooth1.this, btDev.getBondState()+" ....正在連接..", 1000).show();
     }
    } catch (Exception e) {
     e.printStackTrace();
    }
   }
  }
  class ClickEvent implements View.OnClickListener {
   @Override
   public void onClick(View v) {
    if (v == btnSearch)// 搜索藍牙設備,在BroadcastReceiver顯示結果
    {
     if (btAdapt.getState() == BluetoothAdapter.STATE_OFF) {// 如果藍牙還沒開啟
      Toast.makeText(Bluetooth1.this, "請先打開藍牙", 1000)
        .show();
      return;
     }
     if (btAdapt.isDiscovering())
      btAdapt.cancelDiscovery();
     lstDevices.clear();
     Object[] lstDevice = btAdapt.getBondedDevices().toArray();
     for (int i = 0; i < lstDevice.length; i++) {
      BluetoothDevice device = (BluetoothDevice) lstDevice[i];
      String str = " 已配對|" + device.getName() + "|"
        + device.getAddress();
      lstDevices.add(str); // 獲取設備名稱和mac地址
      adtDevices.notifyDataSetChanged();
     }
     setTitle("本機:" + btAdapt.getAddress());
     btAdapt.startDiscovery();
    } else if (v == tbtnSwitch) {// 本機藍牙啟動/關閉
     if (tbtnSwitch.isChecked() == false)
      btAdapt.enable();

     else if (tbtnSwitch.isChecked() == true)
      btAdapt.disable();

    } else if (v == btnDis)// 本機可以被搜索
    {
     Intent discoverableIntent = new Intent(
       BluetoothAdapter.ACTION_REQUEST_DISCOVERABLE);
     discoverableIntent.putExtra(
       BluetoothAdapter.EXTRA_DISCOVERABLE_DURATION, 300);
     startActivity(discoverableIntent);
    } else if (v == btnExit) {
     try {
      if (btSocket != null)
       btSocket.close();
     } catch (IOException e) {
      e.printStackTrace();
     }
     Bluetooth1.this.finish();
    }
   }
  }
 @Override
 public boolean onCreateOptionsMenu(Menu menu) {
  getMenuInflater().inflate(R.menu.main, menu);
  return true;
 }


}
PairingRequest.java (重要部分,自動配對主要是這個部分完成,activity只是創建了一個配對請求)
package cn.bluetooth;

import android.bluetooth.BluetoothDevice;
import android.content.BroadcastReceiver;
import android.content.Context;
import android.content.Intent;
import android.widget.Toast;

public class PairingRequest extends BroadcastReceiver {
 String strPsw = "0000";
 final String ACTION_PAIRING_REQUEST = "android.bluetooth.device.action.PAIRING_REQUEST";
 static BluetoothDevice remoteDevice = null;

 @Override
 public void onReceive(Context context, Intent intent) {
  if (intent.getAction().equals(ACTION_PAIRING_REQUEST)) {

   BluetoothDevice device = intent
     .getParcelableExtra(BluetoothDevice.EXTRA_DEVICE);
   if (device.getBondState() != BluetoothDevice.BOND_BONDED) {
    try {
     ClsUtils.setPin(device.getClass(), device, strPsw); // 手機和藍牙采集器配對
     // ClsUtils.cancelPairingUserInput(device.getClass(),
     // device); //一般調用不成功,前言裡面講解過了
     Toast.makeText(context, "配對信息" + device.getName(), 5000)
       .show();
    } catch (Exception e) {
     // TODO Auto-generated catch block
     Toast.makeText(context, "請求連接錯誤...", 1000).show();
    }
   }
   // */
   // pair(device.getAddress(),strPsw);
  }
 }
}
AndroidManifest.xml 啟動activity,接收廣播
<manifest xmlns:android="http://schemas.android.com/apk/res/android"
 package="cn.bluetooth"
 android:versionCode="1"
 android:versionName="1.0" >
 <uses-sdk
  android:minSdkVersion="8"
  android:targetSdkVersion="15" />
<uses-permission android:name="android.permission.BLUETOOTH_ADMIN" />
<uses-permission android:name="android.permission.BLUETOOTH" />
 <application
  android:icon="@drawable/ic_launcher"
  android:label="@string/app_name"
  android:theme="@style/AppTheme" >
  <activity
   android:name=".Bluetooth1"
   android:label="@string/title_activity_bluetooth1" >
   <intent-filter>
    <action android:name="android.intent.action.MAIN" />
    <category android:name="android.intent.category.LAUNCHER" />
   </intent-filter>
  </activity>
  <receiver android:name=".PairingRequest">
     <intent-filter>
     <action android:name="android.bluetooth.device.action.PAIRING_REQUEST" />
     </intent-filter>
    </receiver>

 </application>
</manifest>
main.xml 布局
<LinearLayout xmlns:android="http://schemas.android.com/apk/res/android"
 xmlns:tools="http://schemas.android.com/tools"
 android:id="@+id/LinearLayout1"
 android:layout_width="match_parent"
 android:layout_height="match_parent"
 android:orientation="vertical" >
 <Button
 android:layout_width="wrap_content"
 android:layout_height="wrap_content"
 android:id="@+id/btnSearch"
 android:text="btnSearch"
/>
<Button
 android:layout_width="wrap_content"
 android:layout_height="wrap_content"
 android:id="@+id/btnExit"
 android:text="btnExit"
/>
<Button
 android:layout_width="wrap_content"
 android:layout_height="wrap_content"
 android:id="@+id/btnDis"
 android:text="btnDis"
/>
<ToggleButton
android:layout_width="wrap_content"
 android:layout_height="wrap_content"
 android:id="@+id/tbtnSwitch"
 android:text="tbtnSwitch"
/>
<ListView
 android:layout_width="fill_parent"
 android:layout_height="wrap_content"
 android:id="@+id/lvDevices"

/>
</LinearLayout>
 Android Activity使用拾遺
一、onWindowFocusChanged有時我們需要測量一個Activity多長時間才能顯示出來,那麼在代碼中打點計時的時機選在哪兒呢?在onCreate和onRes
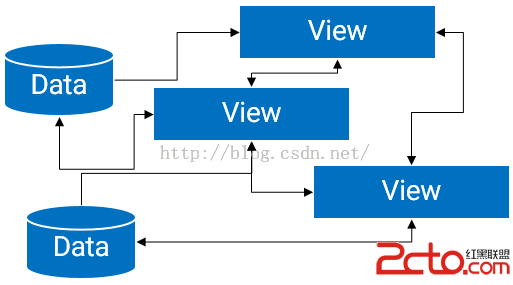
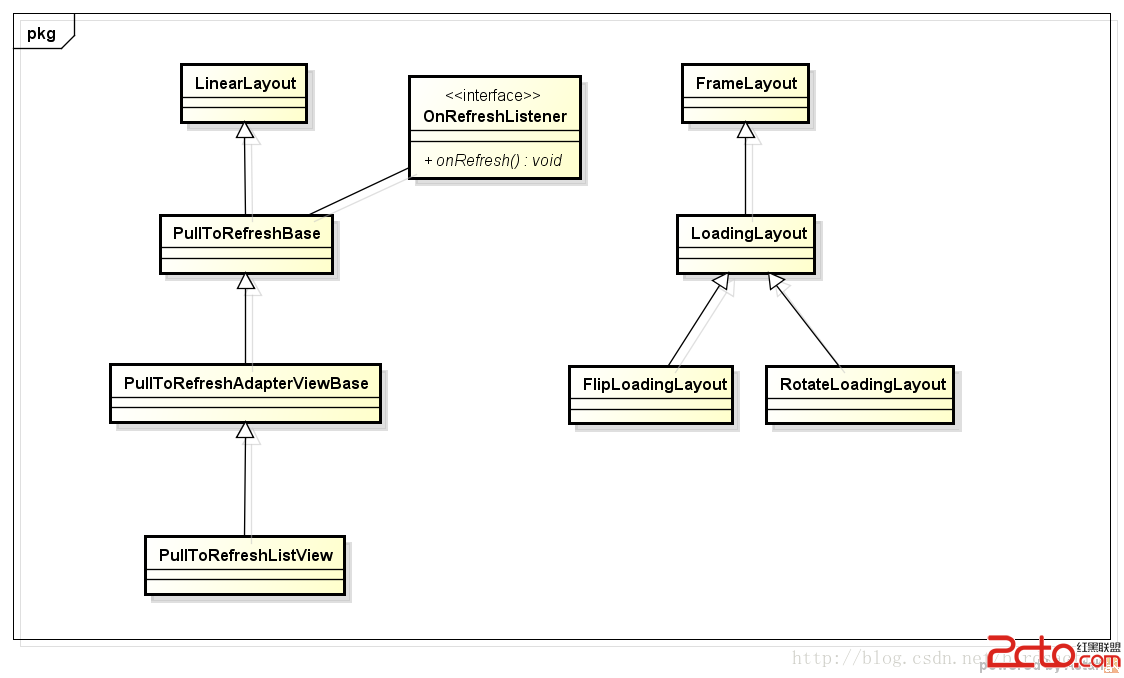 開源Android-PullToRefresh下拉刷新源碼分析
PullToRefresh 這個庫用的是非常至多,github 今天主要分析一下源碼實現.我們通過ListView的下拉刷新進行分析,其它的類似。整個下拉刷新 父View
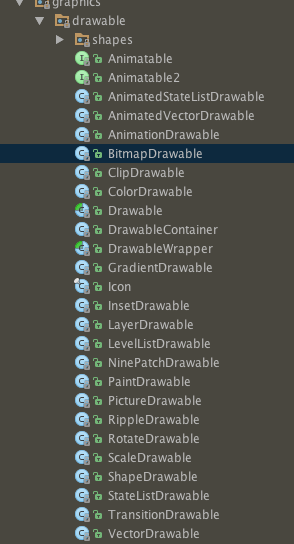 Android各種各樣的Drawable-更新中
概述通常情況下,我們很少直接使用Drawable的實現類,大部分的情況下還是使用xml的方式進行開發。只有在程序中需要動態的修改drawable的屬性時,才需要使用具體的
 AndroidUI組件SlidingTabLayout實現ViewPager頁滑動效果
使用SlidingTabLayout需要准備2個類,分別是 SlidingTabLayout,與SlidingTabStrip,,放進項目中時只用修改下包名即可。 效果制